Chevrolet Sonic Repair Manual: Air Inlet Grille Panel Replacement
|
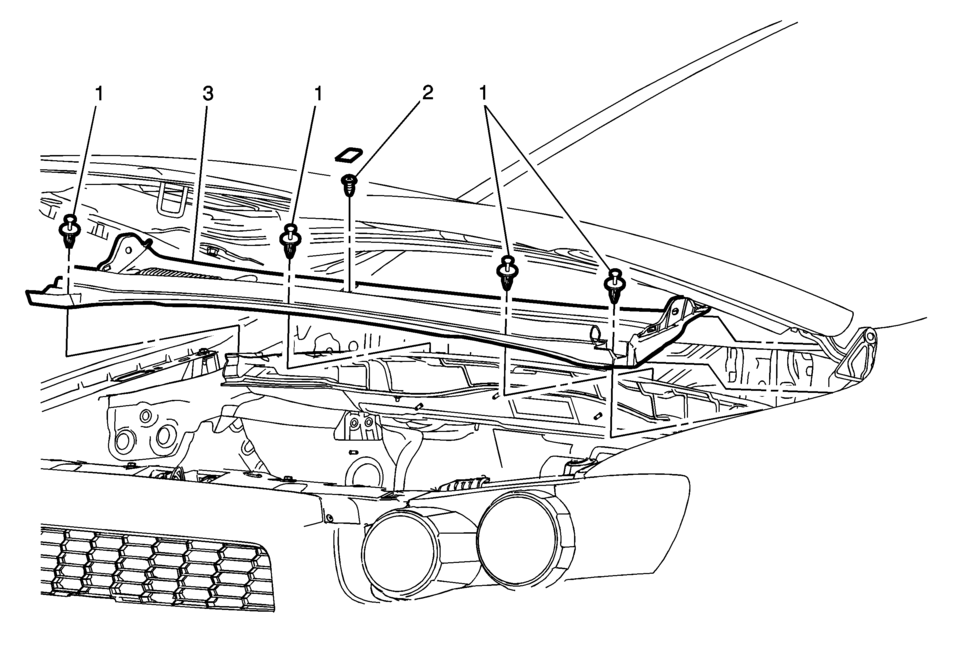
Callout |
Component Name |
|---|---|
Preliminary Procedure
|
|
|
1 |
Air Inlet Grille Panel Retainer (Qty:?Ōé¼ŌĆ░4) Procedure
Release and remove the retainers from the air inlet grille panel. |
|
2 |
Air Inlet Panel Screw Caution: Refer to Fastener Caution.
|
|
3 |
Air Inlet Grille Panel Procedure
|
 Front Grille
...
 Front Lower Grille Replacement
Front Lower Grille Replacement
Callout
Component Name
Preliminary Procedures
Remove the front bumper fascia assembly. Refer to Fron ...
Other materials:
Front Wheel Speed Sensor Replacement
Removal Procedure
Warning: Refer to Brake Dust Warning.
Raise and support the vehicle. Refer to Lifting and Jacking the Vehicle.
Remove the tire and wheel assembly. Refer to Tire and Wheel Removal
and Installation.
Clean the wheel speed sensor mounting area on t ...
Drive Belt Removal
Special Tools
EN-955 Locking Pins
EN-48488 Holding Wrench
For equivalent regional tools, refer to Special Tools.
Install EN-48488 wrench (1) to the drive belt tensioner.
Note: The drive belt tensioner must always be in a pre-tensioned
state.
Move the dri ...
Synchronizers Cleaning and Inspection
Note: When servicing the synchronizers, retain them in the order
that they are removed. Mark the parts to ensure the correct position for
inspection and assembly.
Clean all the synchronizer parts in a suitable cleaning
solvent and air dry all the parts.
Inspect the 1 ...

0.0058