Chevrolet Sonic Repair Manual: Battery Positive and Negative Cable Replacement
- Removal Procedure
-
- Disconnect the negative battery cable. Refer to Battery Negative Cable Disconnection and Connection.
- Remove the fuse block and battery positive cable cover.
- Remove the battery tray. Refer to Battery Tray Replacement.
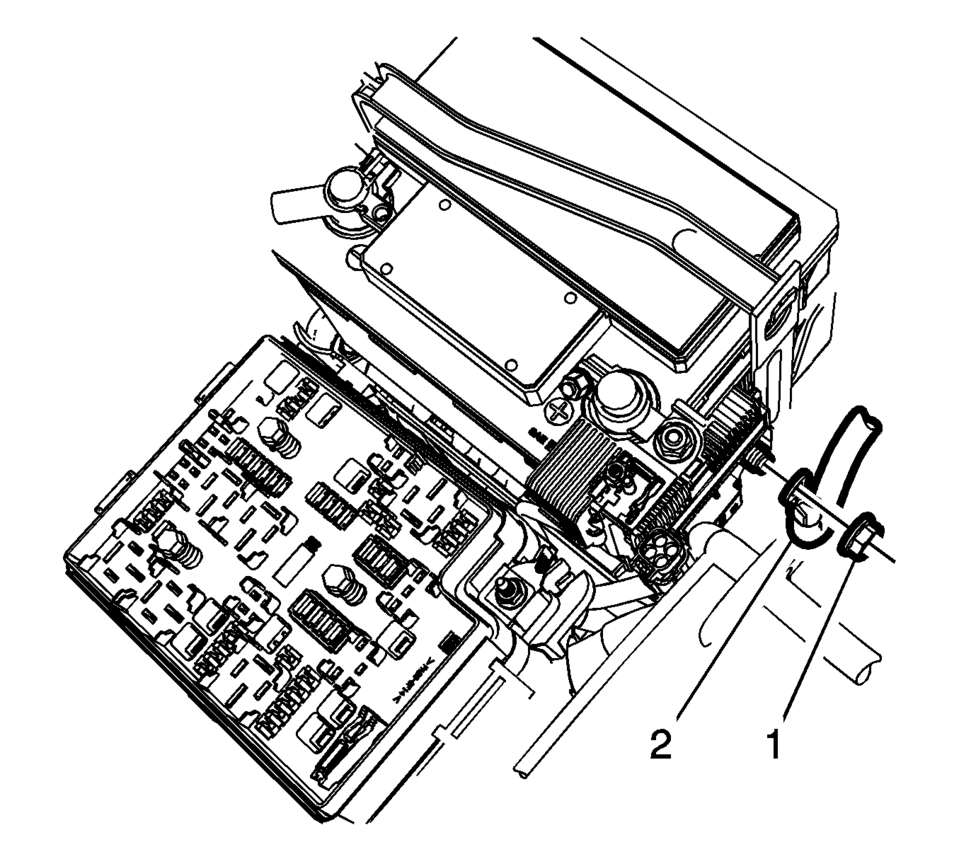
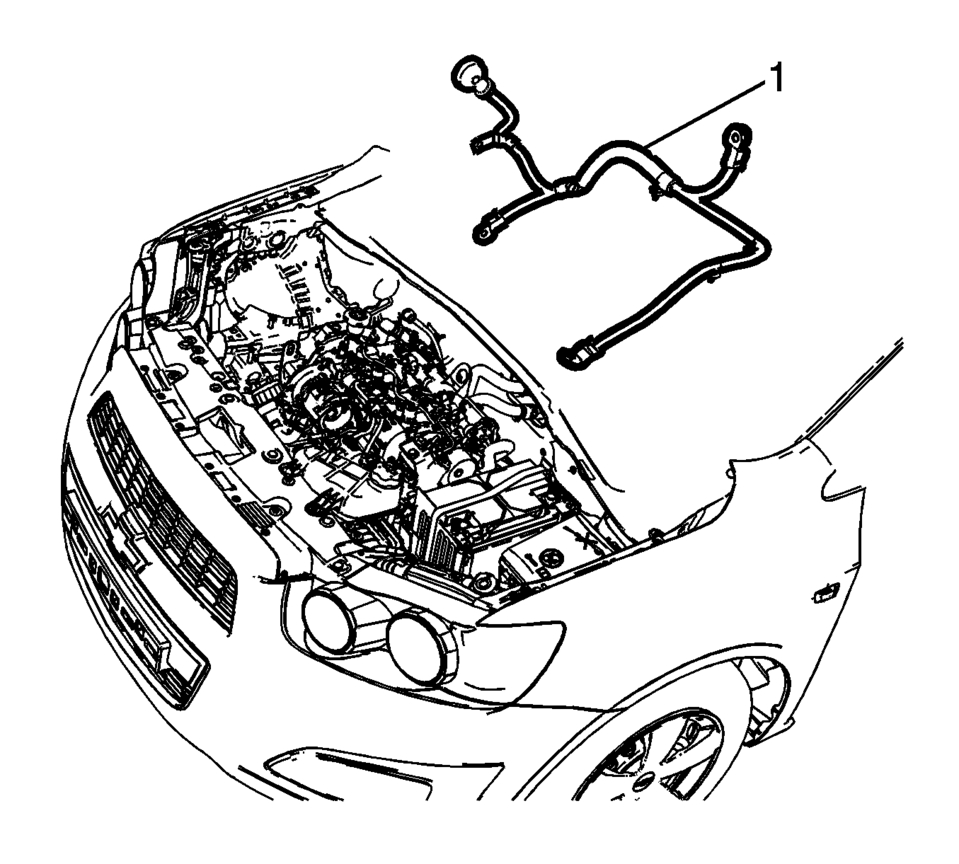
- Remove the battery positive nut (1) and the battery positive cable (2), from the battery positive cable junction block.
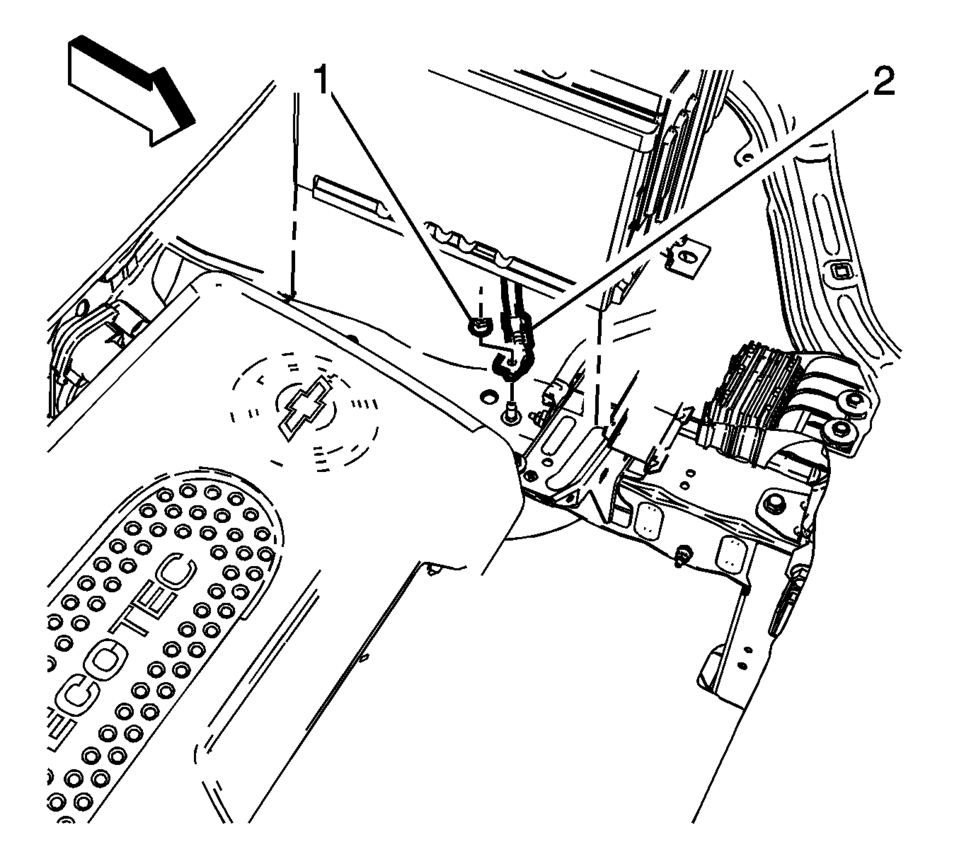
- Remove the battery negative cable nut (1) and the battery negative cable (2), from the chassis frame stud.
- Remove the drivetrain and front suspension frame skid plate. Refer to Drivetrain and Front Suspension Frame Skid Plate Replacement.
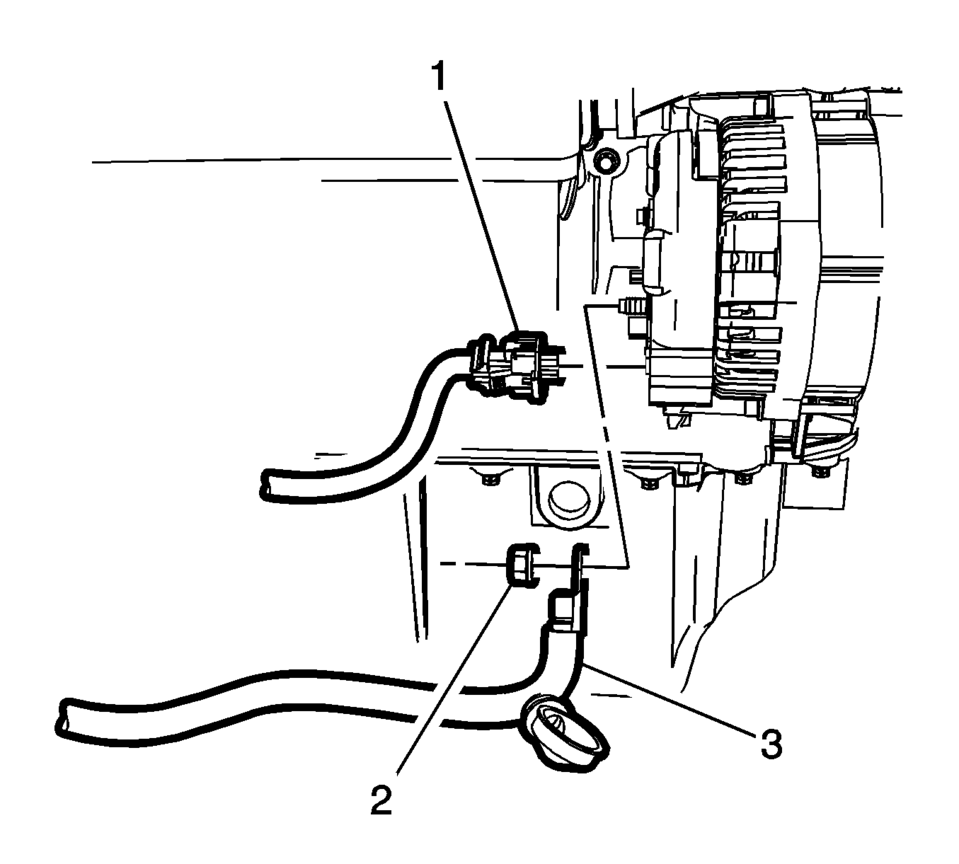
- Remove the battery positive cable nut (2) and the battery positive cable (3), from the back of the generator.
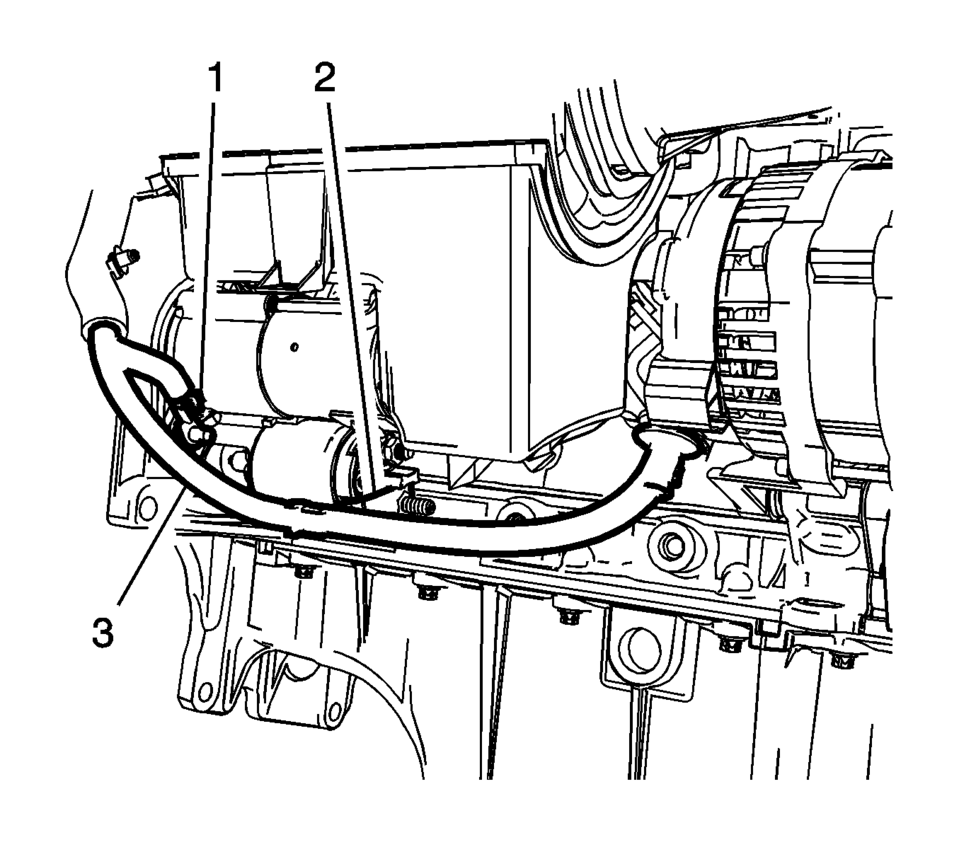
- Remove the battery negative cable stud/nut (1) and the starter solenoid nut (2).
- Remove the battery positive and negative cable (1) from the engine compartment.
Note:
Visualize the routing of the battery positive and negative cable within the engine compartment.
- Installation Procedure
-
- Install the battery positive cable (3) to the back of the generator
and tighten nut (2) to 20 Y (15 lb ft)
.
- Install the battery positive cable (3) to the starter solenoid and tighten
nut (2) to 12 Y (9 lb ft)
.
- Install the battery negative cable to the starter and tighten the stud/nut (1)
to 25 Y (18 lb ft)
.
- Install the drivetrain and front suspension frame skid plate. Refer to Drivetrain and Front Suspension Frame Skid Plate Replacement.
- Install the battery negative cable nut (1) and the battery negative
cable (2), to the chassis frame stud and tighten to 22 Y (16 lb ft)
.
- Install the battery positive cable (2) to the battery positive cable
extension cable junction block and tighten nut (1) to 12 Y (9 lb ft)
.
- Install the battery tray. Refer to Battery Tray Replacement.
- Connect the negative battery cable. Refer to Battery Negative Cable Disconnection and Connection.
- Install the fuse block and battery positive cable cover.
Caution:
Refer to Fastener Caution.
- Install the battery positive cable (3) to the back of the generator
and tighten nut (2) to 20 Y (15 lb ft)
 Battery Positive Cable Replacement
Removal Procedure
Disconnect the negative battery cable. Refer to Battery Negative Cable
Disconnection and Connection.
Remove the underhood fuse block cover.
Remove the ...
 Battery Replacement
Removal Procedure
Open the hood.
Disconnect the negative battery cable. Refer to Battery Negative Cable
Disconnection and Connection.
Remove the battery retainer bo ...
Other materials:
Why Safety Belts Work
When riding in a vehicle, you travel as fast as the vehicle does. If the vehicle
stops suddenly, you keep going until something stops you. It could be the windshield,
the instrument panel, or the safety belts!
When you wear a safety belt, you and the vehicle slow down together. There is
mor ...
Battery Load Management
The vehicle has Electric Power Management (EPM) that estimates the battery's
temperature and state of charge. It then adjusts the voltage for best performance
and extended life of the battery.
When the battery's state of charge is low, the voltage is raised slightly to
quickly bring t ...
Brake Pedal Position Sensor Replacement
Removal Procedure
Remove the instrument panel lower trim pad cover. Refer to Instrument
Panel Lower Trim Pad Cover Replacement.
Disconnect the brake pedal position sensor electrical connector.
Remove the brake pedal position sensor bolt?€‰(1).
Remove t ...

0.007