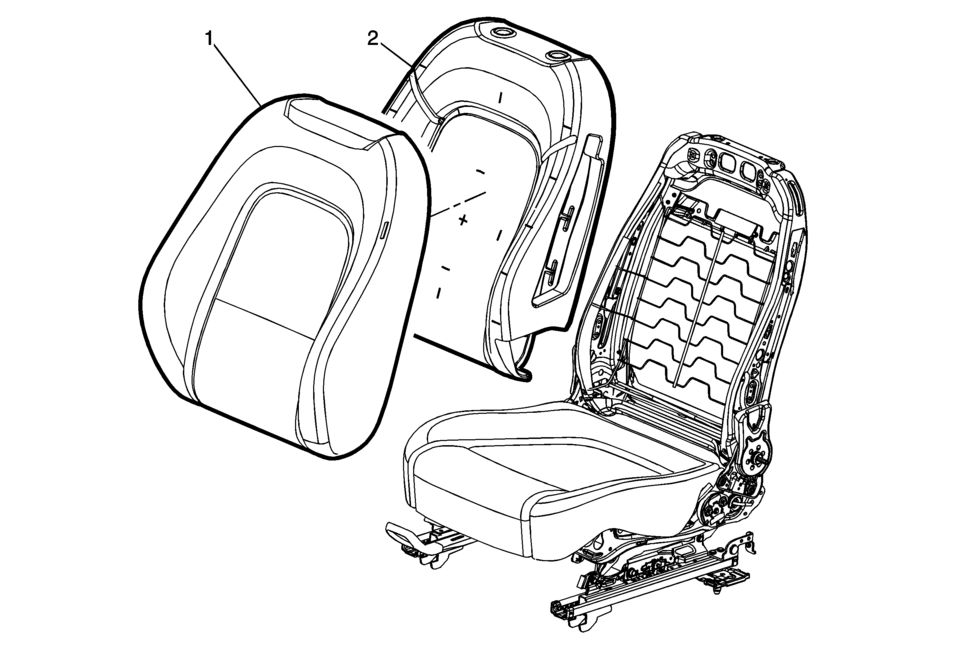
Chevrolet Sonic Repair Manual: Driver or Passenger Seat Back Cover and Pad Replacement
|
Callout |
Component Name |
|---|---|
|
Warning: Refer to SIR Warning. Warning: Do not repair or replace the seat stitching or seams in the seat back trim cover with an internal mounted seat side airbag module. Replace the complete seat back trim cover from the OEM. Non-OEM seat stitching may cause improper airbag deployment which could result in personal injury.
|
|
|
1 |
Seat Back Cushion Cover Procedure
|
|
2 |
Front Seat Back Cushion Pad Procedure
Pull the cushion cover assembly off of the pad. Tip: Seat back cover can be damaged upon reinstalling cover to seat back pad. When reinstalling the seat cushion cover to the seat pad, start in upper outboard corner and install outboard side of the cover. Then start at the upper inboard corner and install inboard side of cover. |
 Driver or Passenger Seat Adjuster Handle Replacement (4 Way Uplevel)
Driver or Passenger Seat Adjuster Handle Replacement
Callout
Component Name
1
Front Seat Adjuster Handle Cover
Proced ...
 Driver or Passenger Seat Back Cushion Frame Replacement
Driver or Passenger Seat Back Cushion Frame Replacement
Callout
Component Name
Preliminary Procedures
Remove the driver or passenge ...
Other materials:
Radio Front Side Door Speaker Replacement
Radio Front Side Door Speaker Replacement
Callout
Component Name
Preliminary Procedure
Remove the front side door trim. Refer to Front Side Door Trim Replacement.
1
Radio Front Side Door Speaker ...
Airbag Sensing and Diagnostic Module Replacement
Airbag Sensing and Diagnostic Module Replacement
Callout
Component Name
Warning: Refer to SIR Warning.
Warning: Do not strike or jolt the inflatable restraint sensing
and diagnostic module (SDM). Before apply ...
Moonroof
Basic information
WARNING
In the Nissan Armada, occupants may be ejected through an open moonroof
during an accident. Always ensure that all passengers are properly secured with
seat belts and that child restraints are used where required.
Never allow anyone to stand up, lean out, or ex ...

0.0069