Chevrolet Sonic Repair Manual: Front Wheel Drive Shaft Outer Joint and Boot Replacement
Special Tools
DT-35910 Drive Axle Boot Clamp Pliers
For equivalent regional tools, refer to Special Tools
- Disassemble Procedure
-
- Remove the wheel drive shaft from the vehicle. Refer to Front Wheel Drive Shaft Replacement.
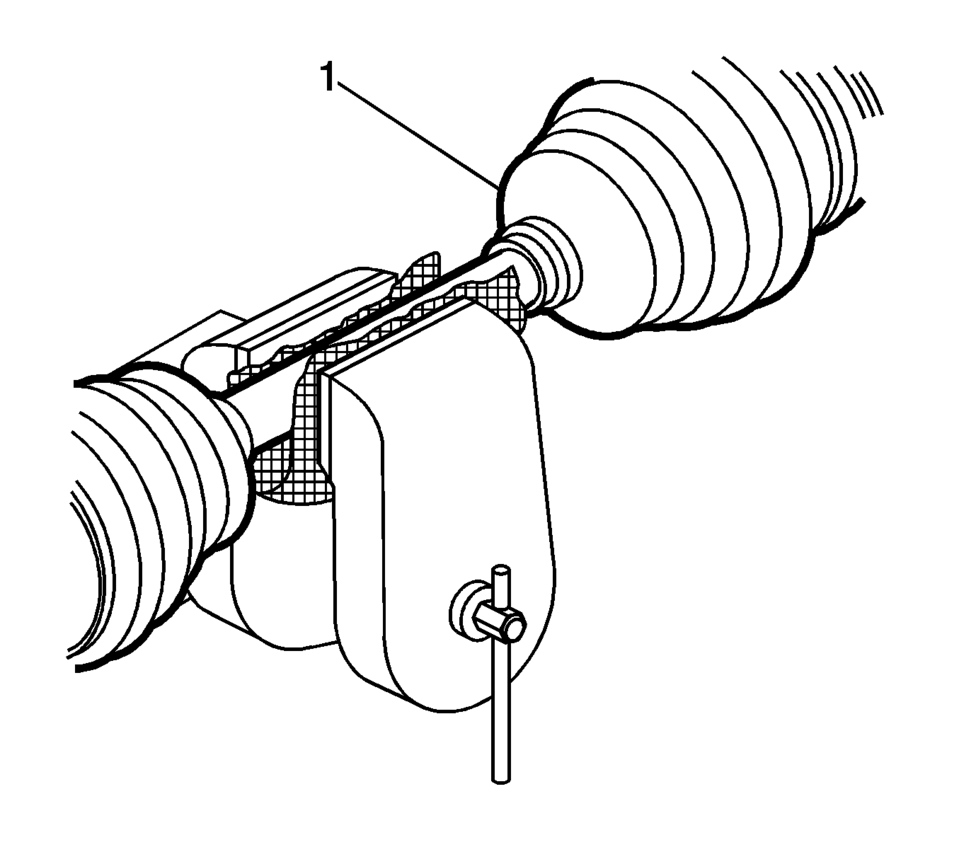
- Install the drive axle shaft (1) in a soft jawed vice.
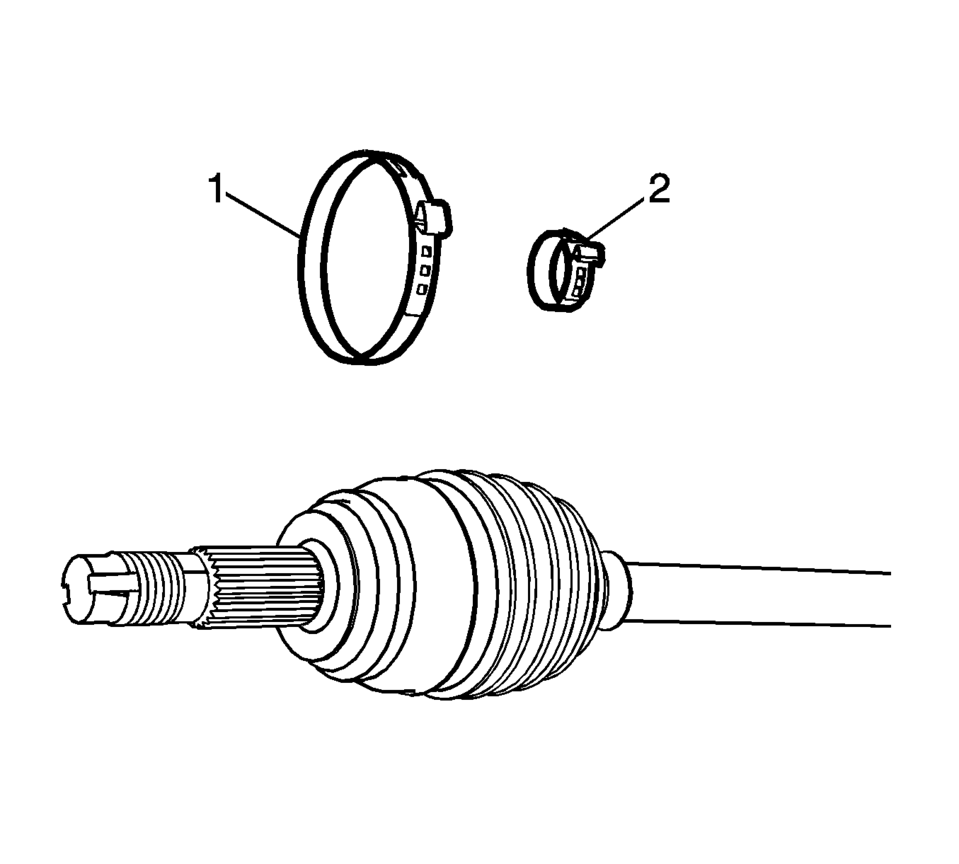
- Using a pair of side cutters, remove the outer boot clamp (1) and the inner boot clamp (2).
- Discard the boot clamps (1) and (2). Use NEW clamps only.
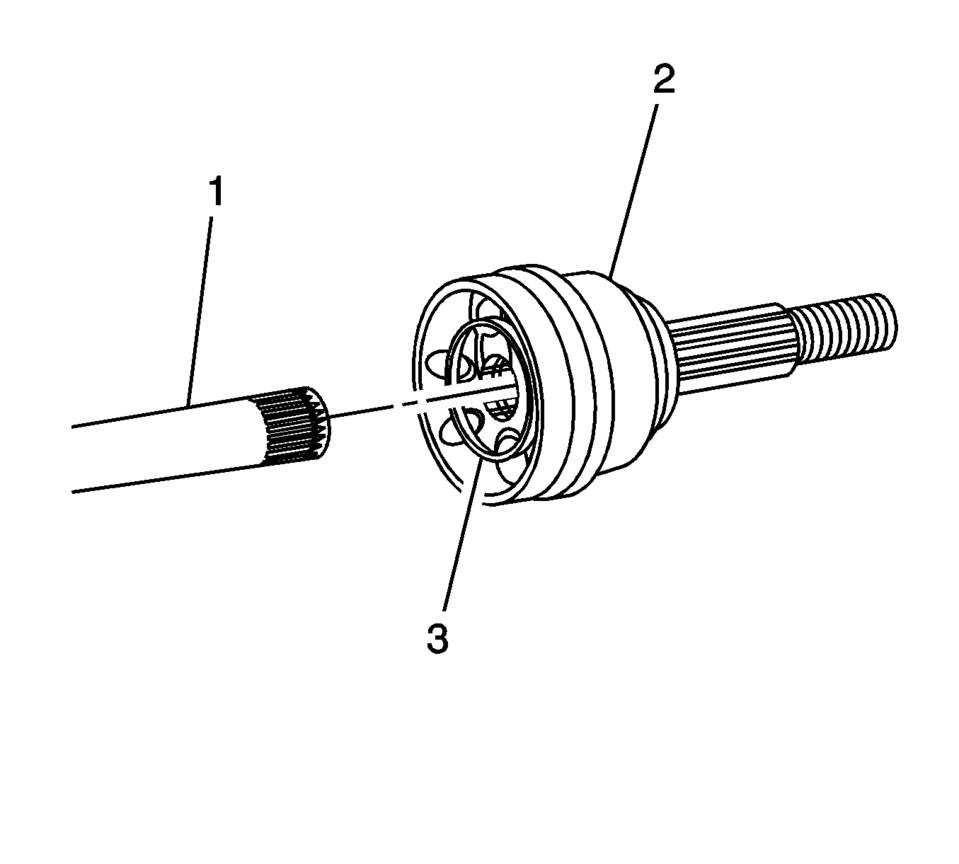
- Remove the CV joint (2) from the wheel drive shaft (1) while tapping the inner race (3) using a bronze bar and a hammer.
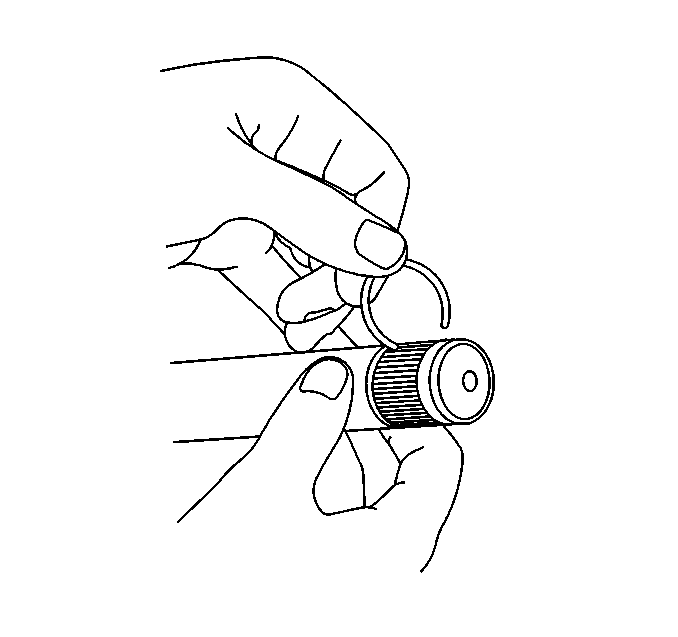
- Using the appropriate tool, remove and discard the retaining clip.
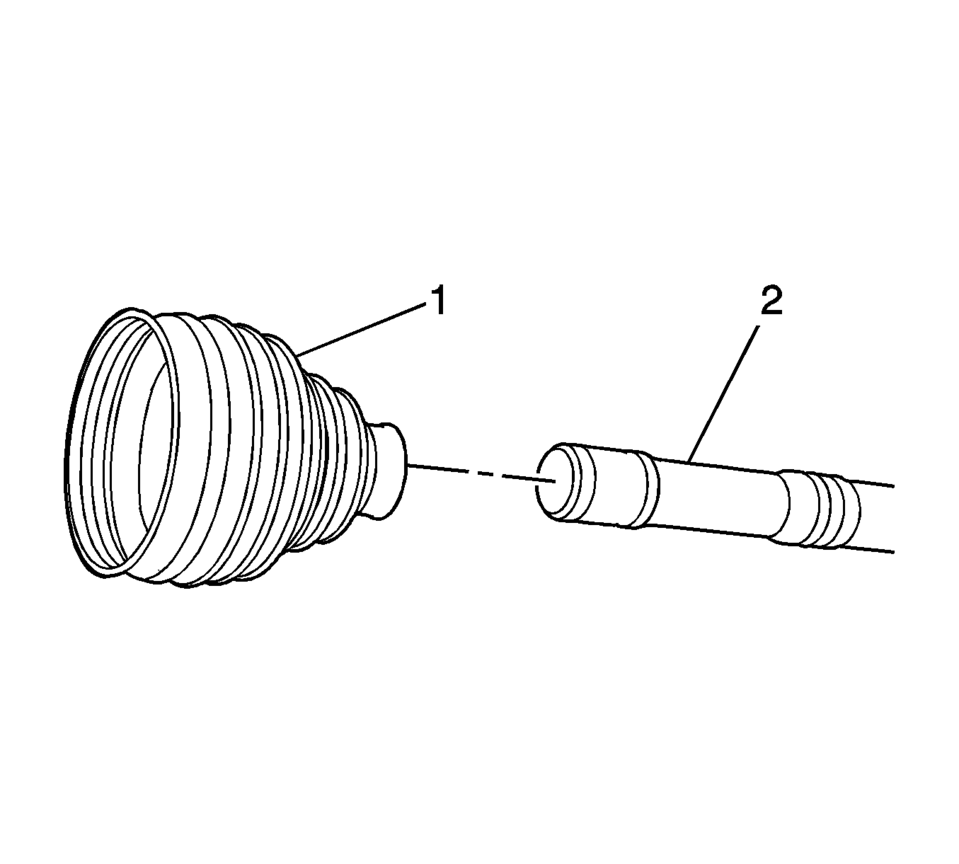
- Remove the boot (1) from the wheel drive shaft (2).
- Inspect the outer CV joint for damage and wear. Refer to Wheel Drive Shaft Outer Joint Inspection.
Caution:
Do not cut through the wheel drive shaft inboard or outboard boot during service. Cutting through the boot may damage the sealing surface of the housing and the tripot or the constant velocity joint bushing. Damage to the sealing surface may lead to water and dirt intrusion and premature wear of the constant velocity joint.
- Assemble Procedure
-
- Position the boot (1) on the wheel drive shaft (2).
- Using the appropriate tool, install the NEW retaining clip.
- Ensure that the boot (1) is properly seated in the grooved (2) wheel drive shaft (3).
- Place approximately half the lubricant from the service kit inside the outboard boot and pack the CV joint with the remaining lubricant.
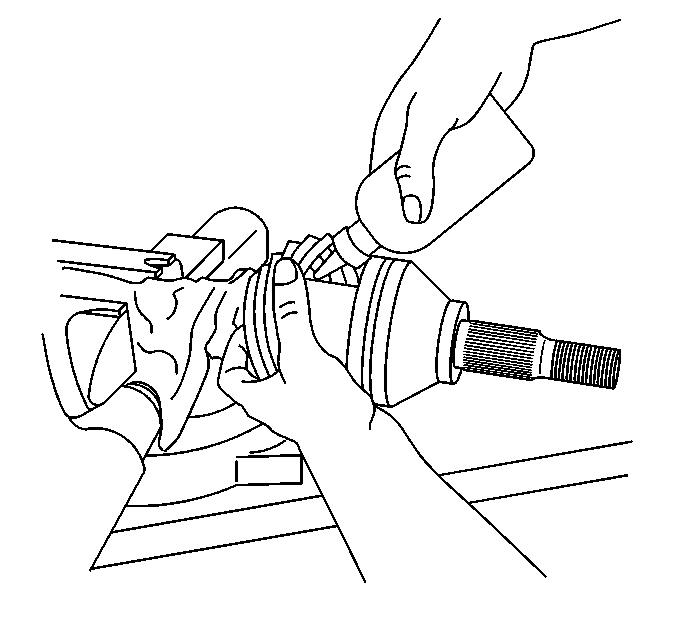
- Using a block of wood and a hammer, install the CV joint (1) on the wheel drive shaft.
- Install the inner boot clamp (2) and the outer boot clamp (1).
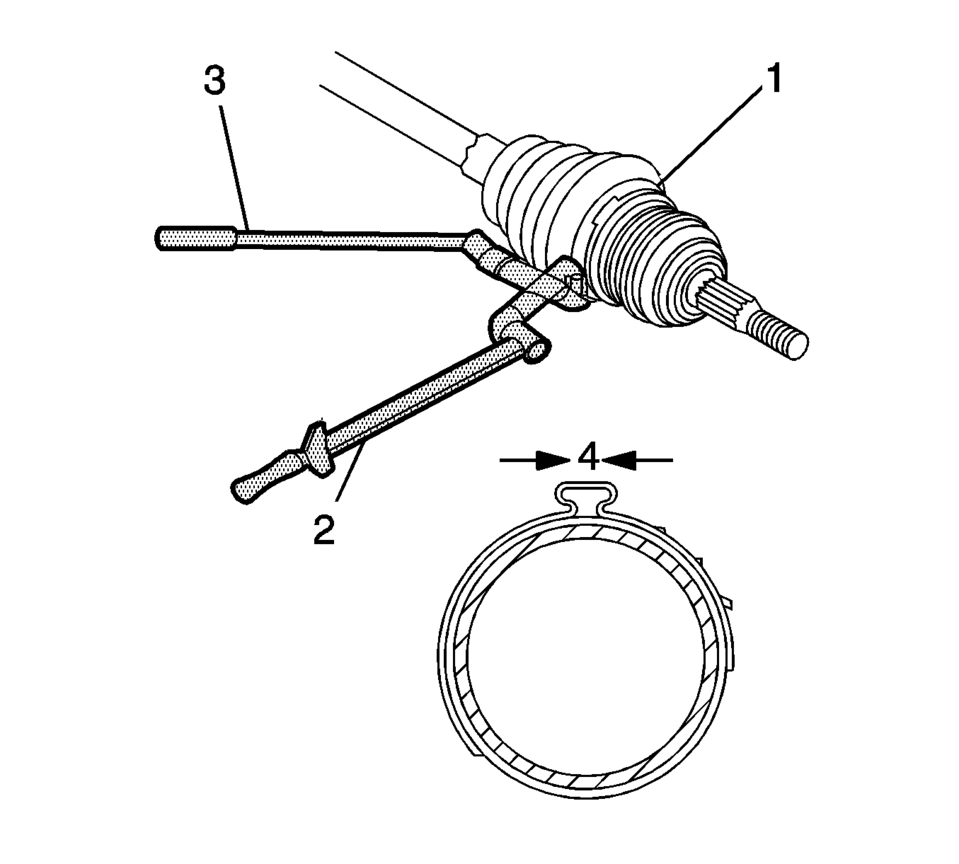
- Using the DT-35910 pliers and a torque or ratchet wrench and
breaker bar (1), close the boot clamp (2) until the gap (3) measures
1.9 mm (0.07 in)
.
- Using the DT-35910 pliers and a torque or ratchet wrench (2) and
breaker bar (3), close the boot clamp (1) until the gap (4) measures
1.7 mm (0.06 in)
.
- Distribute the lubricant within the outer CV joint by moving it in a circular motion at least four to five times.
- Remove the wheel drive shaft from the bench vise.
- Install the wheel drive shaft assembly. Refer to Front Wheel Drive Shaft Replacement.


Note:
Ensure that the boot clamp is properly positioned around the entire circumference of the boot.
 Front Wheel Drive Shaft Inner Joint and Boot Replacement
Special Tools
DT-35910 Drive Axle Boot Clamp Pliers
For equivalent regional tools, refer to Special Tools.
Disassemble Procedure
Note: There are types of inner joints available. If ...
 Front Wheel Drive Shaft Replacement
Special Tools
J-45859 Axle Remover
For regional equivalent tools, refer to Special Tools.
Removal Procedure
Raise and support the vehicle. Refer to Lifting and Jacking the Vehicle.
...
Other materials:
Radio with Touchscreen
The infotainment system can play music or movies by connecting an auxiliary device
to the USB port, if equipped.
USB Support
USB Supported Devices
USB Flash Drives
Portable USB Hard Drives
2G-5G iPod nano®
1G-3G iPod touch®
120GB/160GB iPod classic®
3G/3GS/4/4S iPhone®
Not a ...
Clutch and Differential Housing Disassemble
Special Tools
M-680770 Universal Sliding Mallet
R-0007758 Holding Fixture
R-0407008 Counter Shaft Bearing Remover
R-0407010 Input Shaft Needle Bearing Puller and Driver
R-0407013 Gearshift Device Bushing Puller
R-0007761 Universal Handle for Pullers and Installers
T-0207928 Retai ...
Valve Stem Oil Seal and Valve Spring Replacement
Special Tools
207649 Rod Hairpin Clips
547324 Flange Screws
EN-840 Pliers / Remover
EN-958 Installer
EN-45059 Angle Meter
EN-50717 Kit
J-43649?E Rods
For equivalent regional tools, refer to Special Tools.
Removal Procedure
Remove the spark plugs. Refer to Spark ...

0.0082