Chevrolet Sonic Repair Manual: Low and Reverse and 1-2-3-4 Clutch Housing Cleaning and Inspection
|
Callout |
Component Name |
|---|---|
|
Caution: After cleaning the transmission components, allow to air dry. Do not use cloth or paper towels in order to dry any transmission components. Lint from the towels can cause component failure. Caution: Do not reuse cleaning solvents. Previously used solvents may deposit sediment which may damage the component.
|
|
|
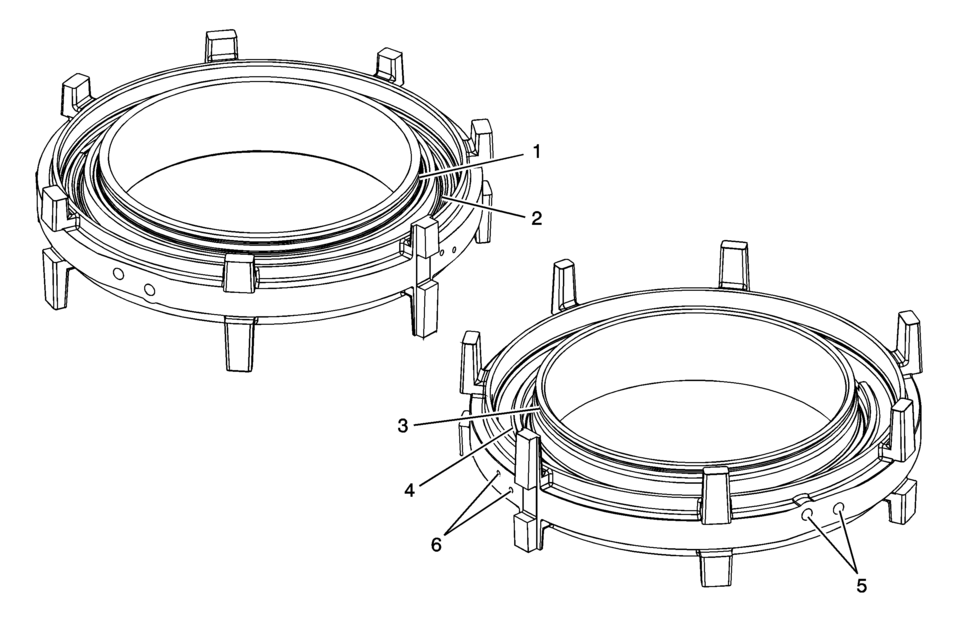
1 |
1??? Clutch Spring Retainer Groove |
|
2 |
1??? Clutch Piston Bore |
|
3 |
Low and Reverse Clutch Spring Retainer Groove |
|
4 |
Low and Reverse Clutch Piston Bore |
|
5 |
Clutch Oil Passages |
|
6 |
Air Bleed Passages |
 Low and Reverse and 1-2-3-4 Clutch Housing Assemble (6T40/45/50)
Table 1:
1??? Clutch Piston Installation
Table 2:
Low and Reverse Clutch Piston Installation
1??? Clutch Piston Installation
1??? Clutch Piston Installa ...
 Low and Reverse and 1-2-3-4 Clutch Housing Disassemble
Table 1:
Low and Reverse Clutch Piston Removal
Table 2:
1??? Clutch Piston Removal
Low and Reverse Clutch Piston Removal
Low and Reverse Clutch Piston R ...
Other materials:
Drive Range, Sixth Gear (Gen 2)
As vehicle speed increases, the transmission control module (TCM) processes input
signals from the automatic transmission input and output speed sensors, the throttle
position sensor and other vehicle sensors to determine the precise moment to command
ON the normally-low 26 pressure control so ...
Fluid Passages (Gen 1)
Figure 1:
Case - Control Valve Body Side (Left)
Figure 2:
Case - Pump Side (Back)
Figure 3:
Control Valve Body - Case Side (Left)
Figure 4:
Control Valve Body - Channel Plate Side (Right
- No Valves)
Figure 5:
Pump Body - Pump Cove ...
Basic information
WARNING
Failure to properly follow all warnings and operating instructions for the
Rear Automatic Braking (RAB) system in the Nissan Armada may result in serious injury
or even fatal accidents.
The Nissan Armada RAB system is designed as a supplemental driver assistance
feature and shoul ...

0.0068