Chevrolet Sonic Repair Manual: Manual Transmission Shift Lever Cable Adjustment
Special Tools
DT-527-A Adjuster or 5mm drill bit
For equivalent regional tools, refer to Special Tools.
- Remove the floor console. Refer to Front Floor Console Replacement.
- Lift upward and disengage (do not remove) cable lock adjuster (1) to release the internal cable assembly, one for each cable.
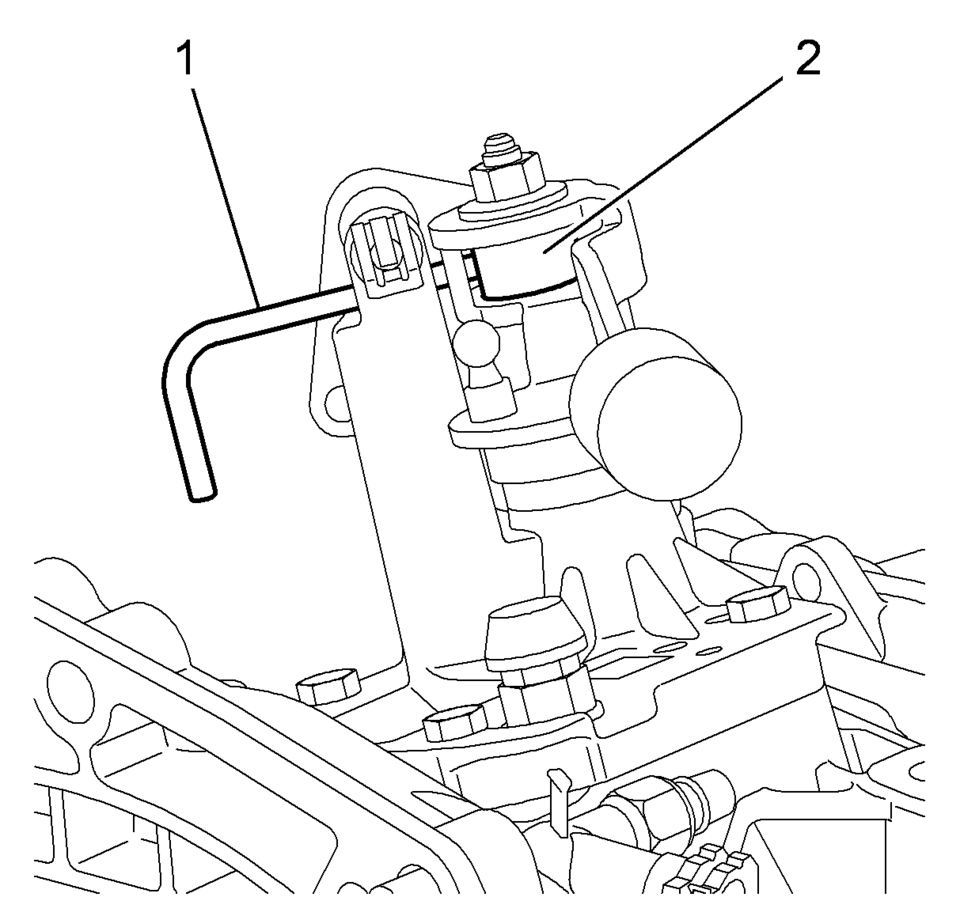
- Lock the transmission gear control with DT-527-A pin (1) or 5mm drill bit.
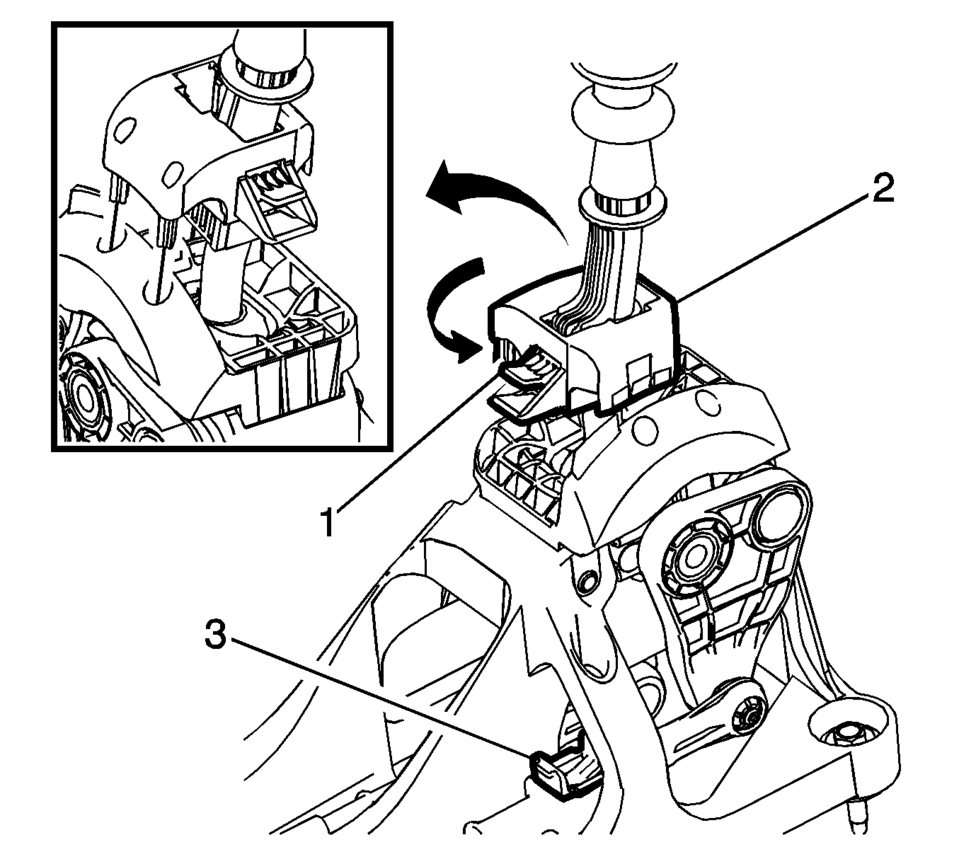
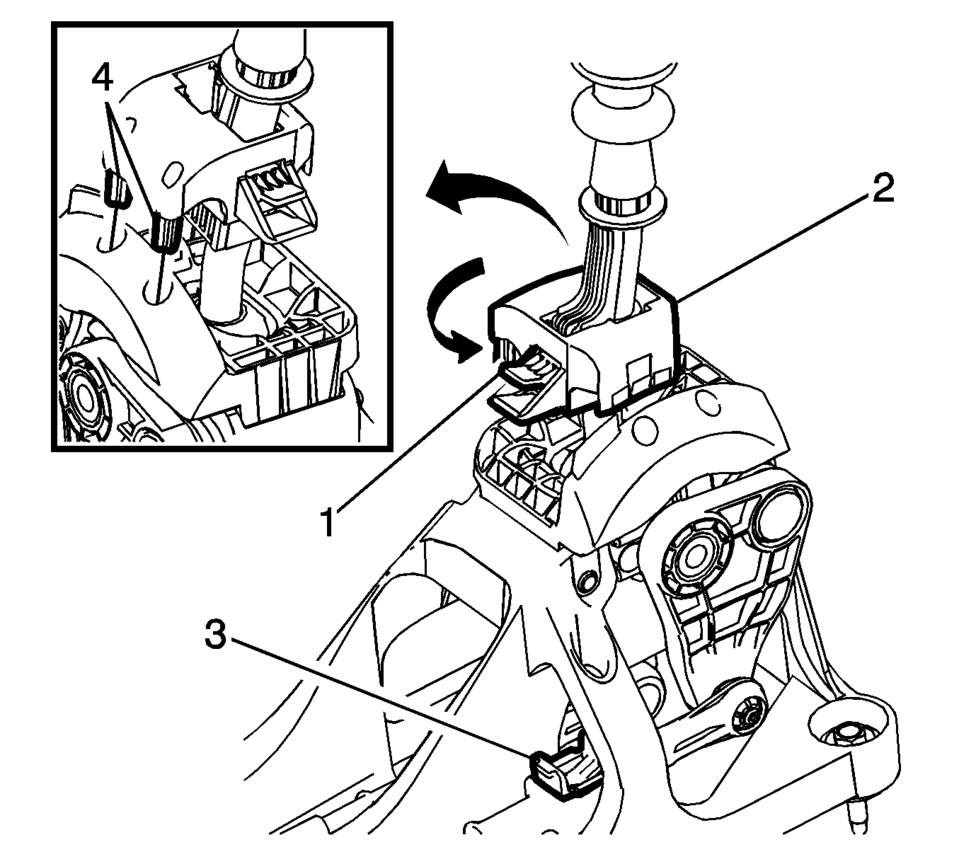
- Lock the position of the shifter control lever by rotating the reverse lockout device with the following instructions:
- Push down on tab (1) and pull up on device (2) to release from installed position.
- Rotate device 180 degrees so tab (1) is in the rear of the shift control assembly.
- Secure integral pins in holes located on shifter base by pushing down device (2) until seated.
- Secure adjuster locks (3) by pushing down until locked. One for each cable.
- Reposition the reverse lockout device with the following instructions:
- Push down on tab (1) and pull up on device (2) to release from installed position.
- Rotate device (2) 180 degrees so tab (1) is in the front of the shift control assembly.
- Push downward on the reverse lockout device (2) until tab (1) snaps into detent.
- Remove the DT-527-A lock pin or drill bit from the transmission gear control.
- Install the floor console. Refer to Front Floor Console Replacement.
- Verify correct operation of the transmission control assembly.
Note:
Not using the specified tools may lead to shift system mis-adjustment.


Note:
The hole of the transmission gear control (2) must be aligned to the hole in the base so the pin (1) can pass thru both. The transmission gear control will be locked in the 1? neutral position.


Note:
During this procedure DO NOT touch or preload the fixed shift lever as this may cause mis-adjustment to the shift system.
 Manual Transmission Shift Lever and Selector Lever Cable Adjustment
Remove the floor console. Refer to
Front Floor Console Replacement.
Lift upward and disengage (do not remove) both cable lock
adjusters (1) to release the internal cable asse ...
Other materials:
Parking Brake Indicator Switch Replacement
Removal Procedure
Remove the front floor console. Refer to
Front Floor Console Replacement.
Ensure that the park brake lever is in the fully released
position.
Disconnect the electrical connector from the park
brake warning indicator switch.
Remove the par ...
Driver Information Center (DIC)
The DIC displays information about your vehicle. It also displays warning messages
if a system problem is detected. See Vehicle Messages. All messages appear in the
DIC display in the instrument cluster.
DIC Operation and Displays
The DIC has different displays which can be accessed b ...
Shift Control Housing Replacement
Removal Procedure
Set the parking brake.
Shift the transmission to the Neutral position.
Remove the battery tray. Refer to
Battery Tray Replacement.
Remove the brake master cylinder assembly from the
power brake booster. Refer to Master Cylinder Replacement.
...
0.0073

