Chevrolet Sonic Repair Manual: Rear Brake Caliper Bracket Replacement
- Removal Procedure
-
Warning:
Refer to Brake Dust Warning.
- Raise and support the vehicle. Refer to Lifting and Jacking the Vehicle.
- Remove the tire and wheel assembly. Refer to Tire and Wheel Removal and Installation.
- DO NOT use any air tools to remove or install the guide pin bolts. Use hand tools ONLY.
- Install an open end wrench to hold the caliper guide pin in line with the brake caliper while removing or installing the caliper guide pin bolt. DO NOT allow the open end wrench to come in contact with the brake caliper. Allowing the open end wrench to come in contact with the brake caliper will cause a pulsation when the brakes are applied.
- Using a backup wrench to hold the brake caliper guide pins stationary, remove the brake caliper guide pin bolts (1).
- Remove the brake caliper and support with heavy mechanics wire.
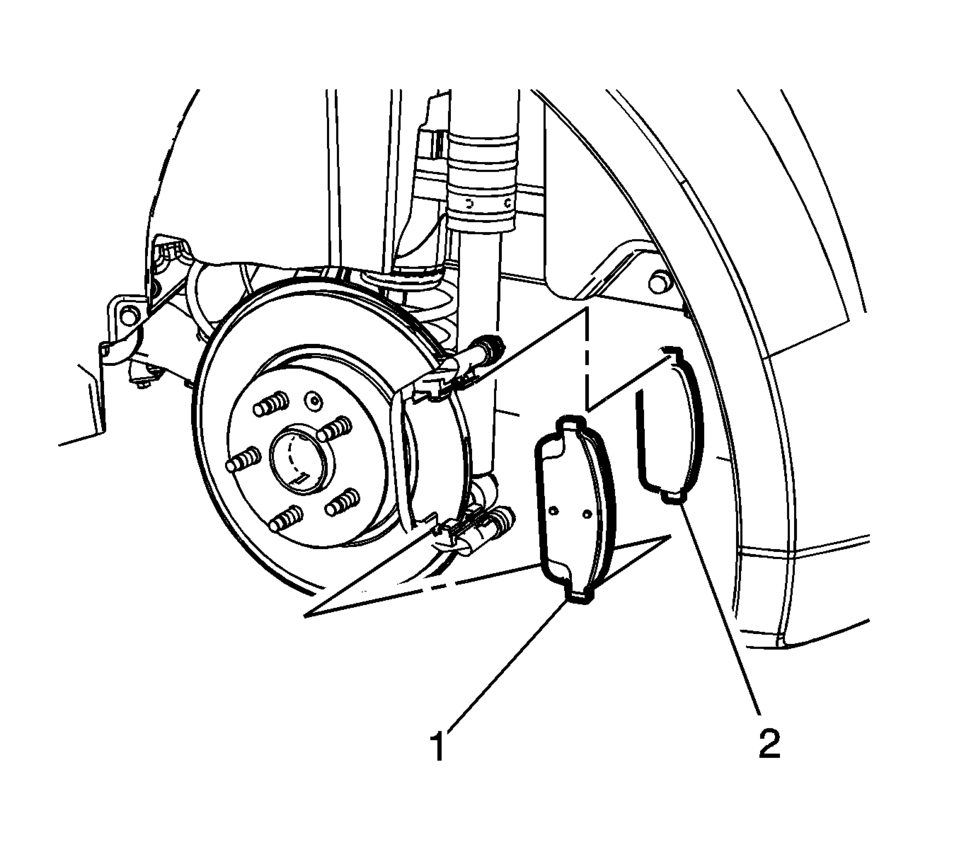
- Remove the outer disc brake pad (1).
- Remove the inner disc brake pad (2).
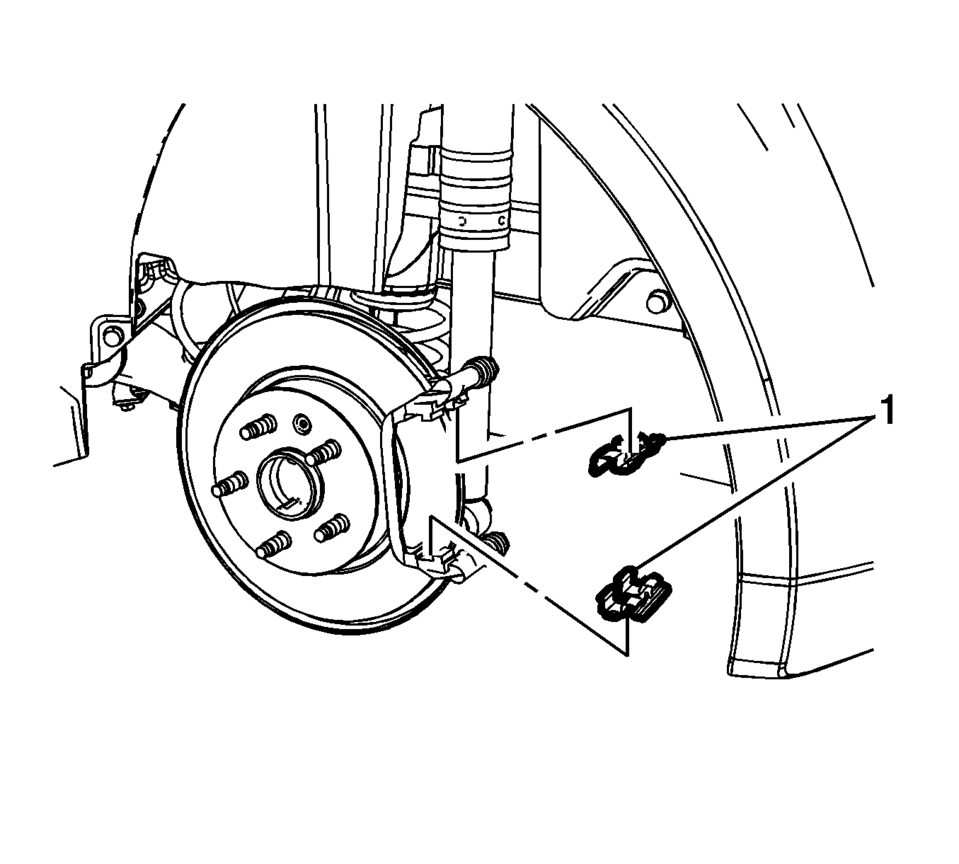
- Remove the disc brake pad springs (1).
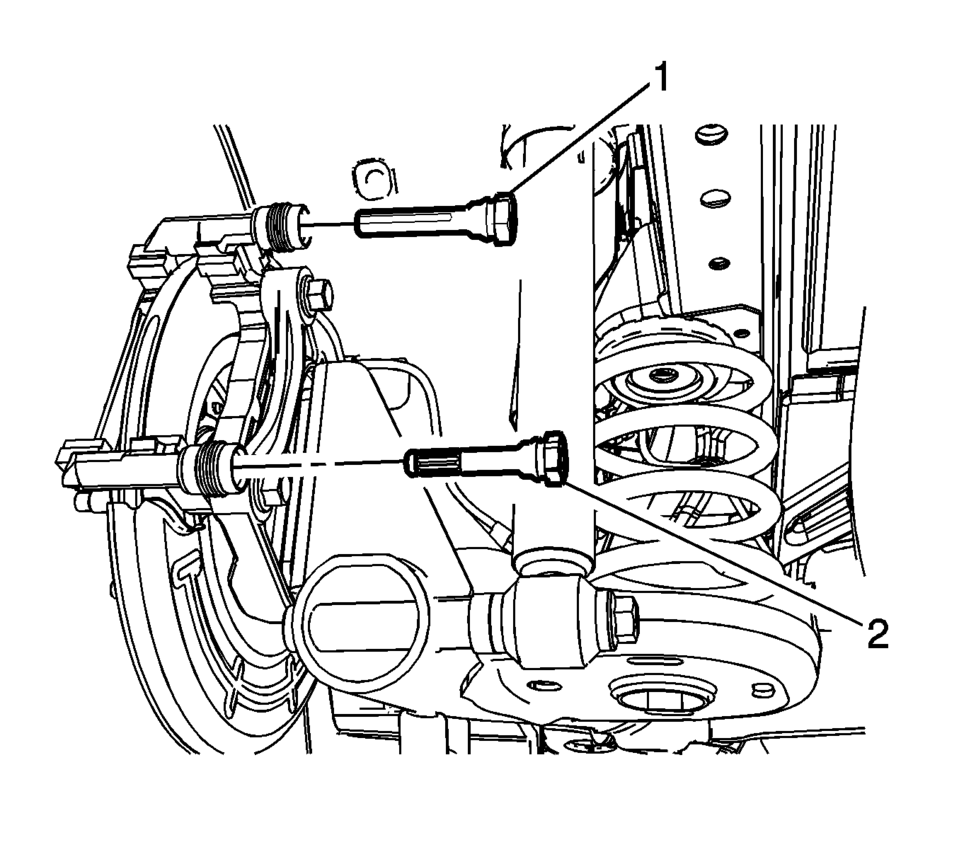
- Remove the upper brake caliper guide pin (1).
- Remove the lower brake caliper guide pin (2).
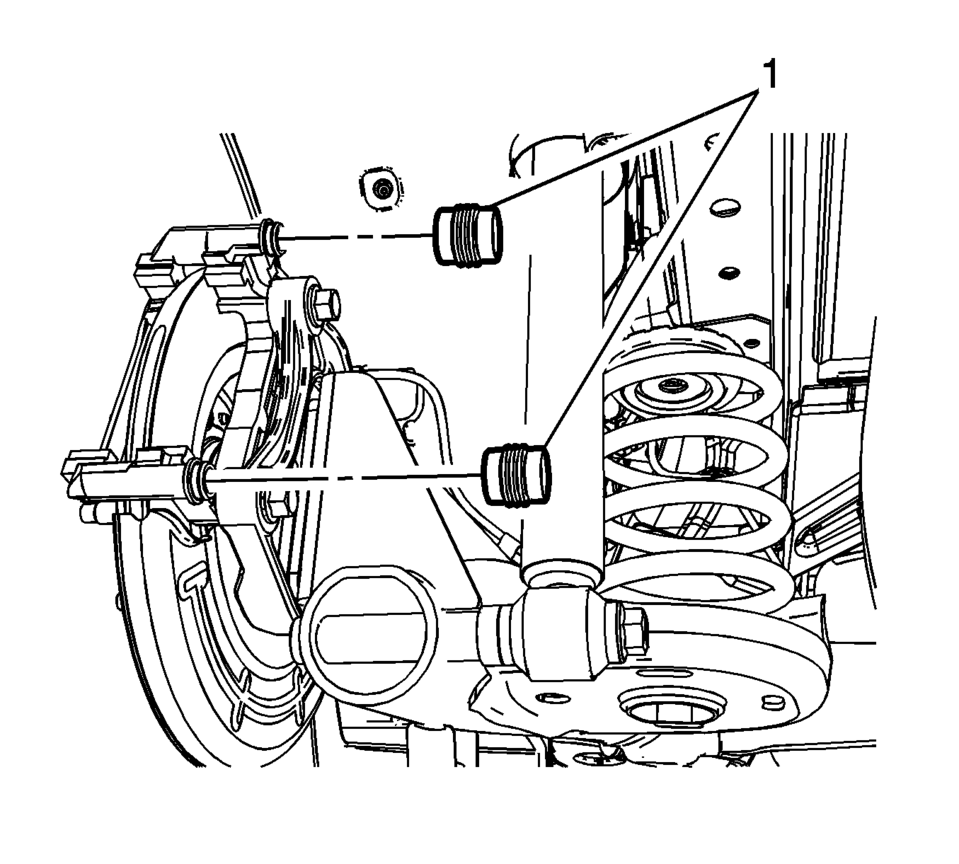
- Remove the brake caliper guide pin seals (1).
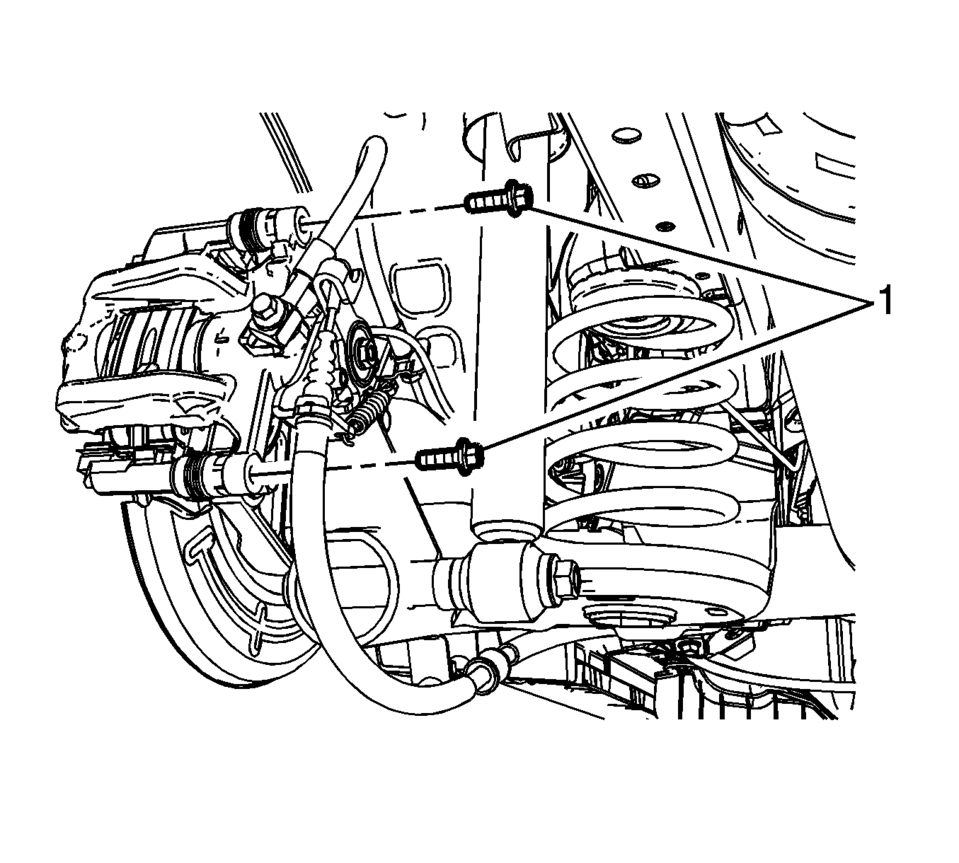
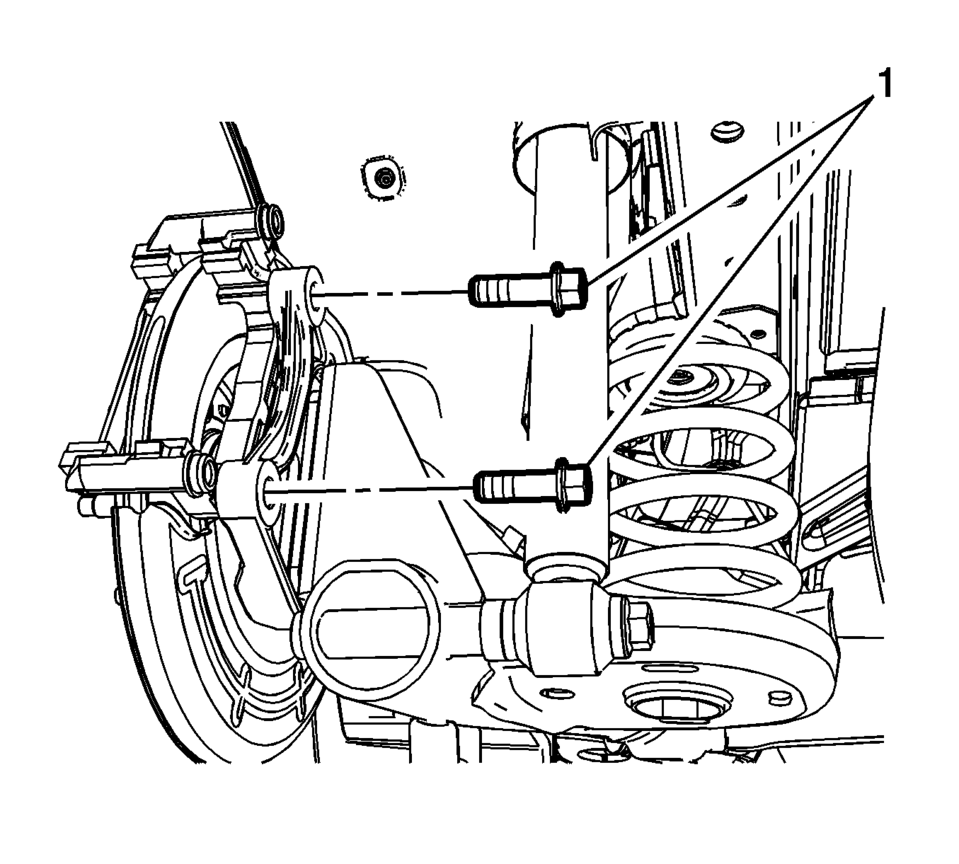
- Remove and discard the brake caliper bracket bolts (1).
- Remove the rear brake caliper bracket.
Note:
Caution:
Support the brake caliper with heavy mechanic wire, or equivalent, whenever it is separated from its mount and the hydraulic flexible brake hose is still connected. Failure to support the caliper in this manner will cause the flexible brake hose to bear the weight of the caliper, which may cause damage to the brake hose and in turn may cause a brake fluid leak.
Note:
The lower brake caliper guide pin is equipped with a bushing and must be installed in the same location.
Note:
Do not reuse the brake caliper bracket bolts.
- Installation Procedure
-
- Install the rear brake caliper bracket.
- Install new brake caliper bracket bolts (1) and tighten to 100 Y
(74 lb ft)
.
- Install the brake caliper guide pin seals (1).
- Install the upper brake caliper guide pin (1).
- Install the lower brake caliper guide pin (2).
- Install the disc brake pad springs (1).
- Install the outer disc brake pad (1).
- Install the inner disc brake pad (2).
- Position the brake caliper over the disc brake pads and to the brake caliper bracket.
- Using a backup wrench to hold the brake caliper guide pins stationary,
install the brake caliper guide pin bolts (1) and tighten to 28 Y (21 lb ft)
.
- Install the tire and wheel assembly. Refer to Tire and Wheel Removal and Installation.
Caution:
Refer to Fastener Caution.
Note:
Ensure the brake caliper guide pin seals are fully seated in the groove of the brake caliper bracket.
Note:
The lower brake caliper guide pin is equipped with a bushing and must be installed in the same location.
 Front Seat Belt Anchor Plate Tensioner Replacement
Front Seat Belt Anchor Plate Tensioner Replacement
Callout
Component Name
Warning: Refer to SIR Warning.
Warning: ...
 Rear Brake Caliper Replacement
Removal Procedure
Warning: Refer to Brake Dust Warning.
Warning: Refer to Brake Fluid Irritant Warning.
Raise and support the vehicle. Refer to Lifting and Jacking the ...
Other materials:
Exterior Lamp Controls
The exterior lamp control is on the instrument panel to the outboard side of
the steering column.
There are four positions:
(Off): Briefly turn to this position
to turn the automatic light control off or on again.
AUTO (Automatic): Turns the headlamps on automatically at normal brightness, ...
Pairing with Touchscreen
A Bluetooth-enabled cell phone must be paired to the Bluetooth system and then
connected to the vehicle before it can be used. See your cell phone manufacturer's
user guide for Bluetooth functions before pairing the cell phone. If a Bluetooth
phone is not connected, calls will be made usin ...
Drunk Driving
Death and injury associated with drinking and driving is a global tragedy.
Warning
Drinking and then driving is very dangerous. Your reflexes, perceptions, attentiveness,
and judgment can be affected by even a small amount of alcohol. You can have a serious
— or even fatal — collision if y ...

0.0066