Chevrolet Sonic Repair Manual: Strut, Strut Component, or Spring Replacement
- Disassembly Procedure
-
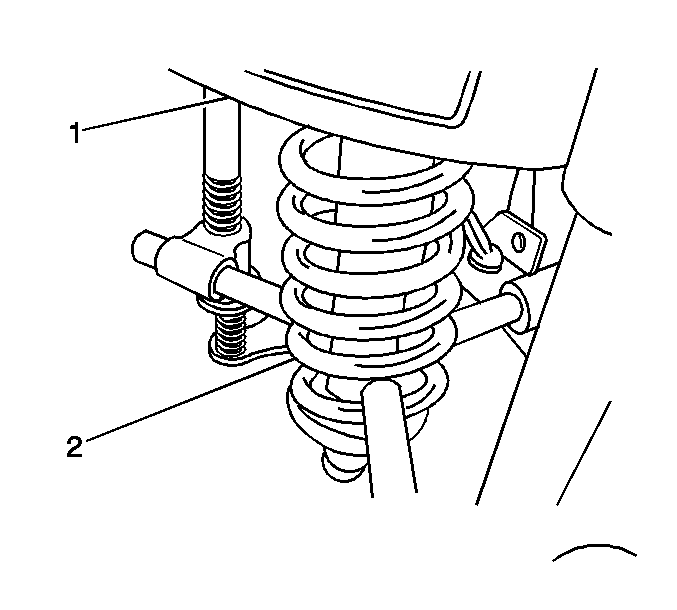
- Remove the strut assembly from the vehicle. Refer to Strut Assembly Removal and Installation.
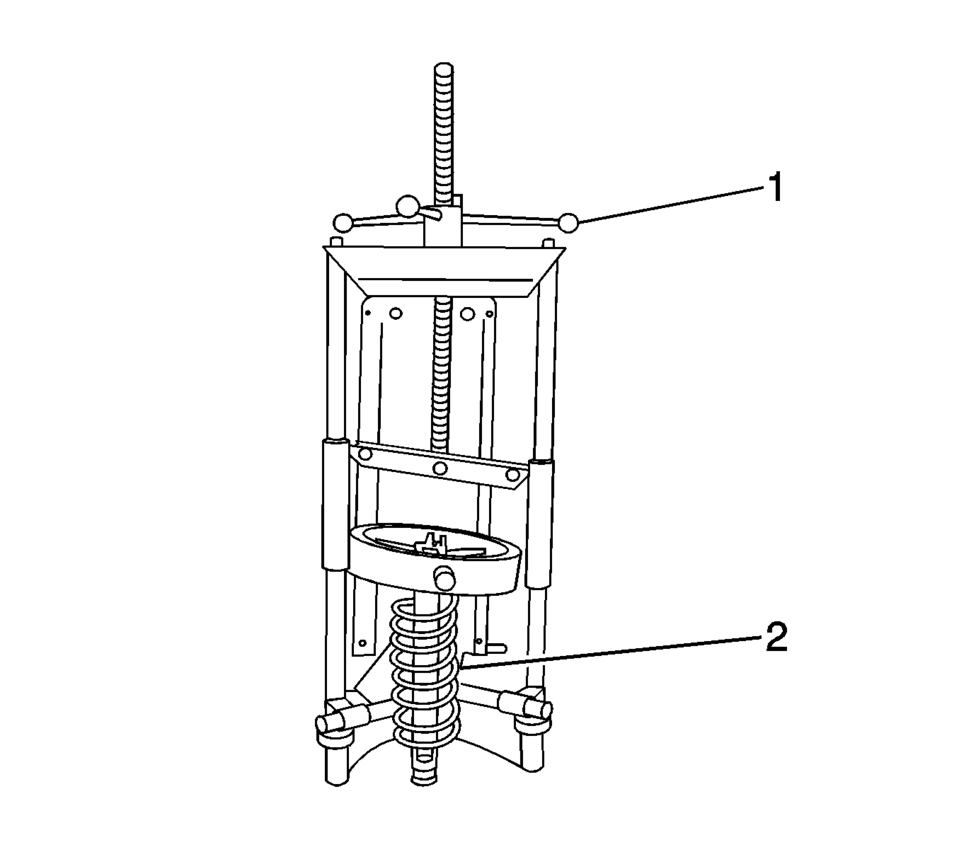
- Install the strut assembly (2) in a suitable spring compressor (1) and compress the front spring.
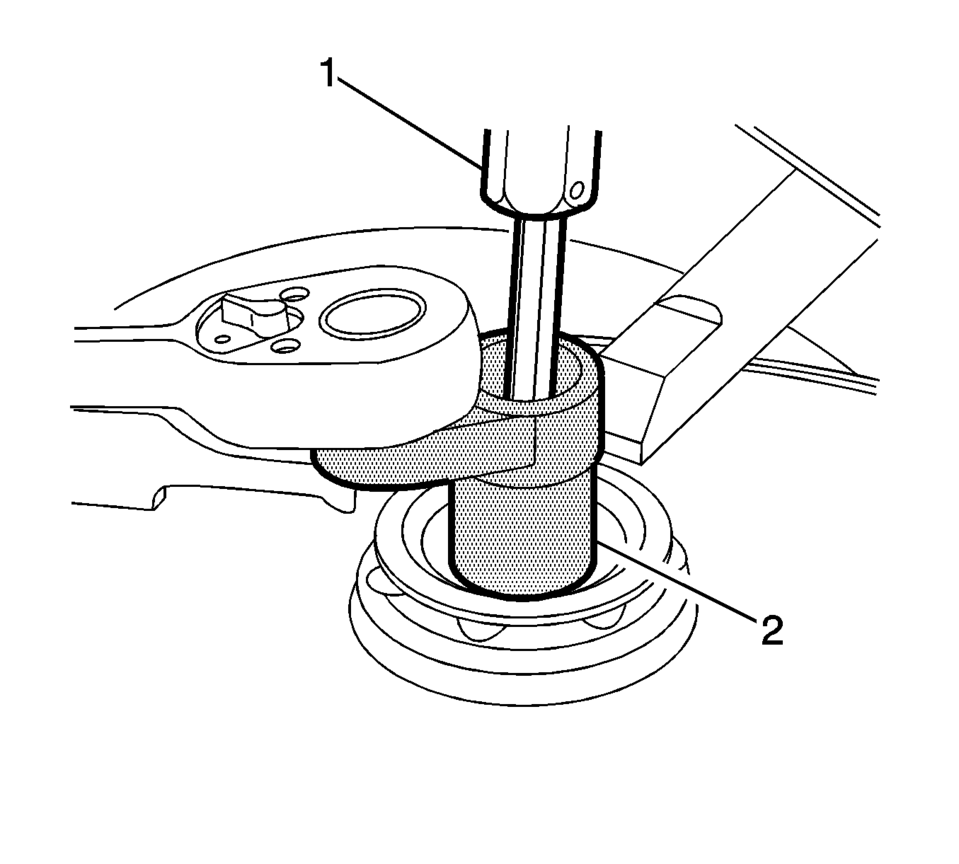
- Use a suitable bit (1) and socket (2) to loosen the front suspension strut mount nut.
- Slowly loosen the spring compressor (2) to remove the front suspension strut components to be serviced.
- Remove the front suspension strut mount assembly (1), front spring insulator (2), front spring (3), front suspension strut bumper (4) and the front strut (5) from the spring compressor.
Note:
The spring is compressed when the strut moves freely.
(((((((l(((((((((((i

- Assembly Procedure
-
- Install the front suspension strut (5), front suspension strut bumper (4), front spring (3), front spring insulator (2) and the front suspension strut mount assembly (1) in the spring compressor.
- Use the spring compressor (1) to compress the front spring (2).
- Install the front suspension strut mount nut and tighten as much as possible by hand.
- Use a suitable bit (1) and socket (2) to tighten the front suspension
strut mount nut to 65 Y (48 lb ft)
.
- Remove the strut assembly from the spring compressor.
- Install the strut assembly. Refer to Strut Assembly Removal and Installation.
(((((((l(((((((((((i
Caution:
Refer to Fastener Caution.
 Strut Assembly Removal and Installation
Special Tools
CH 49375 Strut Rod Nut Socket
For equivalent regional tools, refer to Special Tools
Removal Procedure
Remove the air inlet grille panel. Refer to Air Inlet Grill ...
 Shock Absorber Disposal
Warning: Use the proper eye protection when drilling to prevent metal
chips from causing physical injury.
Clamp the strut in a vise horizontally with the rod (1) completely ex ...
Other materials:
Climate Controls
If equipped with these climate control systems, the heating, cooling, and ventilation
can be controlled for the vehicle.
Climate Control System with Heater and Air Conditioning
1. Temperature Control
2. Fan Control
3. Air Delivery Mode Control
4. Driver and Passenger Heated Seats (If Equipp ...
Dinghy Towing All except RS Model with Automatic Transmission
When dinghy towing a vehicle with an automatic transmission, the vehicle should
be run at the beginning of each day and at each RV fuel stop for about five minutes.
This will ensure proper lubrication of transmission components.
To dinghy tow the vehicle from the front with all four wheels on ...
Air Conditioning (A/C) Refrigerant Pressure Sensor Replacement (1.4L)
Air Conditioning (A/C) Refrigerant Pressure Sensor Replacement
Callout
Component Name
Preliminary Procedures
Raise and support the vehicle. Refer to Lifting and Jacking the
Vehicle.
Remove the front bumper fascia opening ...

0.0052