Chevrolet Sonic Repair Manual: Camshaft Replacement
Special Tools
EN-422 Installer
For equivalent regional tools, refer to Special Tools.
- Removal Procedure
-
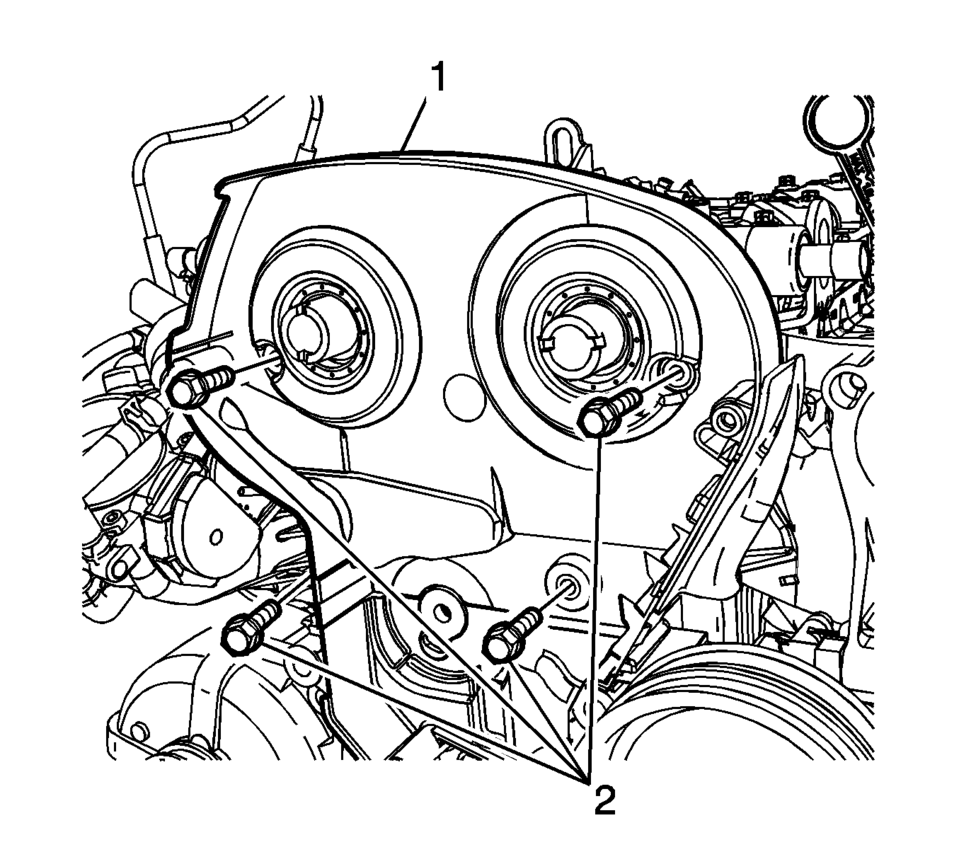
- Remove the timing belt rear cover (1). Refer to Timing Belt Rear Cover Replacement.
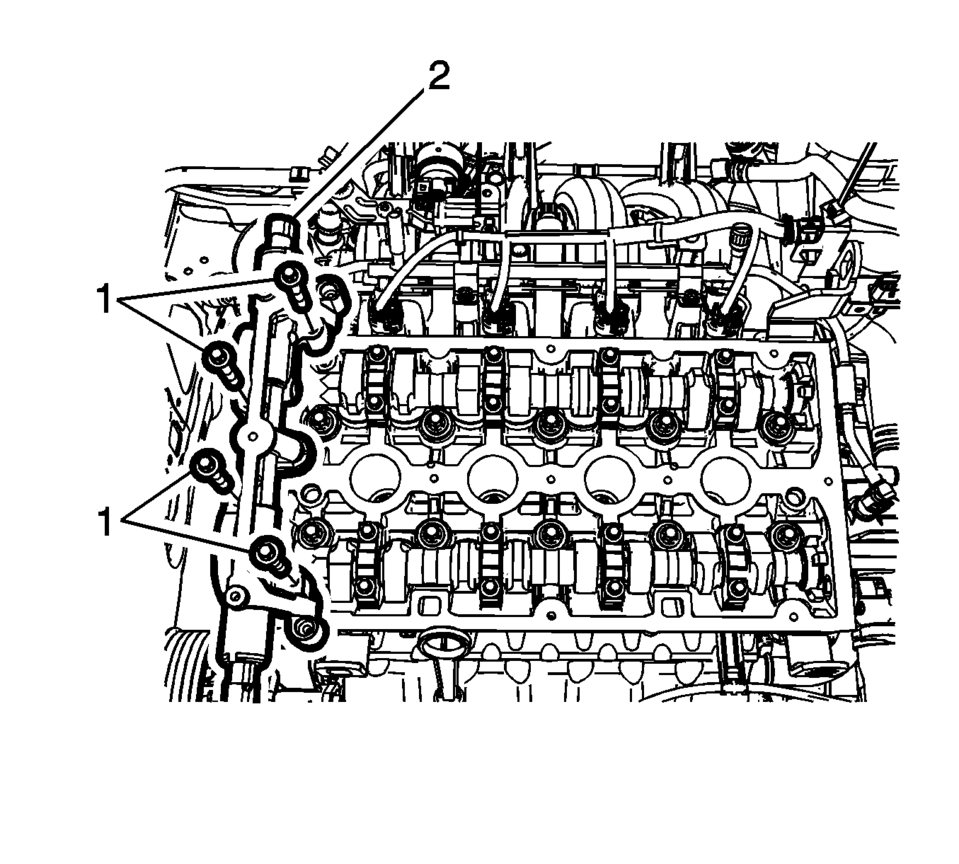
- Remove the camshaft position solenoid valve housing bolts (1) and housing (2).
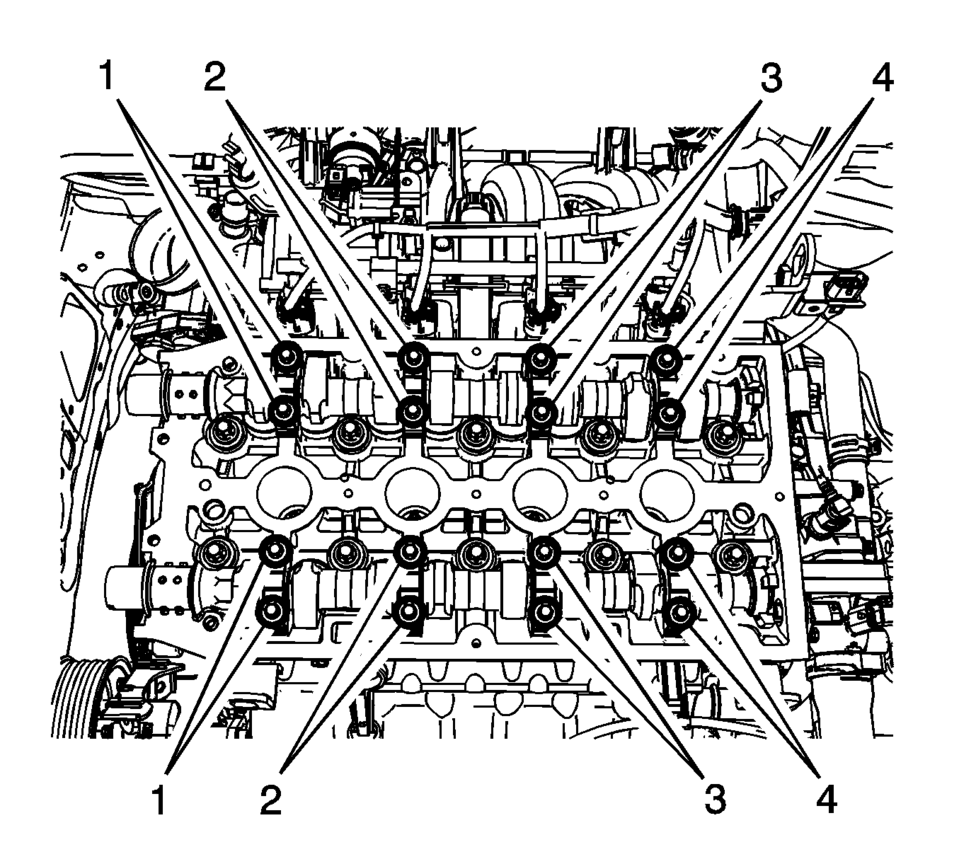
- Remove the camshaft cap bolts in sequence (1, 4, 2, 3).
- Remove the camshaft caps.
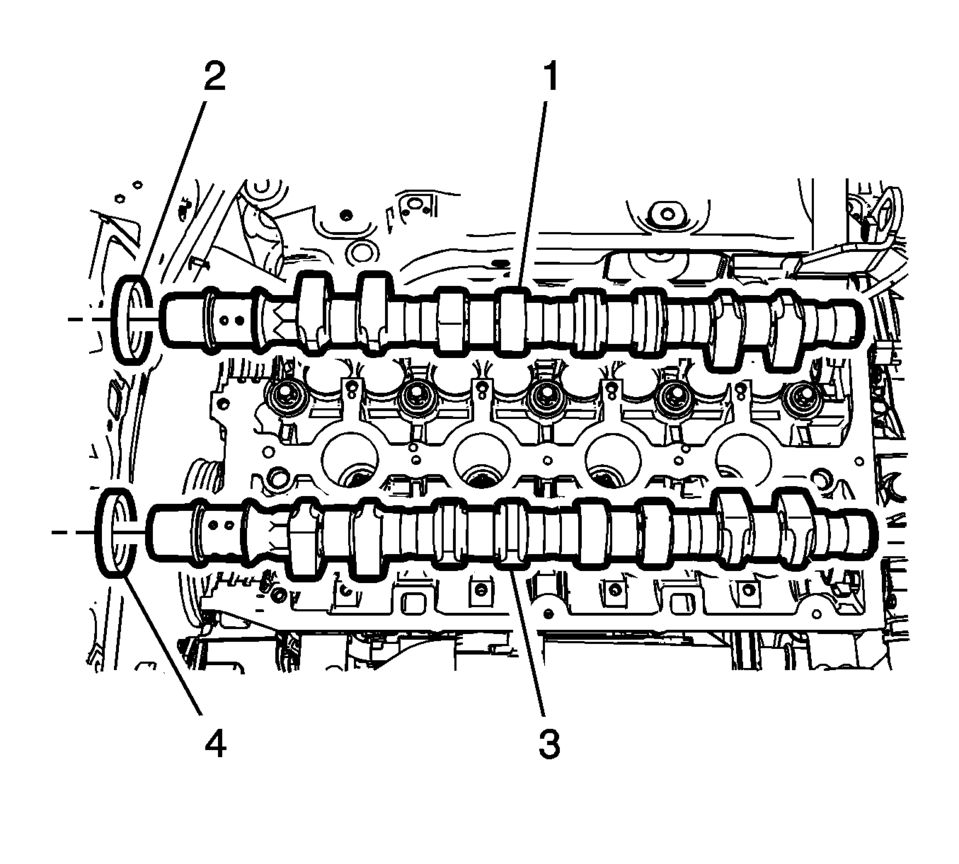
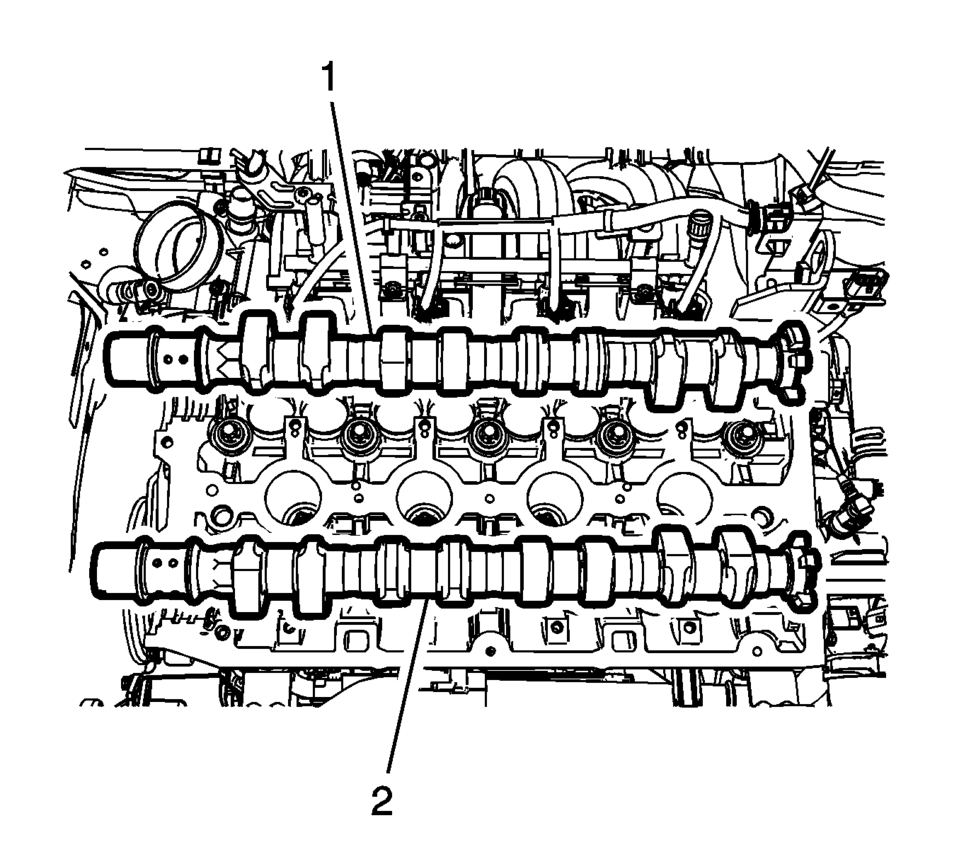
- Remove the exhaust camshaft (1) and intake camshaft (3) as necessary.
- Remove exhaust camshaft seal (2) and intake camshaft seal (4) as necessary.
Note:
Take extreme care to prevent any scratches, nicks or damage to the camshafts and caps bearing surfaces.
Note:
Mark the camshafts upon removal to ensure installation is in the correct position.
Note:
The camshaft seal MUST be replaced whenever the camshaft is removed.
- Installation Procedure
-
- Coat and lubricate the camshaft bearing and cam surfaces with clean engine oil.
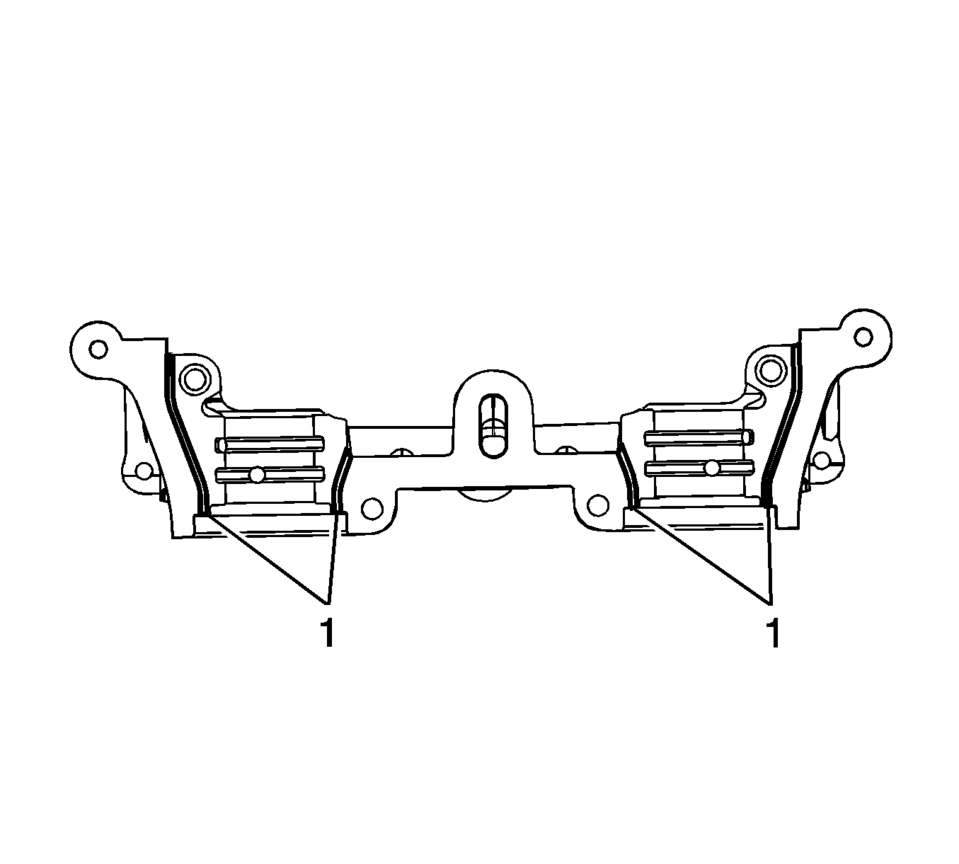
- Apply sealant to the surface (1) of the 1st camshaft bearing cap.
- Install the exhaust camshaft (1) and intake camshaft (2) on the cylinder head.
- Install the camshaft bearing caps in sequence (2, 3, 1, 4) Tighten the
camshaft bearing cap bolts to 8 Y (71 lb in)
.
- Install the camshaft position solenoid valve housing (2) and camshaft
position solenoid valve housing bolts (1). Tighten the bolts to 8 Y (71 lb in)
.
- Install the new camshaft oil seal rings using EN-422 installer .
- Install the timing belt rear cover (1) and tighten the bolts (2) to
6 Y (53 lb in)
. Refer to Timing Belt Rear Cover Replacement.
Note:
It is essential to ensure that no sealant is applied outside the marked sealing areas.
Caution:
Refer to Fastener Caution.
 Camshaft Removal
Note: Note removal sequence 1?E.
Remove the 4 camshaft bearing cap bolts.
Note: Release the bearing support by striking it gently with a
plastic hammer.
...
 Exhaust Camshaft Installation
Note: Mind the markings on the camshaft bearing caps. Camshaft
bearing caps should be installed in their original position.
Lubricate camshaft and camshaft bearing caps with eng ...
Other materials:
Disarming the System
To disarm the system, either unlock the doors using the RKE transmitter, or start
the vehicle with a recognized transmitter in the vehicle.
To avoid setting off the alarm by accident:
Press on the RKE transmitter.
Start the vehicle.
To avoid setting off the alarm by accident:
Lock t ...
Steering Wheel Horn Contact Replacement
Steering Wheel Horn Contact Replacement
Callout
Component Name
Preliminary Procedure
Remove the steering wheel inflatable restraint module. Refer to Airbag
Steering Wheel Module Replacement.
1
S ...
Fuel Tank Filler Door Replacement
Fuel Tank Filler Door Replacement
Callout
Component Name
1
Fuel Tank Filler Door
Procedure
Position the fuel tank filler door to the full open position. Using light
outward sliding pressure on the filler door, ...

0.0059