Chevrolet Sonic Repair Manual: Engine Control Module Replacement
|
Callout |
Component Name |
|---|---|
|
Note: If the ECM is to be replaced, the ECM must be RESET (prepared for removal) prior to removal from the vehicle. Failing to reset the ECM will result in the following:
|
|
|
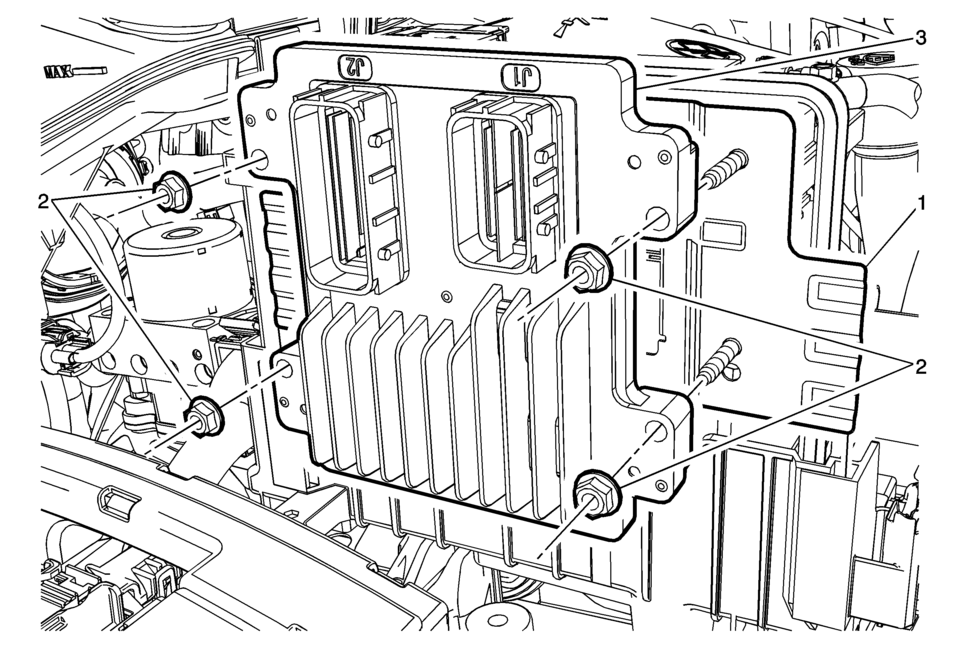
1 |
Engine Control Module Mounting Bracket Procedure
|
|
2 |
Engine Control Module Fasteners (Qty: 4) Caution: Refer to Fastener Caution.
9 Y (80 lb in) |
|
3 |
Engine Control Module Caution:
Note: Before removing the engine control module (ECM), record the oil life percentage remaining. Use the scan tool to reset the Engine Oil Life remaining back to the original percentage recorded. |
 Engine Control Module Description
The Engine Control Module (ECM) interacts with many emission related components
and systems, and monitors emission related components and systems for deterioration.
OBD II diagnostics monitor the ...
 K20 Engine Control Module: Programming and Setup
Special Tools
EL-49642 SPS Programming Support Tool
For equivalent regional tools, refer to Special Tools.
Note:
DO NOT program a control module unless directed to by a service procedu ...
Other materials:
Instrument Panel Lower Trim Pad Cover Replacement (With AAL)
Instrument Panel Lower Trim Pad Cover Replacement
Callout
Component Name
Preliminary Procedure
Disable the SIR system. Refer to SIR Disabling and Enabling.
1
Instrument Panel Lower Trim Pad Fastener ...
Transmission Disassemble (Gen 1)
Special Tools
3-9506289 Universal Adapter
R-0007758 Holding Fixture
S-9407198 Differential Bearing Race Wrench
For equivalent regional tools, refer to Special Tools.
Attach R-0007758 holding fixture (2) to the transmission.
Attach R-0007758 holding fixture (2 ...
Front Floor Console Cover Replacement (Manual Transmission)
Removal Procedure
Use a flat bladed plastic trim tool in order to release
the retainers securing the console cover (1) to the console assembly.
Reach under the console cover assembly (1) and release
the retainer tabs securing the transmission s ...

0.0053