Chevrolet Sonic Repair Manual: Front Side Door Replacement
|
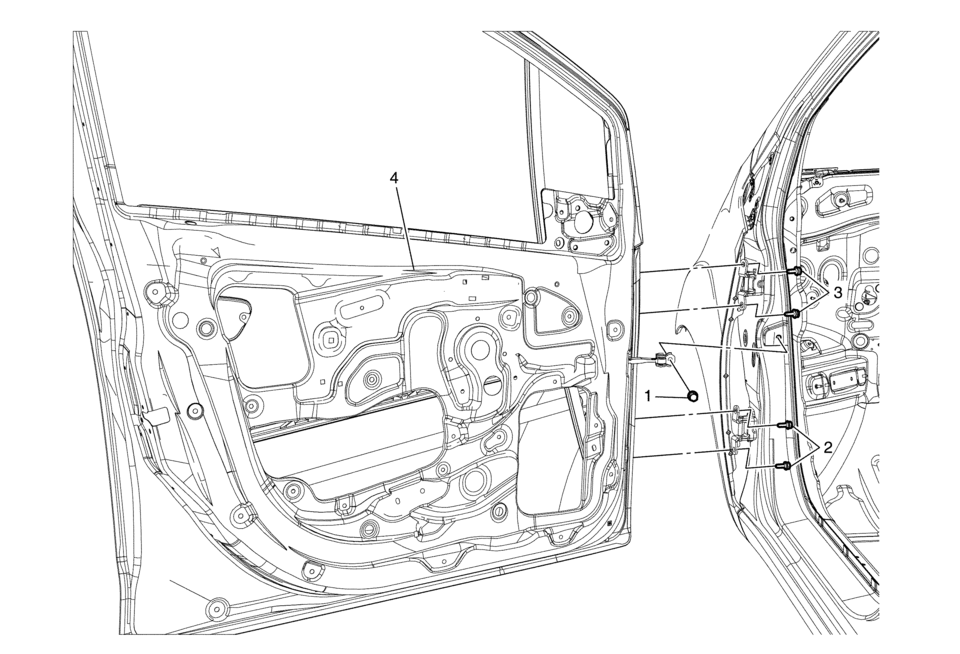
Callout |
Component Name |
|---|---|
|
Warning: Refer to SIR Warning.
|
|
|
1 |
Front Side Door Check Link Bolt to Body Caution: Refer to Fastener Caution.
22?€‰Y (16?€‰lb?€‰ft) |
|
2 |
Front Side Door Lower Hinge Bolt to Door (Qty:?€‰2) Tighten
25?€‰Y (18?€‰lb?€‰ft) |
|
3 |
Front Side Door Upper Hinge Bolt to Door (Qty:?€‰2) Tighten
25?€‰Y (18?€‰lb?€‰ft) |
|
4 |
Front Side Door Assembly Procedure
|
 Front Side Door Outer Panel Replacement
Removal Procedure
Note: According to different corrosion warranties, only the regional
mandatory joining methods are allowed.
Disable the SIR System. Refer to SIR Disabling ...
 Front Side Door Trim Replacement
Front Side Door Trim Replacement
Callout
Component Name
Preliminary Procedure
Remove the front side door upper front trim panel ...
Other materials:
Speaker Replacement Reference
Speaker Replacement Reference
Component
Repair Instruction
Front Door Speaker
Radio Front Side Door Speaker Replacement
Front Tweeter Speaker
Radio Windshield Side Garnish Molding Speaker
...
Liftgate Adjustment
Liftgate Adjustment
Callout
Component Name
1
Liftgate
Caution: Refer to Fastener Caution.
Procedure
Loosen the 4 liftgate hinge bolts to adjust the liftgate.
Adjust the liftgate in order to obtai ...
Low and Reverse and 1-2-3-4 Clutch Housing, Low and Reverse Clutch Assembly,
Output Sun Gear, and 2-6 Clutch Plate Disassemble (Gen 2)
Low and Reverse and 1-2-3-4 Clutch Housing, Low and Reverse Clutch
Assembly, Output Sun Gear, and 2-6 Clutch Plate Disassemble
Callout
Component Name
1
1??? Clutch Backing Plate
2
1??? Clu ...

0.0052