Chevrolet Sonic Repair Manual: Headlining Trim Panel Replacement (Hatchback without Sunroof)
|
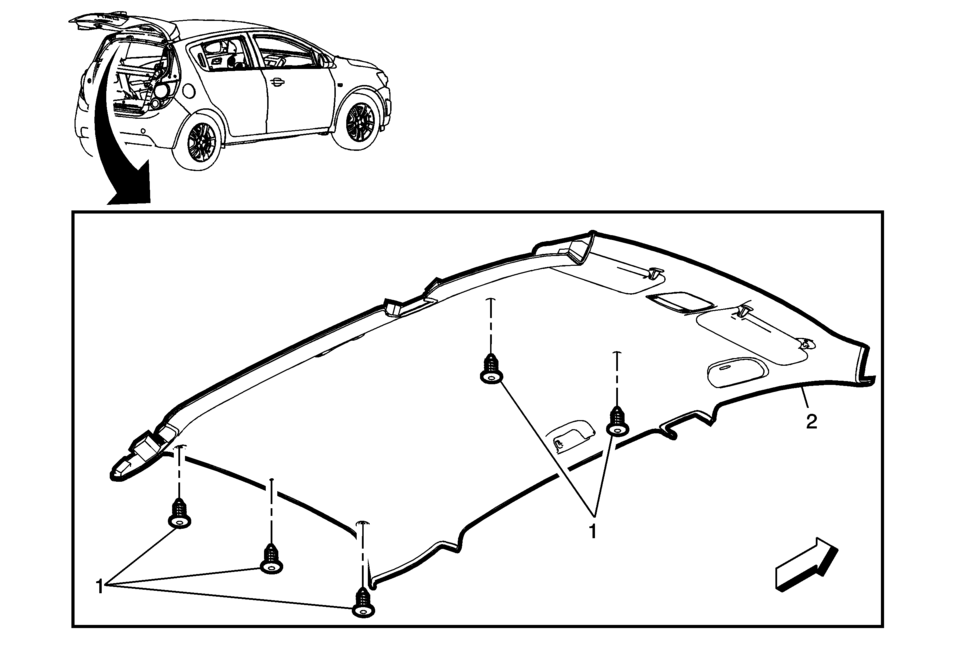
Callout |
Component Name |
|---|---|
|
Warning: Do not attempt to repair or alter the head impact energy-absorbing material glued to the headliner or to the garnish trims. If the material is damaged, replace the headliner and/or the garnish trim. Failure to do so could result in personal injury. Caution: If a vehicle is equipped with a head curtain inflator module ensure that the inflator module and tether are undamaged. If tether or curtain airbag are damaged in any way, they must be replaced. Caution: Use care when working around the head curtain inflator module. Sharp tools may puncture the curtain airbag. If the head curtain inflator module is damaged in any way, it must be replaced.
|
|
|
1 |
Headliner Trim Panel Retainer?€‰(Qty:?€‰5) |
|
2 |
Headliner Trim Panel Assembly Procedure
Disconnect the electrical connectors. Note: When installing a new headliner, tape any unused connector to the headliner with a high adhesive tape. |
 Headlining Trim Panel Replacement (Hatchback with Sunroof)
Headlining Trim Panel Replacement
Callout
Component Name
Warning: Do not attempt to repair or alter the head impact
energ ...
 Headlining Trim Panel Replacement (Sedan with Sunroof)
Headlining Trim Panel Replacement
Callout
Component Name
Warning: Do not attempt to repair or alter the head impact
energ ...
Other materials:
Brake Warning System Description and Operation
Brake Warning Indicator
Brake Warning Block Diagram
B80Park
Brake
SwitchB20Brake
Fluid Level
SwitchK9Body
Control
ModuleP16Instrument
Cluster
Hard-Wired
Seri ...
Manual Shift Detent Lever with Shaft Position Switch Assembly Replacement
Special Tools
DT-41229 Manual Shaft Pin Installer
DT-48550 Detent Lever Pin Remover
For equivalent regional tools, refer to Special Tools.
Removal Procedure
Disconnect the transmission range selector lever cable
terminal (1) from the transmission manual shi ...
Low and Reverse and 1-2-3-4 Clutch Housing Cleaning and Inspection
Low and Reverse and 1-2-3-4 Clutch Housing Cleaning and Inspection
Callout
Component Name
Caution: After cleaning the transmission components, allow
to air dry. Do not use cloth or paper towels in order to dry any transmi ...

0.0047