Chevrolet Sonic Repair Manual: Outside Rearview Mirror Glass Replacement
- Removal Procedure
-
- Place masking tape over the mirror glass.
- Carefully push the outside rearview mirror glass upward and into the right corner of the mirror housing, allowing access to the bottom edge.
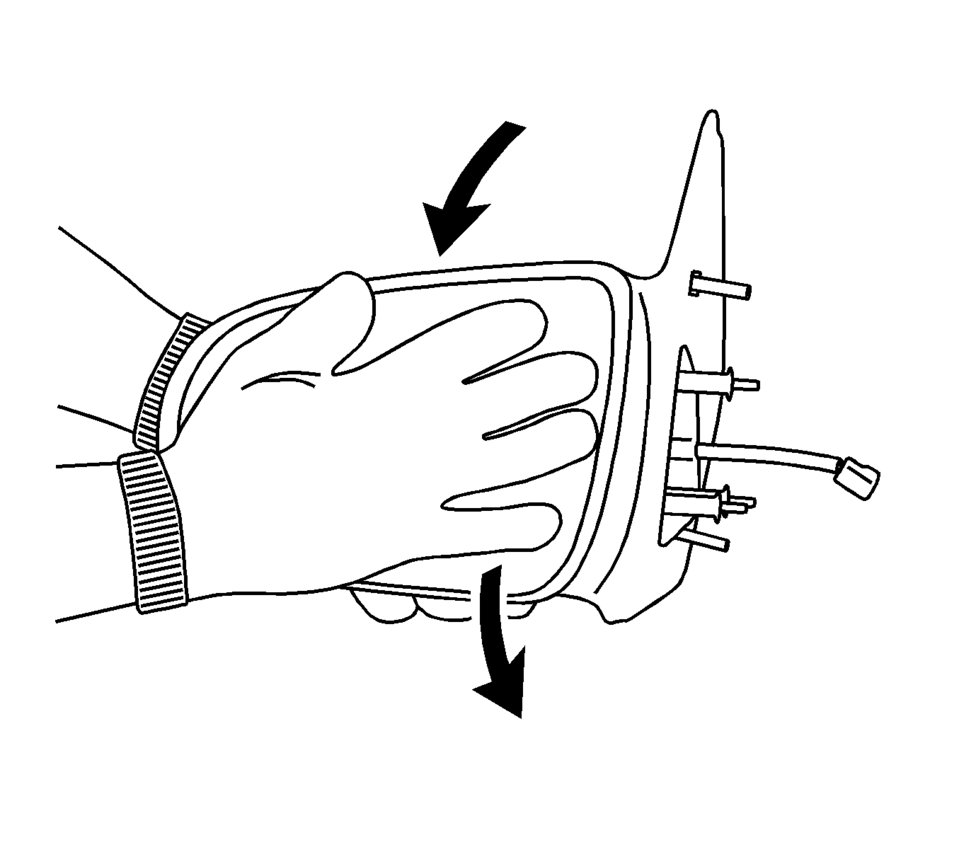
- Grasp the bottom edge of the mirror glass firmly, lift it up and pull rearward until the mirror glass releases the motor ring.
Warning:
Approved safety glasses and gloves should be worn when performing this procedure to reduce the chance of personal injury.

- Installation Procedure
-
- Place the mirror glass on the lower motor ring retainers.
- Place one hand on the back of the mirror housing, using the flat palm of the other hand press inward locking the mirror glass to the motor ring.
- Remove the masking tape from the mirror glass.
- Inspect the outside mirror for proper operation.
 Inside Rearview Mirror Replacement
Inside Rearview Mirror Replacement
Callout
Component Name
1
Inside Rearview Mirror Cover
Procedure
Remove the wir ...
 Outside Rearview Mirror Housing Rear Cover Replacement
Outside Rearview Mirror Housing Rear Cover Replacement
Callout
Component Name
Preliminary Procedures
Remove the outside rearvie ...
Other materials:
Safety Belt Use During Pregnancy
Safety belts work for everyone, including pregnant women. Like all occupants,
they are more likely to be seriously injured if they do not wear safety belts.
A pregnant woman should wear a lap-shoulder belt, and the lap portion should
be worn as low as possible, below the rounding, throughout ...
OnStar Overview
If equipped, this vehicle has a comprehensive, in-vehicle system that can connect
to a live Advisor for Emergency, Security, Navigation, Connection, and Diagnostic
Services.
The OnStar system status light is next to the OnStar buttons. If the status light
is:
Solid Green: System is read ...
Transmission Fluid Drain and Fill
Draining Procedure
Note:
The fluid check bolt at the front of the transmission may not be
opened.
The transmission fluid drained out during the pre-delivery inspection
may be re-used. New transmission fluid must be used during servicing
work.
The transmis ...

0.0059