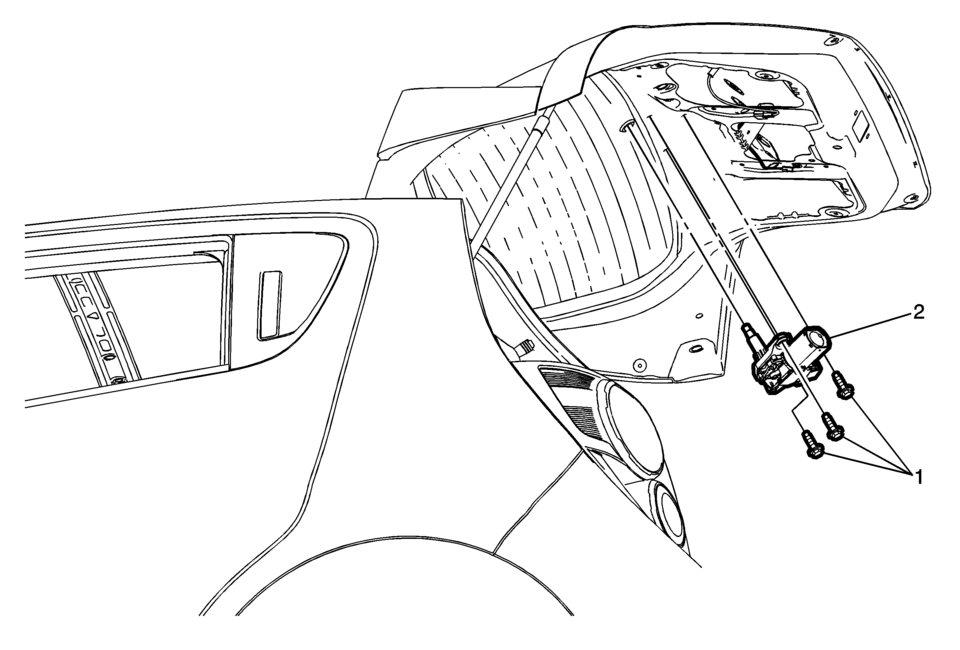
Chevrolet Sonic Repair Manual: Rear Window Wiper Motor Replacement (Hatchback)
|
Callout |
Component Name |
|---|---|
Preliminary Procedure
|
|
|
1 |
Rear Window Wiper Motor Bolt (Qty:?€‰3) Caution: Refer to Fastener Caution.
9?€‰Y (80?€‰lb?€‰in) |
|
2 |
Rear Window Wiper Motor Procedure
|
 Rear Window Wiper Motor Grommet Replacement
Rear Window Wiper Motor Grommet Replacement
Callout
Component Name
Preliminary Procedure
Remove the rear window wiper motor. Re ...
 Windshield Wiper Motor Replacement
Windshield Wiper Motor Replacement
Callout
Component Name
Preliminary Procedure
Remove the wiper system module. Refer to Windsh ...
Other materials:
Front Seat Belt Buckle Replacement
Front Seat Belt Buckle Replacement
Callout
Component Name
Preliminary Procedures
Remove the front seat. Refer to Driver or Passenger Seat Removal and
Installation.
1
Driver or Passenger Seat Bel ...
Rear Seat Back Bolster Replacement
Rear Seat Back Bolster Replacement
Callout
Component Name
Preliminary Procedures
Disable the SIR system. Refer to SIR Disabling and Enabling
1
Rear Seat Back Cushion Bolster
Warning: Refer t ...
Tire and Wheel Balancing (Wheel Pilot Bore Greasing)
Beginning with MY 2011 vehicle, pilot bore grease should be applied.
To enable this, grease must be applied to the pilot bore to prevent the
wheel from seizing onto the hub.
Refer to Adhesives, Fluids, Lubricants, and Sealers for pilot bore lubricant
part number.
Do not use any pene ...

0.0056