Chevrolet Sonic Repair Manual: 2-6 Clutch Piston Installation (6T40/45/50)
|
Callout |
Component Name |
|---|---|
|
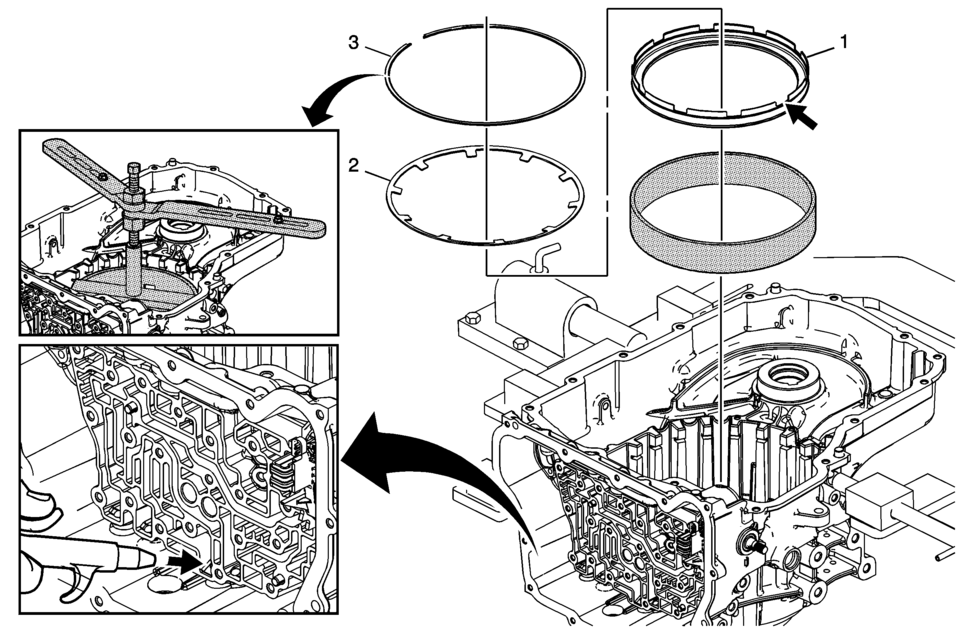
1 |
2? Clutch Piston Assembly Note:
Special Tool
DT-47796 Seal Protector For equivalent regional tools, refer to Special Tools. |
|
2 |
2? Clutch Spring |
|
3 |
2? Clutch Spring Retainer Caution: Regulate the air pressure to 276 kPa (40 psi) maximum. High pressure could cause the piston to over travel and damage the piston seals. Note:
For equivalent regional tools, refer to Special Tools. |
 2-6 Clutch Piston Installation (6T30)
2-6 Clutch Piston Installation
Callout
Component Name
1
2? Clutch Piston Assembly
Note:
Position the ...
 2-6 Clutch Piston Removal
2-6 Clutch Piston Removal
Callout
Component Name
1
2? Clutch Spring Retainer
Special Tool
DT-28585 Snap Ring Remo ...
Other materials:
Ignition Positions
The ignition switch has four different positions.
To shift out of P (Park), the ignition must be in ON/RUN and the regular brake
pedal applied.
1 (STOPPING THE ENGINE/LOCK/ OFF): When the vehicle is stopped, turn the ignition
switch to LOCK/ OFF to turn the engine off.
This position locks t ...
Speaker Replacement Reference
Speaker Replacement Reference
Component
Repair Instruction
Front Door Speaker
Radio Front Side Door Speaker Replacement
Front Tweeter Speaker
Radio Windshield Side Garnish Molding Speaker
...
Low and Reverse and 1-2-3-4 Clutch Housing, Low and Reverse Clutch Assembly,
Output Sun Gear, and 2-6 Clutch Plate Disassemble (Gen 2)
Low and Reverse and 1-2-3-4 Clutch Housing, Low and Reverse Clutch
Assembly, Output Sun Gear, and 2-6 Clutch Plate Disassemble
Callout
Component Name
1
1??? Clutch Backing Plate
2
1??? Clu ...

0.0125