Chevrolet Sonic Repair Manual: 3-5-Reverse and 4-5-6 Clutch Fluid Seal Ring Replacement (Gen 1)
|
Callout |
Component Name |
|---|---|
|
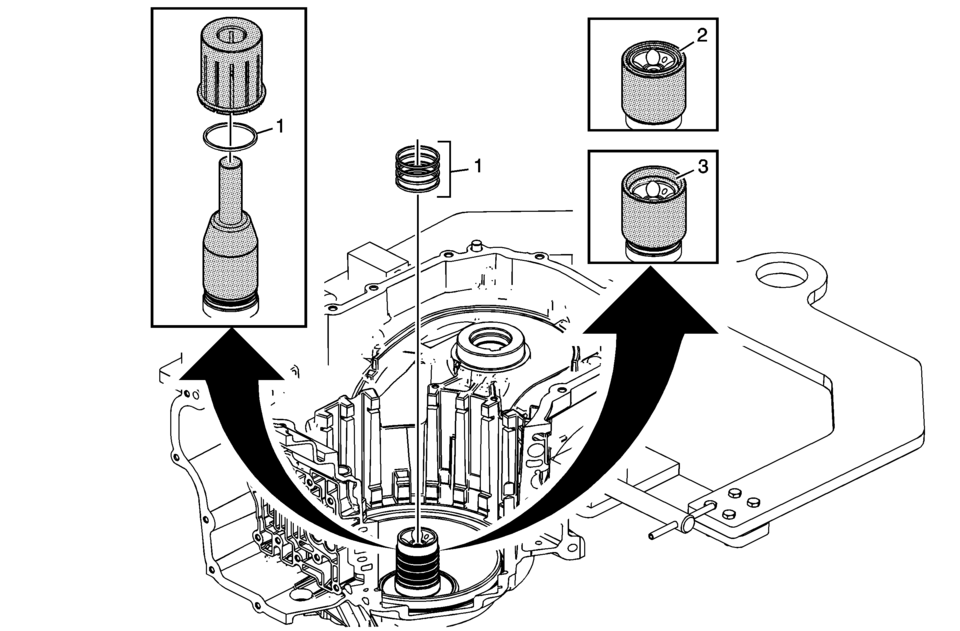
Special Tools
DT-46620 Seal Installer For equivalent regional tools, refer to Special Tools. |
|
|
1 |
3? Reverse and 4?? Clutch Fluid Seals (Qty: 4) Procedure
|
|
2 |
Small Chamfer Up Caution: Do not force the seal installer down over the seals as this will roll and damage the seals. The large chamfer is designed to fit over the over stretched seal. Use a hand to help shrink the seal if the seal installer is difficult to install over the seal rings. Procedure
Install DT-46620-1 which is part of DT-46620 seal installer with the large chamfer end down over the fluid seal rings and leave DT-46620-1 which is part of DT-46620 seal installer on the seals for at least 60 seconds. |
|
3 |
Large Chamfer Up Procedure
|
 2-6 Clutch Piston Removal
2-6 Clutch Piston Removal
Callout
Component Name
1
2? Clutch Spring Retainer
Special Tool
DT-28585 Snap Ring Remo ...
 3-5-Reverse and 4-5-6 Clutch Fluid Seal Ring Replacement (Gen 2)
3-5-Reverse and 4-5-6 Clutch Fluid Seal Ring Replacement
Callout
Component Name
Special Tools
DT-46620 Seal Installer
For e ...
Other materials:
Hood Rear Weatherstrip Replacement
in
Hood Rear Weatherstrip Replacement
Callout
Component Name
1
Hood Rear Weatherstrip
Procedure
The hood rear weatherstrip is held in place with 10?€‰plastic retainers
that are part of the air inlet grille. ...
Rear Seat Cushion Cover and Pad Replacement
Rear Seat Cushion Cover and Pad Replacement
Callout
Component Name
Preliminary Procedure
Remove the rear seat cushion. Refer to Rear Seat Cushion Removal and
Installation
1
Rear Seat Cushion Cov ...
Fastener Tightening Specifications - Wheels
Fastener Tightening Specifications
Application
Specification
Metric
English
Clamp Fit TPM Stem Locknut
7 Y Dynamically
62 lb in
Clamp ...

0.0059