Chevrolet Sonic Repair Manual: Air Conditioning Compressor and Condenser Hose Replacement (LUV)
- Removal Procedure
-
- Recover the refrigerant. Refer to Refrigerant Recovery and Recharging.
- Remove the drivetrain and front suspension frame skid plate if equipped. Refer to Drivetrain and Front Suspension Frame Skid Plate Replacement.
- Remove the front fascia assembly. Refer to Front Bumper Fascia Replacement.
- Disconnect the A/C refrigerant pressure sensor electrical connector.
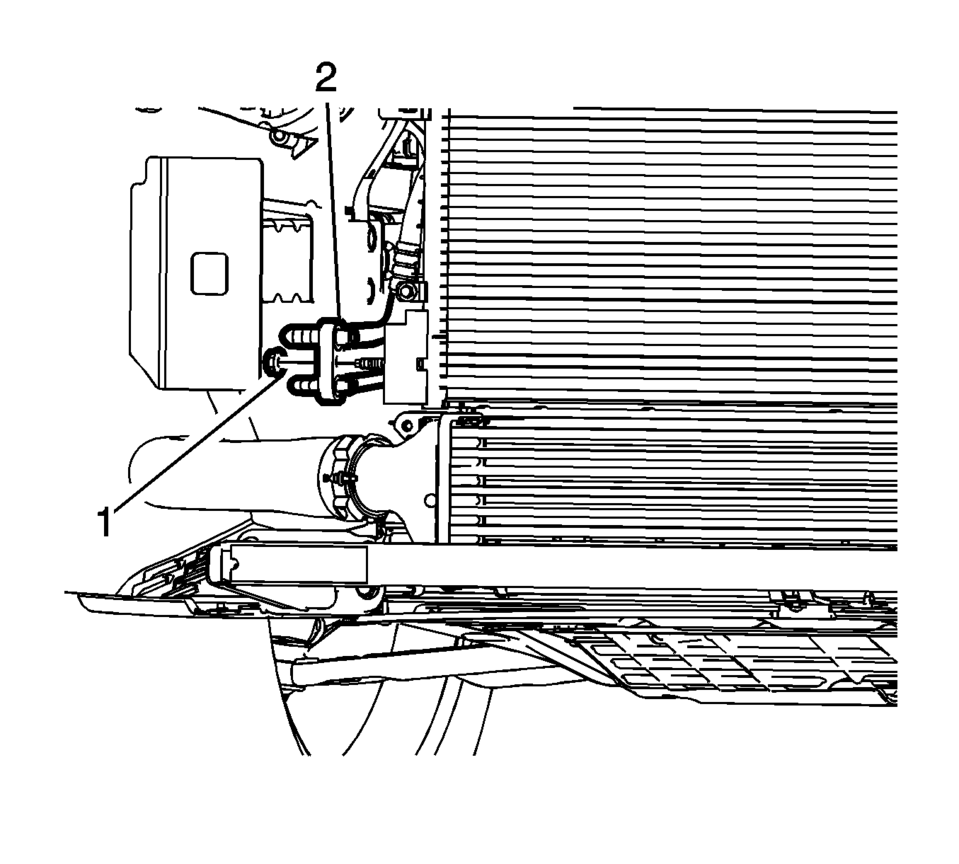
- Remove air conditioning compressor and condenser hose nut (1).
- Remove air conditioning compressor and condenser hose (2) from A/C condenser.
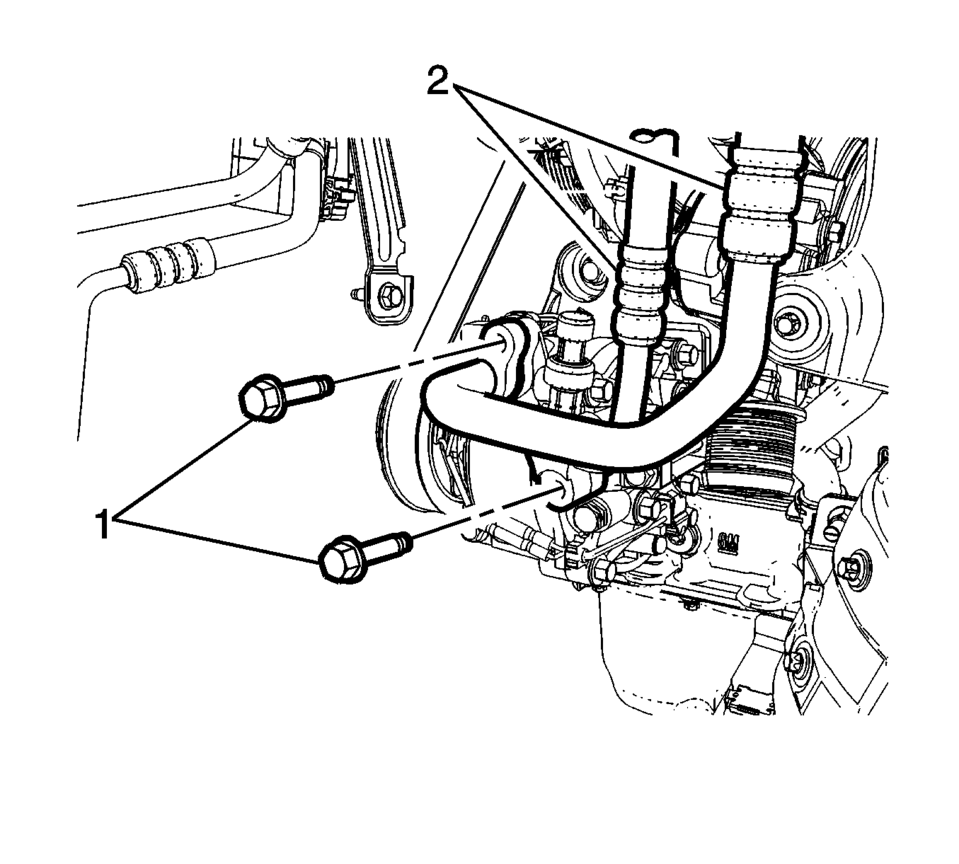
- Remove A/C compressor and condenser hose bolts (1).
- Remove A/C compressor and condenser hose (2) from A/C compressor.
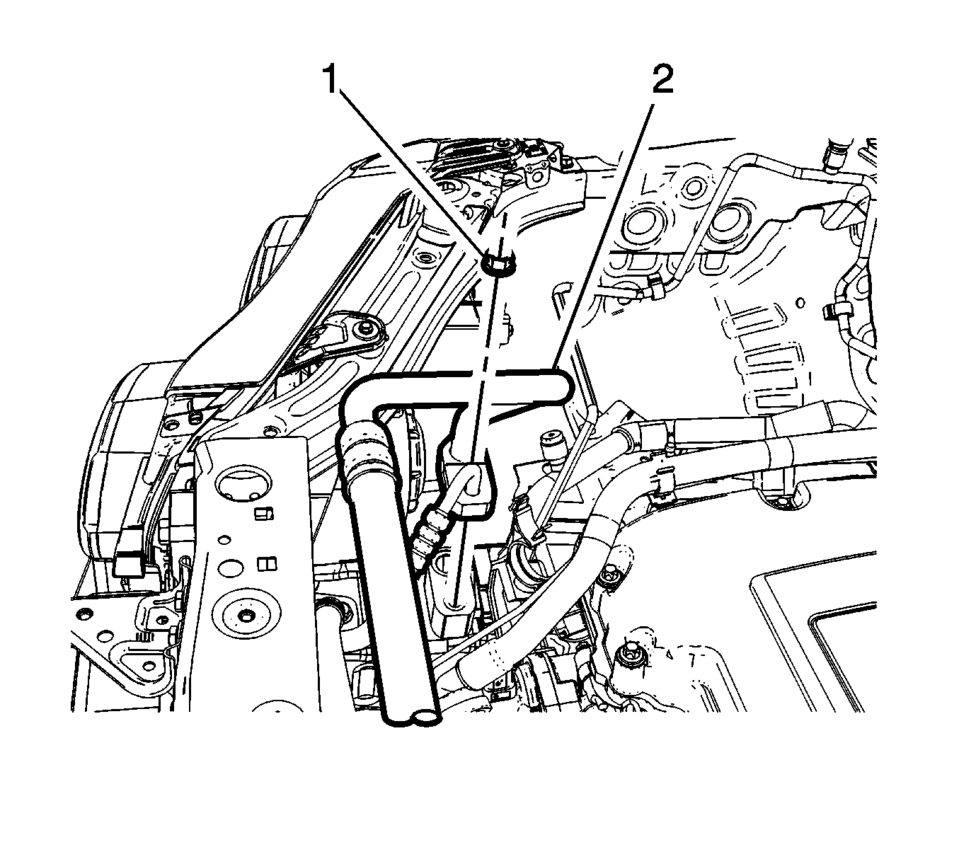
- Remove air conditioning compressor and condenser hose nut (1).
- Remove air conditioning compressor and condenser hose (2) from refrigerant hose.
- Remove air conditioning compressor and condenser hose from the vehicle.
- Discard all the old air conditioning seals.
- Transfer the air conditioning pressure sensor to the new line assembly.
_. i/v
- Installation Procedure
-
- Install NEW air conditioning system seals. Refer to Air Conditioning System Seal Replacement.
- Install air conditioning compressor and condenser hose assembly into the vehicle.
- Install air conditioning compressor and condenser hose (2) to the refrigerant hose.
- Install air conditioning compressor and condenser hose nut (1) and tighten
the nut to 22 Y (16 lb ft)
.
- Install air conditioning compressor and condenser hose (2) to the A/C compressor.
- Install air conditioning compressor and condenser hose bolts (1) and
tighten the bolt to 22 Y (16 lb ft)
.
- Install air conditioning compressor and condenser hose (2) to the A/C condenser.
- Install air conditioning compressor and condenser hose nut (1) and tighten
the nut to 22 Y (16 lb ft)
.
- Connect the A/C refrigerant pressure sensor electrical connector.
- Install the front fascia assembly. Refer to Front Bumper Fascia Replacement.
- Install the drivetrain and front suspension frame skid plate if equipped. Refer to Drivetrain and Front Suspension Frame Skid Plate Replacement.
- Charge the refrigerant system. Refer to Refrigerant Recovery and Recharging.
_. i/v
Caution:
Refer to Fastener Caution.
 Air Conditioning Compressor and Condenser Hose Replacement (LDE/LWE)
Removal Procedure
Recover the refrigerant. Refer to Refrigerant Recovery and Recharging.
Disconnect the A/C refrigerant pressure sensor electrical connector.
Remove air ...
 Air Conditioning Compressor and Condenser Hose Replacement (LUW)
Removal Procedure
Recover the refrigerant. Refer to Refrigerant Recovery and Recharging.
Disconnect the A/C refrigerant pressure sensor electrical connector.
Remove ...
Other materials:
Clearcoat Repair without Repainting
Repair Procedure
Thoroughly wash the repair area with Liquid Wash and Wax GM?€‰P/N?€‰1052870
or the equivalent.
Environmental damage may be corrected. Refer to Environmental Fallout
(Acid Rain) or Rail Dust Damage Repair.
Important: Follow all of the instruc ...
Touch screen display
Basic information
In the Nissan Armada, many vehicle systems and advanced features can be conveniently
controlled through the intuitive touch screen display, providing a modern and user-friendly
interface for drivers.
For a complete overview of touch screen operation in the Nissan Armada, refe ...
Maintenance requirement
Basic information
Routine care and consistent maintenance are essential to keep your Nissan Armada
operating at peak performance, preserving both its mechanical integrity and emission
efficiency.
Regular servicing ensures that the engine, drivetrain, and all critical systems
of your Nissan A ...

0.0046