Chevrolet Sonic Repair Manual: Air Conditioning Compressor and Condenser Hose Replacement (LUV)
- Removal Procedure
-
- Recover the refrigerant. Refer to Refrigerant Recovery and Recharging.
- Remove the drivetrain and front suspension frame skid plate if equipped. Refer to Drivetrain and Front Suspension Frame Skid Plate Replacement.
- Remove the front fascia assembly. Refer to Front Bumper Fascia Replacement.
- Disconnect the A/C refrigerant pressure sensor electrical connector.
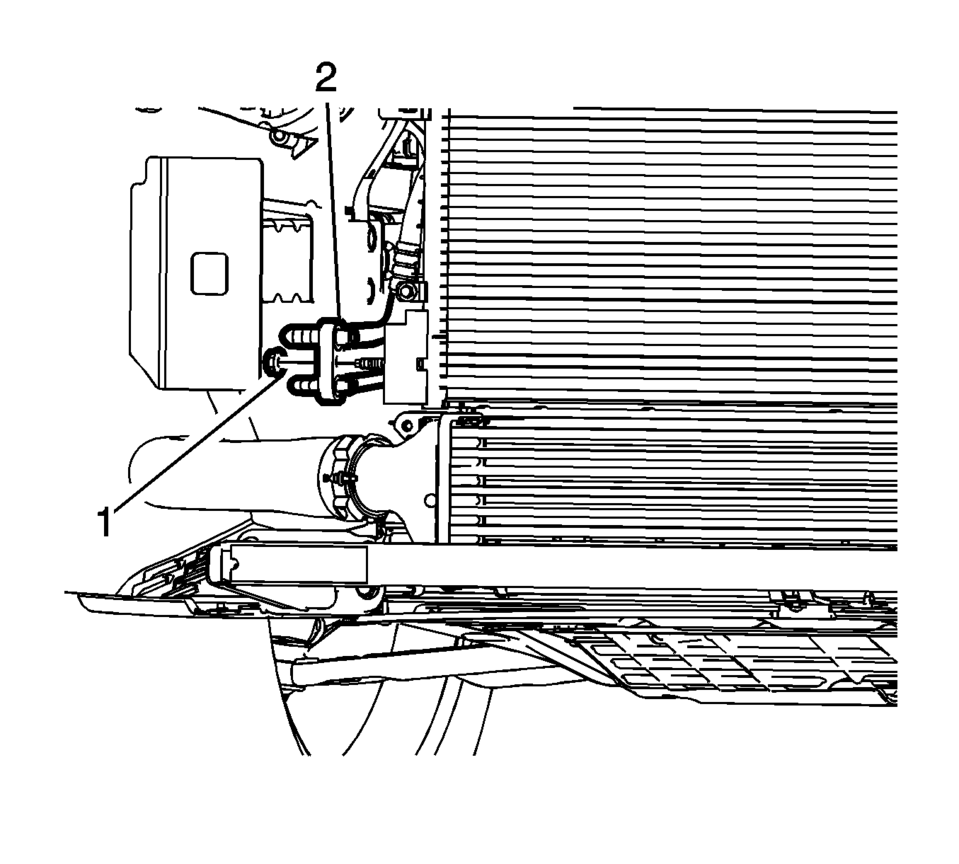
- Remove air conditioning compressor and condenser hose nut (1).
- Remove air conditioning compressor and condenser hose (2) from A/C condenser.
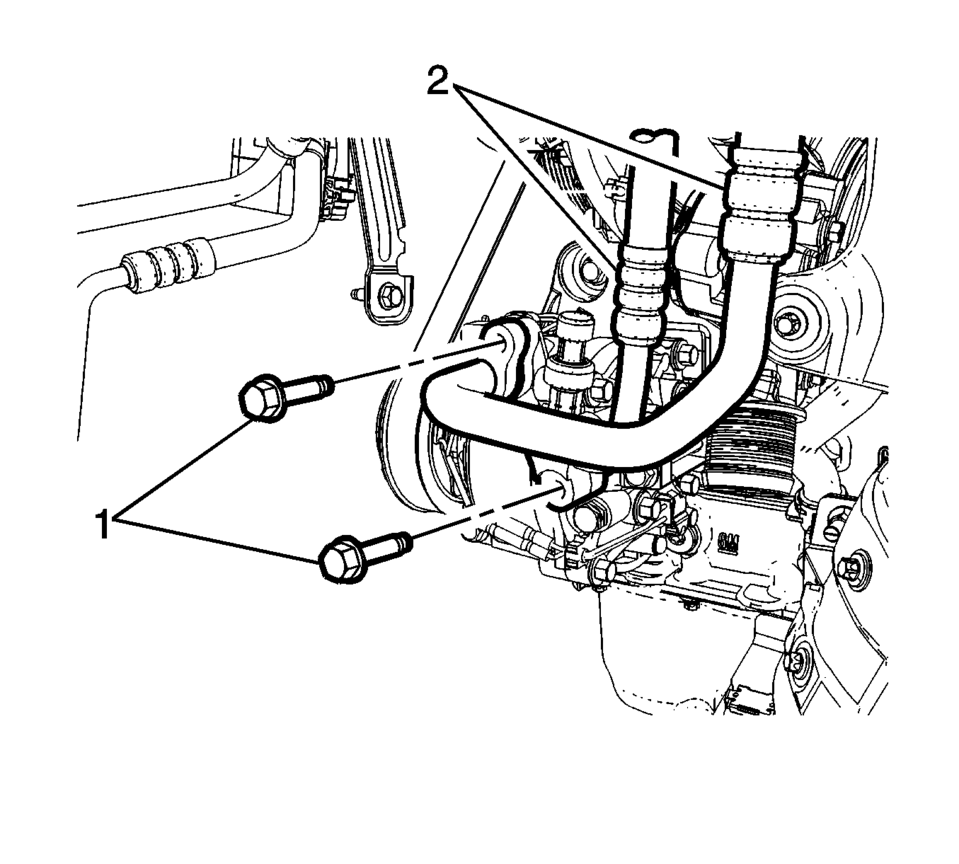
- Remove A/C compressor and condenser hose bolts (1).
- Remove A/C compressor and condenser hose (2) from A/C compressor.
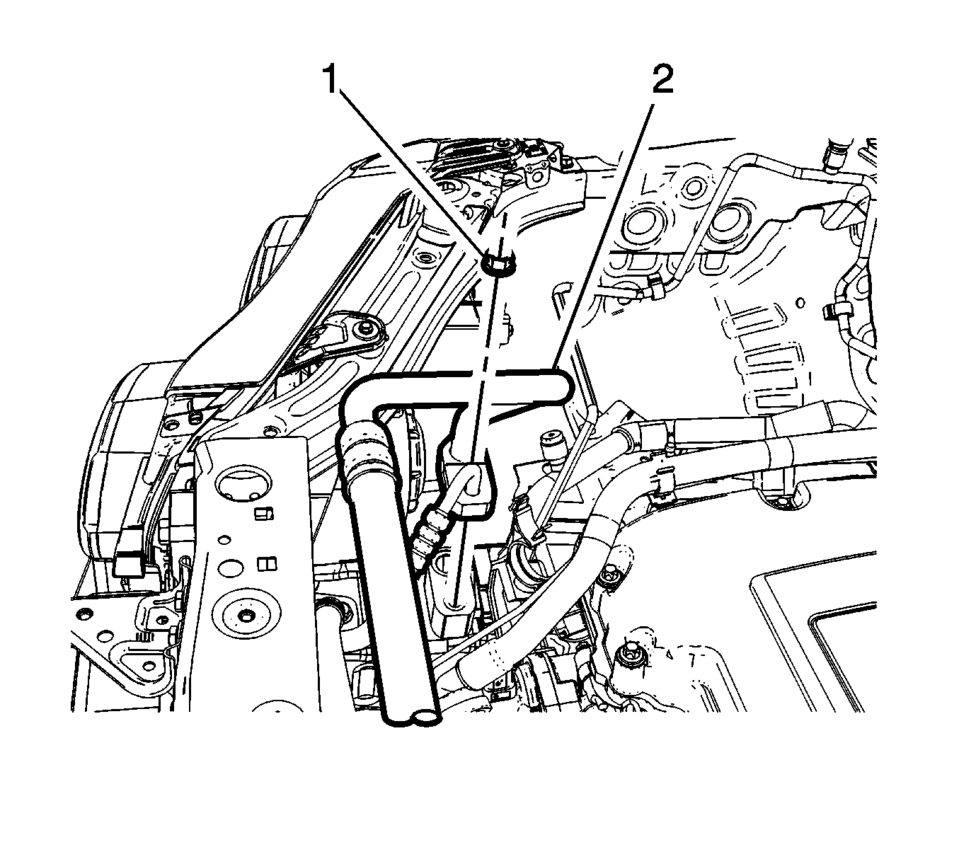
- Remove air conditioning compressor and condenser hose nut (1).
- Remove air conditioning compressor and condenser hose (2) from refrigerant hose.
- Remove air conditioning compressor and condenser hose from the vehicle.
- Discard all the old air conditioning seals.
- Transfer the air conditioning pressure sensor to the new line assembly.
_. i/v
- Installation Procedure
-
- Install NEW air conditioning system seals. Refer to Air Conditioning System Seal Replacement.
- Install air conditioning compressor and condenser hose assembly into the vehicle.
- Install air conditioning compressor and condenser hose (2) to the refrigerant hose.
- Install air conditioning compressor and condenser hose nut (1) and tighten
the nut to 22 Y (16 lb ft)
.
- Install air conditioning compressor and condenser hose (2) to the A/C compressor.
- Install air conditioning compressor and condenser hose bolts (1) and
tighten the bolt to 22 Y (16 lb ft)
.
- Install air conditioning compressor and condenser hose (2) to the A/C condenser.
- Install air conditioning compressor and condenser hose nut (1) and tighten
the nut to 22 Y (16 lb ft)
.
- Connect the A/C refrigerant pressure sensor electrical connector.
- Install the front fascia assembly. Refer to Front Bumper Fascia Replacement.
- Install the drivetrain and front suspension frame skid plate if equipped. Refer to Drivetrain and Front Suspension Frame Skid Plate Replacement.
- Charge the refrigerant system. Refer to Refrigerant Recovery and Recharging.
_. i/v
Caution:
Refer to Fastener Caution.
 Air Conditioning Compressor and Condenser Hose Replacement (LDE/LWE)
Removal Procedure
Recover the refrigerant. Refer to Refrigerant Recovery and Recharging.
Disconnect the A/C refrigerant pressure sensor electrical connector.
Remove air ...
 Air Conditioning Compressor and Condenser Hose Replacement (LUW)
Removal Procedure
Recover the refrigerant. Refer to Refrigerant Recovery and Recharging.
Disconnect the A/C refrigerant pressure sensor electrical connector.
Remove ...
Other materials:
Outside Rearview Mirror Replacement (Manual)
Outside Rearview Mirror Replacement
Callout
Component Name
Preliminary Procedures
Remove the front side door upper front trim panel. Refer to Front
Side Door Upper Front Trim Panel Replacement.
Remove the outside rearview ...
Rear Seat Outboard Seat Back Airbag Replacement
Rear Seat Outboard Seat Back Airbag Replacement
Callout
Component Name
Warning: Following the deployment of a rear seat side air
bag, inspect the following parts for damage. Replace these parts if
necessary:
...
Throttle Body Assembly Replacement
Removal Procedure
Disconnect the throttle body wiring harness connector.
Remove the charge air cooler outlet air hose from
the throttle body. Refer to Charge Air Cooler Outlet
Air Hose Replacement.
Remove the 4 throttle body fasteners (3).
Remo ...

0.0169