Chevrolet Sonic Repair Manual: Air Conditioning O-Ring Seal Replacement
- Removal Procedure
-
- Disassemble the A/C refrigerant components. Refer to the appropriate repair procedure
- Cap or tape the A/C refrigerant components.
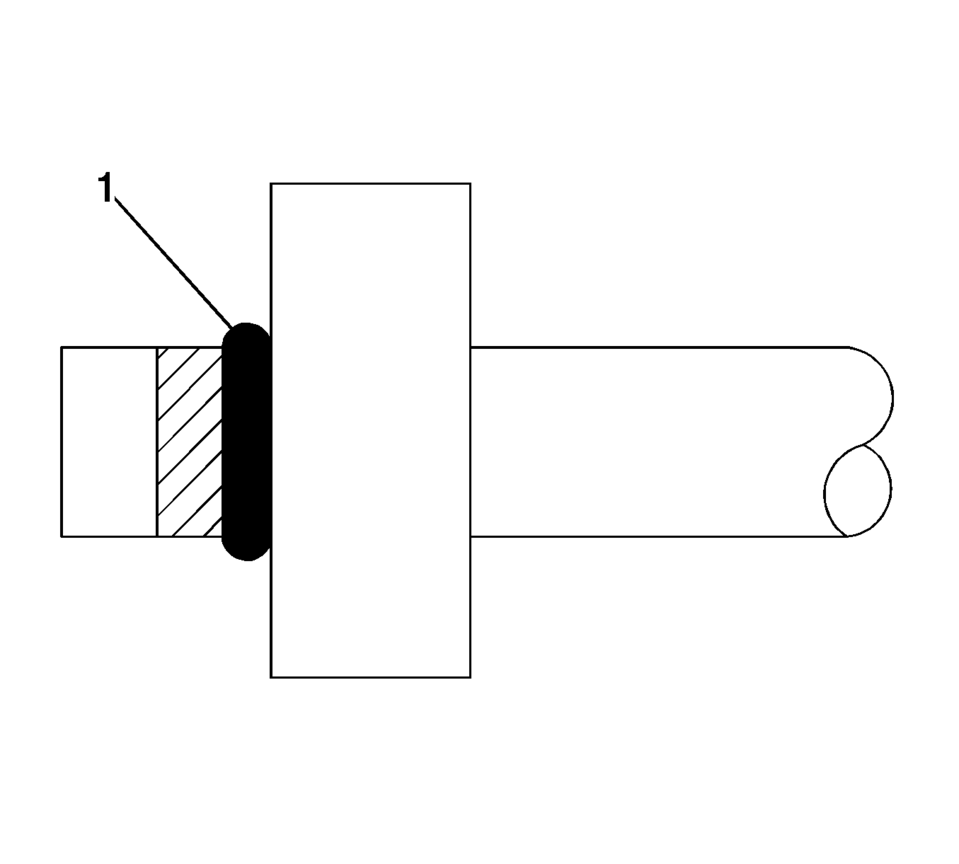
- Remove the O-ring seal (1) from the A/C refrigerant component.
- Inspect the O-ring seal for signs of damage to help determine the root cause of the failure.
- Inspect the A/C refrigerant components for damage or burrs. Repair if necessary.
- DISCARD the O-ring seal.
Note:
Cap or tape the open A/C refrigerant components immediately to prevent system contamination.
- Installation Procedure
-
- Inspect the new O-ring seal for any sign of cracks, cuts, or damage.
- Remove the cap or tape from the A/C refrigerant components.
- Using a lint-free clean, dry cloth, carefully clean the sealing surfaces of the A/C refrigerant components.
- Lightly coat the new O-ring seal with mineral base 525 viscosity refrigerant oil.
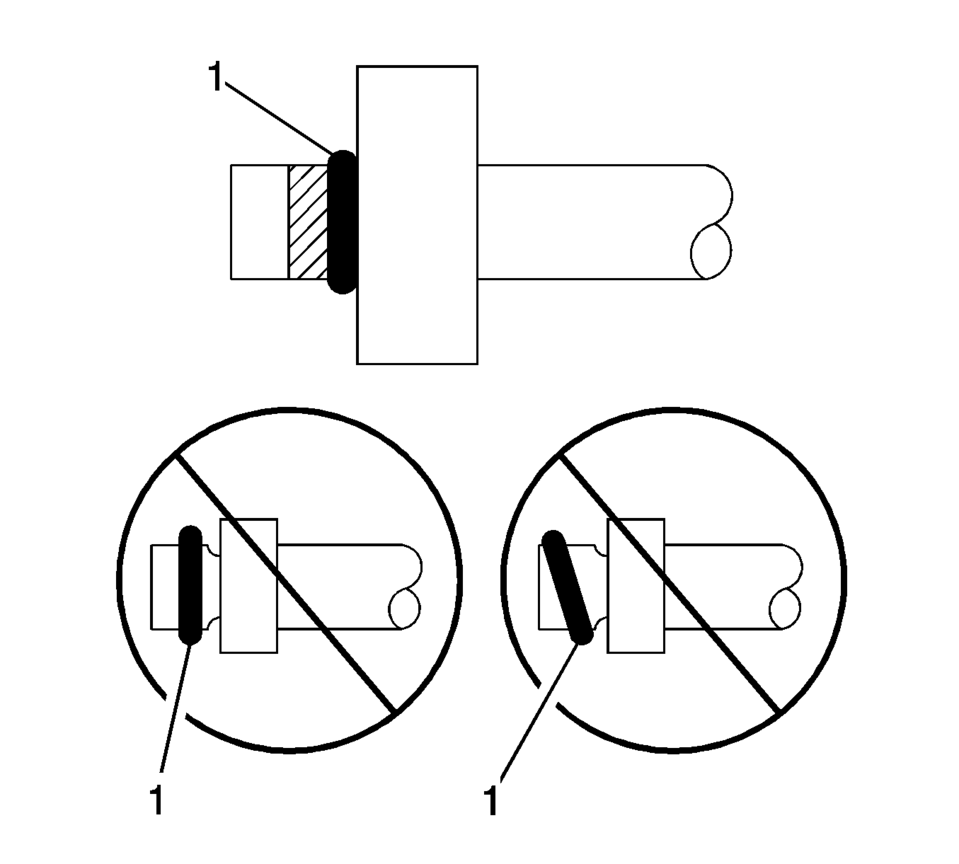
- Carefully slide the NEW O-ring seal (1) onto the A/C refrigerant component.
- The O-ring seal (1) must be fully seated.
- Assemble the A/C components.
Refer to the appropriate repair procedure.
Note:
DO NOT allow any of the mineral base 525 viscosity refrigerant oil on the new O-ring seal to enter the refrigerant system.
Note:
DO NOT reuse O-ring seals.
 Air Conditioning Clutch Assembly Replacement (LUV)
Air Conditioning Clutch Assembly Replacement
Callout
Component Name
Preliminary Procedure
Remove the air conditioning compresso ...
 Air Conditioning Refrigerant Service Valve Core Replacement
Special Tools
GE-39400-A Halogen Leak Detector
GE-46246 Valve Core Removal Tool
For equivalent regional tools, refer to Special Tools.
Removal Procedure
Recover the refrigerant ...
Other materials:
Transmission Assemble (Gen 2)
Special Tools
3-9506289 Universal Adapter
R-0007758 Holding Fixture
S-9407197 Differential Rotating Tool
S-9407198 Differential Bearing Race Wrench
For equivalent regional tools, refer to Special Tools.
Install the clutch and differential housing assembly (1)
onto ...
How to use the HUD
Basic information
To activate the Head Up Display in the Nissan Armada, press the HUD switch. Press
it again to turn the system off.
If the HUD is turned off, it will remain disabled even after restarting the Nissan
Armada, maintaining the last selected setting.
The following HUD settings ...
Basic information
WARNING
Improper use of the Nissan Armada AEB with Pedestrian Detection system may
result in serious injury or even fatal accidents.
The Nissan Armada AEB with Pedestrian Detection system is designed as
a supplemental safety aid and does not replace the driver’s responsibility to
rema ...

0.0088