Chevrolet Sonic Repair Manual: Air Conditioning System Seal Replacement
- Removal Procedure
-
- Disassemble the A/C refrigerant components. Refer to the appropriate repair procedure.
- Cap or tape the A/C refrigerant components.
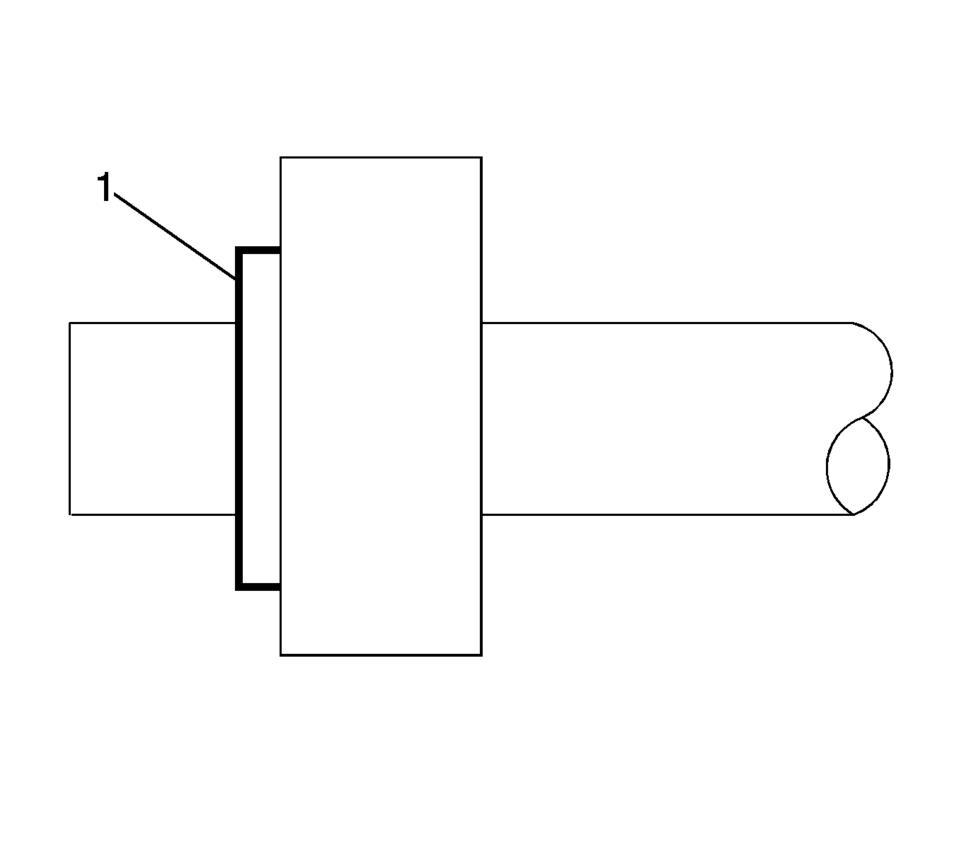
- Remove the sealing washer (1) from the A/C refrigerant component.
- Inspect the seal washer for signs of damage to help determine the root cause of the failure.
- Inspect the A/C refrigerant components for damage or burrs. Repair if necessary.
- DISCARD the sealing washer.
Note:
Cap or tape the open A/C refrigerant components immediately to prevent system contamination.
Note:
DO NOT reuse sealing washer.
- Installation Procedure
-
- Inspect the new sealing washer for any signs of cracks, cuts, or damage.
Do not use a damaged sealing washer.
- Remove the cap or tape from the A/C refrigerant components.
- Using a lint-free clean, dry cloth, clean the sealing surfaces of the A/C refrigerant components.
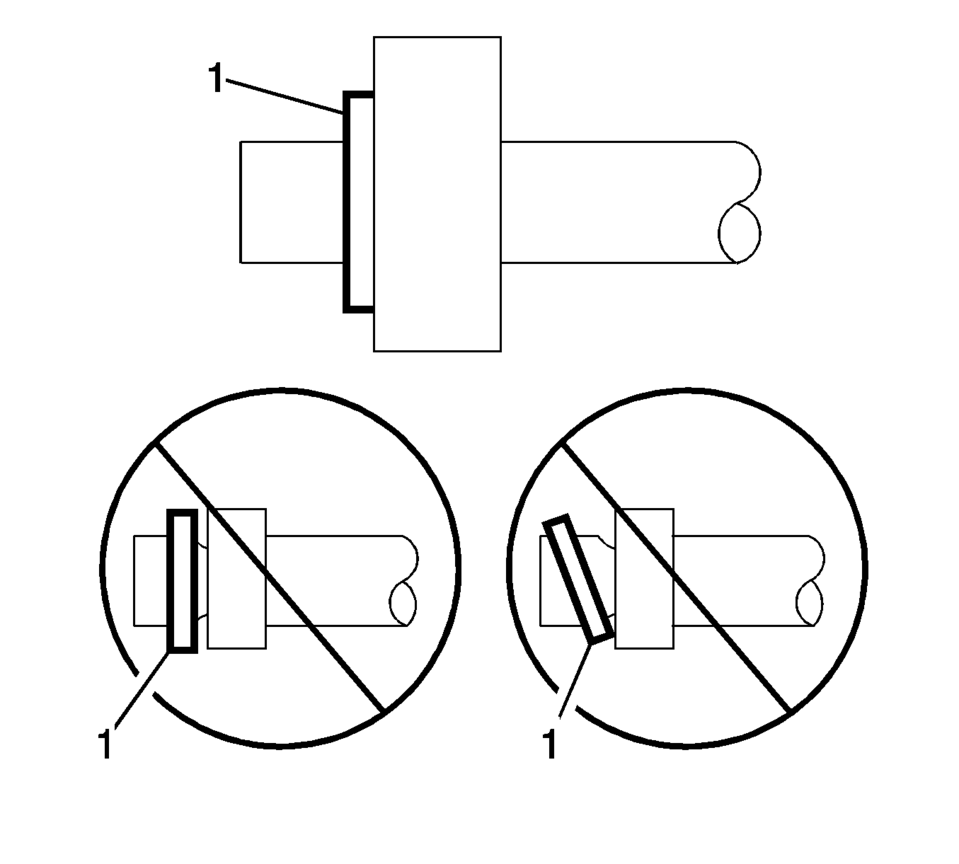
- Carefully install the NEW sealing washer (1) onto the A/C refrigerant
component.
The sealing washer (1) must completely bottom against the surface of the fitting.
- Assemble the remaining A/C refrigerant components. Refer to the appropriate repair procedure.
Note:
Flat washer type seals do not require lubrication.
Note:
After tightening the A/C components, there should be a slight sealing gap of approximately 1.2 mm (3/64 in) between the A/C line and the A/C component.
- Inspect the new sealing washer for any signs of cracks, cuts, or damage.
 Air Conditioning Refrigerant Service Valve Core Replacement
Special Tools
GE-39400-A Halogen Leak Detector
GE-46246 Valve Core Removal Tool
For equivalent regional tools, refer to Special Tools.
Removal Procedure
Recover the refrigerant ...
 Air Inlet Assembly Replacement
Air Inlet Assembly Replacement
Callout
Component Name
Preliminary Procedures
Remove the Heater and Air Conditioning Evaporator and ...
Other materials:
Crankshaft Rear Oil Seal Replacement
Special Tools
EN-658 Rear Main Seal Installer
For equivalent regional tools, refer to Special Tools.
Removal Procedure
If equipped with automatic transmission, remove the flex plate. Refer
to Automatic Transmission Flex Plate Replacement.
If equipped with a manual transmis ...
Front Wheel Drive Shaft Seal Replacement - Right Side
Front Wheel Drive Shaft Seal Replacement - Right Side
Callout
Component Name
Preliminary Procedures
Raise and support the vehicle. Refer to
Lifting and Jacking the Vehicle.
Remove the front wheel drive shaft from the trans ...
Remote engine start
Basic information
Example
The Nissan Armada remote engine start feature is activated using the dedicated
button on the Intelligent Key (if equipped), allowing the engine to be started conveniently
from outside the vehicle.
This advanced Nissan Armada functionality enhances comfort by en ...

0.0083