Chevrolet Sonic Repair Manual: Airbag Sensing and Diagnostic Module Replacement
|
Callout |
Component Name |
|---|---|
|
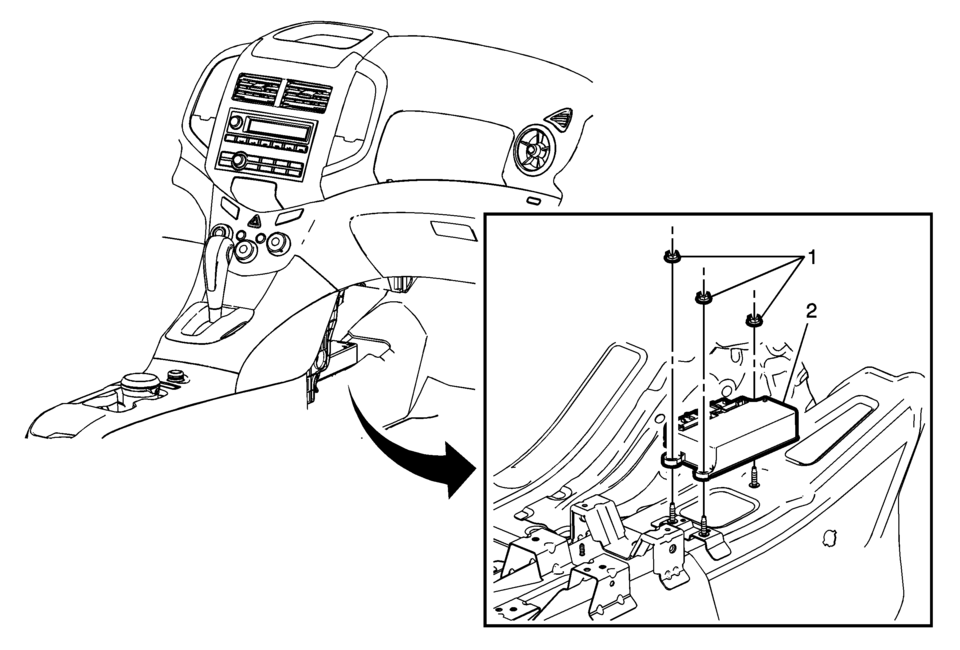
Warning: Refer to SIR Warning. Warning: Do not strike or jolt the inflatable restraint sensing and diagnostic module (SDM). Before applying power to the SDM, make sure that it is securely fastened with the arrow facing toward the front of the vehicle. Failure to observe the correct installation procedure could cause SIR deployment, personal injury, or unnecessary SIR system repairs.
|
|
|
1 |
Inflatable Restraint Sensing and Diagnostic Module Fastener (Qty:?€‰3) Caution: Refer to Fastener Caution.
10?€‰Y (89?€‰lb?€‰in) |
|
2 |
Inflatable Restraint Sensing and Diagnostic Module Assembly Tip:
|
 Airbag Roof Side Rail Module Replacement - Rear
Airbag Roof Side Rail Module Replacement - Rear
Callout
Component Name
Warning: In order to prevent SIR deployment, personal i ...
 Airbag Steering Wheel Module Coil Centering
Note: If a double wire harness strap is installed onto the wire
harness assembly and steering column, the original holder for the wire strap(s)
MUST be reused during installation.
...
Other materials:
Radio without Touchscreen
Connect a 3.5mm (1/8 in) cable to the auxiliary input jack to use a portable
audio player.
Playback of an audio device that is connected to the 3.5mm (1/8 in) jack can
only be controlled using the controls on the device.
Adjusting the Volume
Turn the /VOL knob to adjust the
volume of the i ...
Fastener Tightening Specifications - Wheels
Fastener Tightening Specifications
Application
Specification
Metric
English
Clamp Fit TPM Stem Locknut
7 Y Dynamically
62 lb in
Clamp ...
System operation
The Nissan Armada sonar system provides both visual and audible alerts under
the following conditions:
Detection of front obstacles when the transmission is in D (Drive)
Detection of both front and rear obstacles when the transmission is in R
(Reverse)
How the system alerts of obstacle ...

0.0063