Chevrolet Sonic Repair Manual: Battery Current Sensor Replacement
- Removal Procedure
-
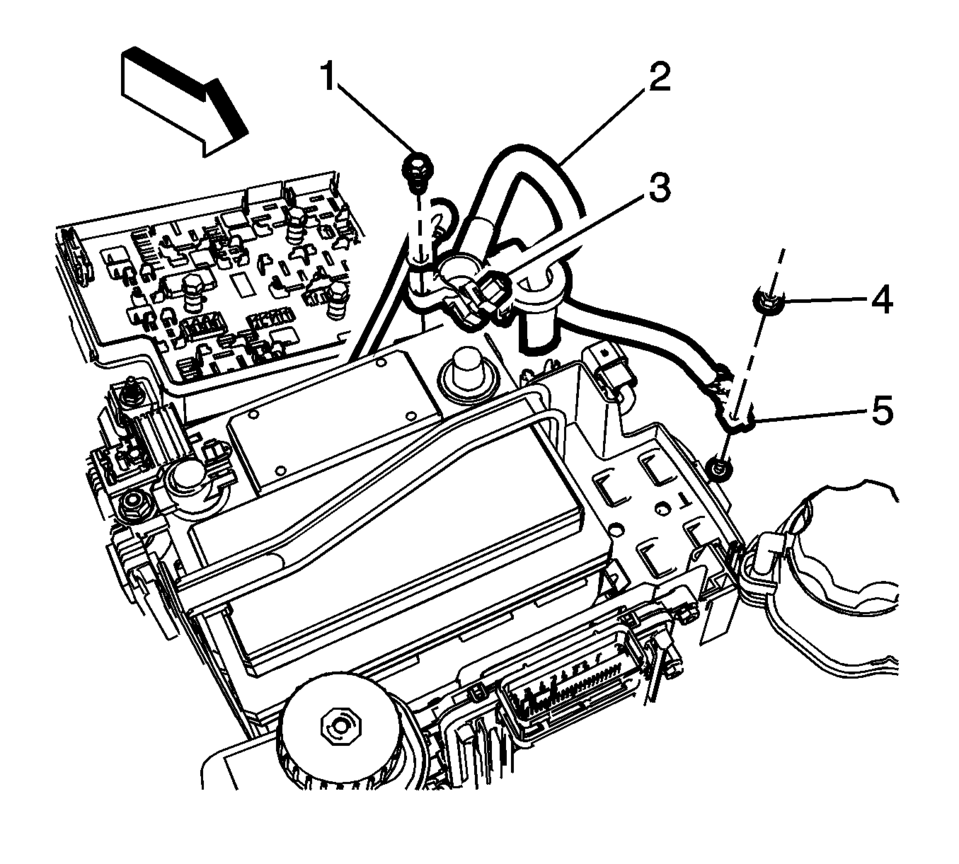
- Disconnect the negative battery cable. Refer to Battery Negative Cable Disconnection and Connection.
- Disconnect the battery current sensor from the body harness connector.
- Unclip the battery current sensor from the battery tray.
- Remove the battery tray. Refer to Battery Tray Replacement.
- Remove the battery negative cable frame ground nut (4) and terminal (5).
- Slide the battery current sensor (2) off the battery negative cable (1).
Note:
Observe the position of the battery current sensor when removing.
- Installation Procedure
-
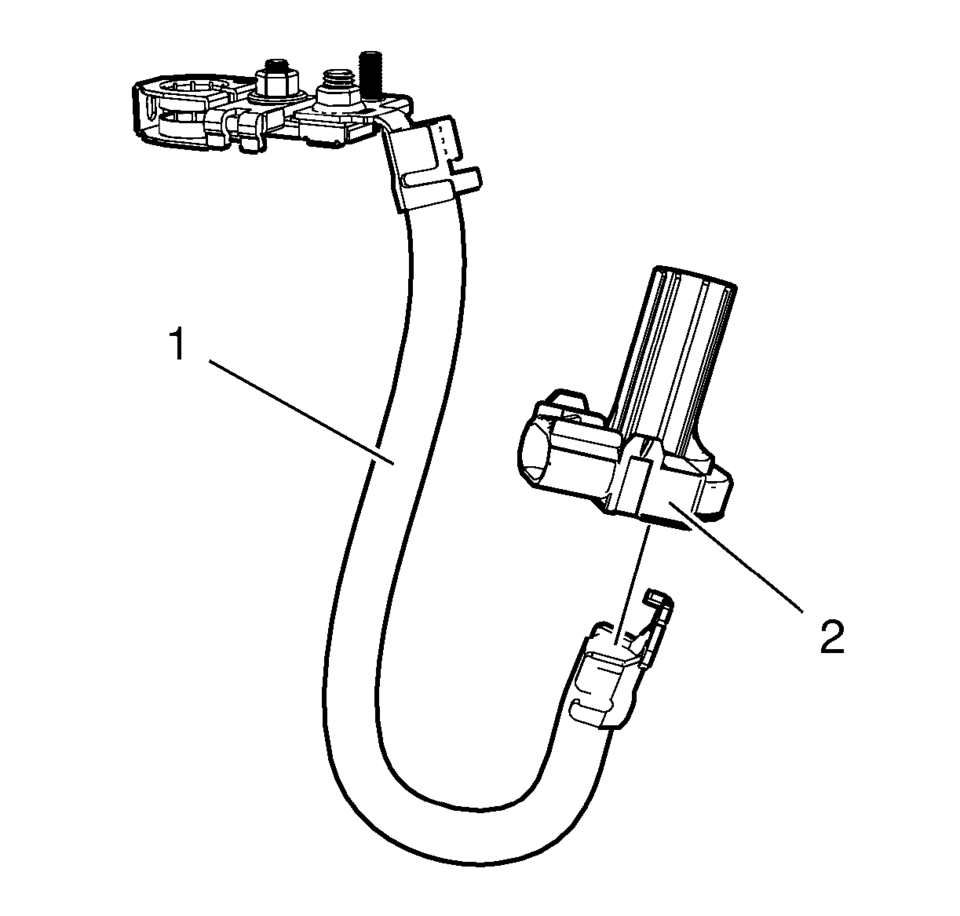
- Install the battery current sensor (2) onto the battery negative cable (1).
- Install the battery negative cable frame ground terminal (5) and bolt (4).
Tighten to 22 Y (16 lb ft)
.
- Install the battery tray. Refer to Battery Tray Replacement.
- Clip the battery current sensor onto the battery tray.
- Connect the battery current sensor to the body harness connector.
- Connect the negative battery cable. Refer to Battery Negative Cable Disconnection and Connection.
Caution:
Refer to Fastener Caution.
 Battery Tray Replacement
Battery Tray Replacement
Callout
Component Name
Preliminary Procedures
Remove the battery. Refer to Battery Replacement.
Uncli ...
 Battery Charging
Special Tools
EL 50313 Battery Tester
For equivalent regional tools, refer to Special Tools.
Diagnostic Aids
For best results, use an automatic taper-rate battery charger with a
...
Other materials:
Radio Replacement (Without US8)
Radio Replacement
Callout
Component Name
Preliminary Procedure
Remove the instrument panel center molding. Refer to
Instrument Panel Center Molding Replacement.
1
Radio Bolts (Qty: 4)
...
Windshield Upper Reveal Molding Replacement
Windshield Upper Reveal Molding Replacement
Callout
Component Name
Preliminary Procedures
Remove the windshield to replace the reveal molding. Refer to Windshield
Replacement.
1
Windshield Revea ...
How to use the automatic brake hold function
Basic information
For optimal use of the Nissan Armada automatic brake hold system, follow the
operational guidelines outlined below to ensure safe and effective performance.
To maintain braking force automatically
When the Nissan Armada automatic brake hold function is active and the white
i ...

0.0055