Chevrolet Sonic Repair Manual: Battery Current Sensor Replacement
- Removal Procedure
-
- Disconnect the negative battery cable. Refer to Battery Negative Cable Disconnection and Connection.
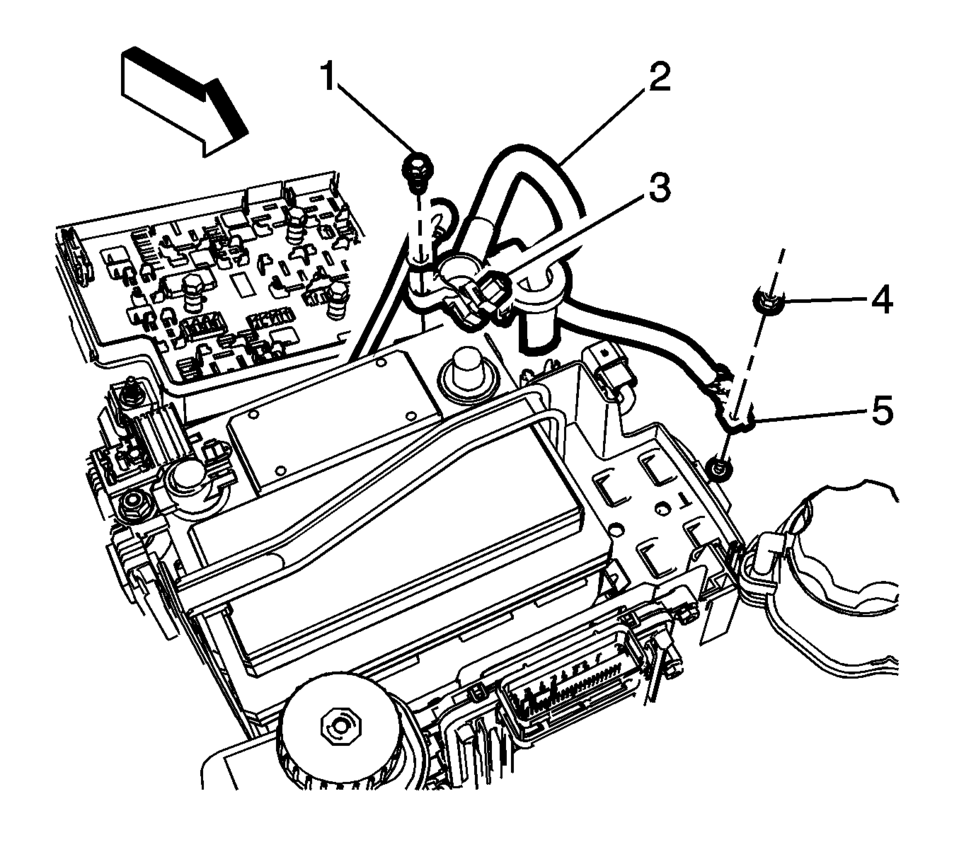
- Disconnect the battery current sensor from the body harness connector.
- Unclip the battery current sensor from the battery tray.
- Remove the battery tray. Refer to Battery Tray Replacement.
- Remove the battery negative cable frame ground nut (4) and terminal (5).
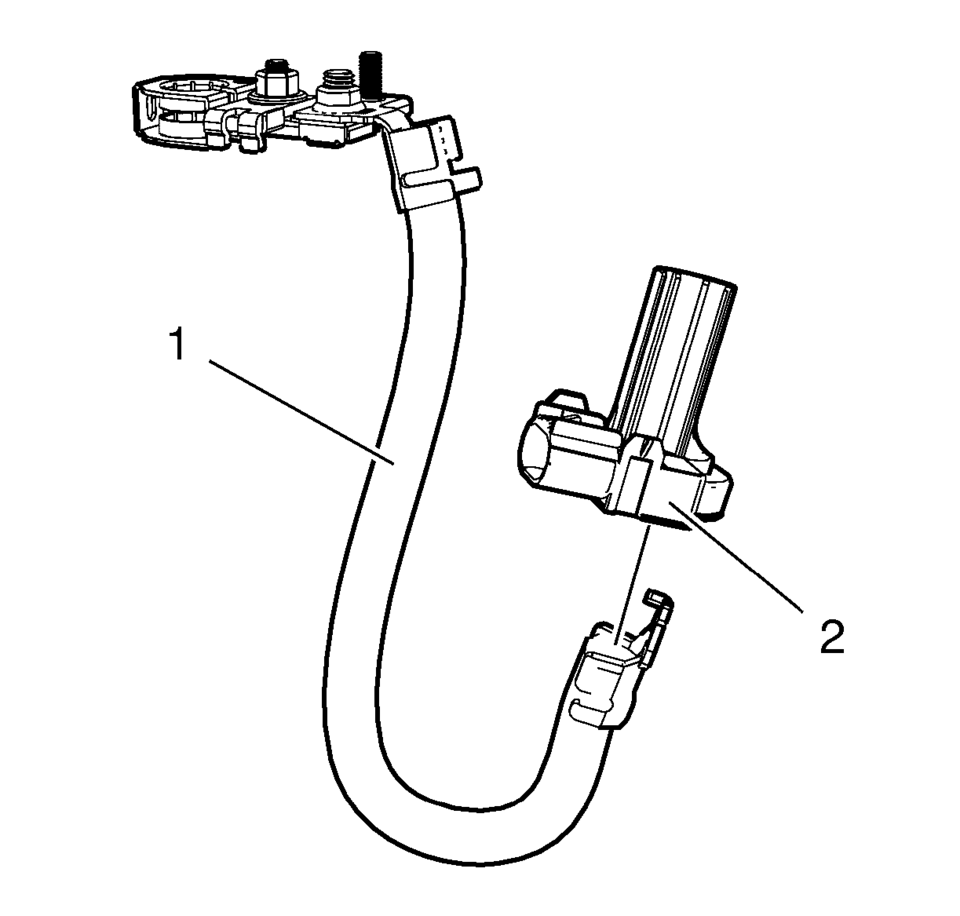
- Slide the battery current sensor (2) off the battery negative cable (1).
Note:
Observe the position of the battery current sensor when removing.
- Installation Procedure
-
- Install the battery current sensor (2) onto the battery negative cable (1).
- Install the battery negative cable frame ground terminal (5) and bolt (4).
Tighten to 22 Y (16 lb ft)
.
- Install the battery tray. Refer to Battery Tray Replacement.
- Clip the battery current sensor onto the battery tray.
- Connect the battery current sensor to the body harness connector.
- Connect the negative battery cable. Refer to Battery Negative Cable Disconnection and Connection.
Caution:
Refer to Fastener Caution.
 Battery Charging
Special Tools
EL 50313 Battery Tester
For equivalent regional tools, refer to Special Tools.
Diagnostic Aids
For best results, use an automatic taper-rate battery charger with a
...
 Battery Description and Operation
Warning: Batteries produce explosive gases, contain corrosive acid,
and supply levels of electrical current high enough to cause burns. Therefore,
to reduce the risk of personal injury when w ...
Other materials:
Tire and Wheel Assembly-to-Hub/Axle Flange Match-Mounting
Note: After remounting a tire and wheel assembly to a hub/axle flange,
remeasure the tire and wheel assembly on-vehicle runout in order to verify that
the amount of runout has been reduced and brought to within tolerances.
Mark the location of the high spot on the tire and wheel asse ...
Intake Manifold Tuning Valve Actuator Replacement
Intake Manifold Tuning Valve Actuator Replacement
Callout
Component Name
Preliminary Procedure
Properly raise and support the vehicle. Refer to Lifting and Jacking
the Vehicle.
1
Intake Manifold ...
Engine Oil and Oil Filter Replacement
Removal Procedure
Open hood.
Place a drain pan below the vehicle.
Caution: To prevent damage to oil filter cap ensure proper
tool is used. Do not use an open end wrench which may cause damage to
filter cap.
Using a 24mm socket or closed end wrench loosen ...

0.0058