Chevrolet Sonic Repair Manual: Battery Replacement
- Removal Procedure
-
- Open the hood.
- Disconnect the negative battery cable. Refer to Battery Negative Cable Disconnection and Connection.
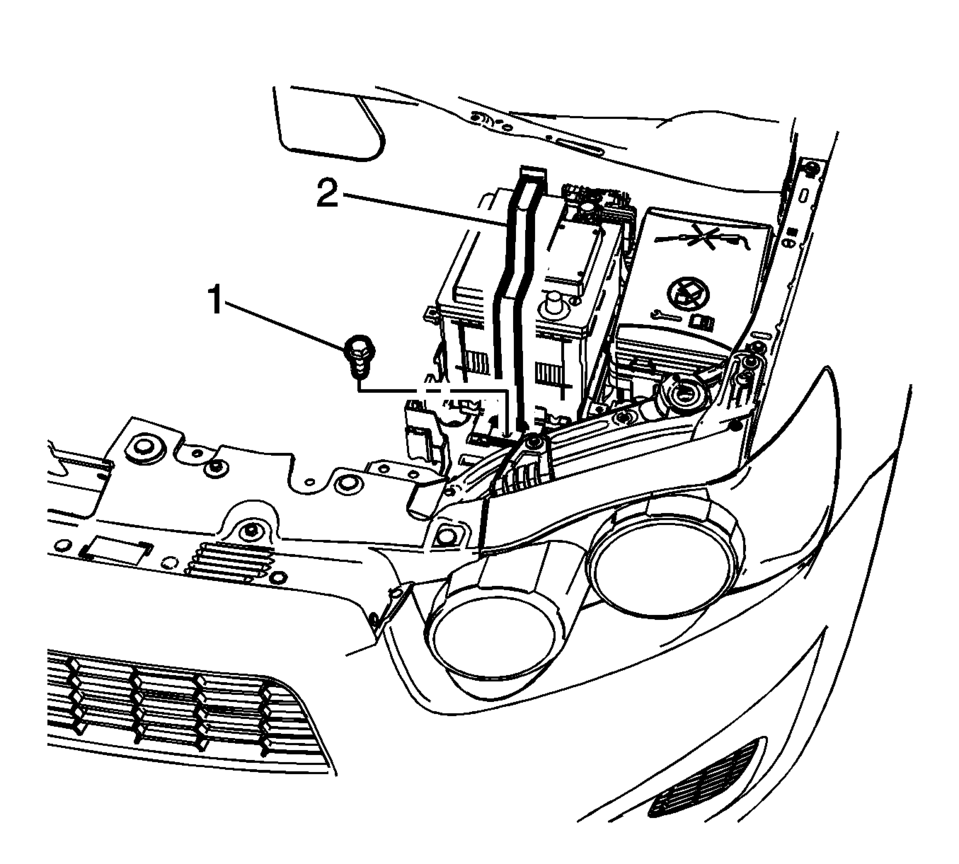
- Remove the battery retainer bolt (1) and the battery retainer (2).
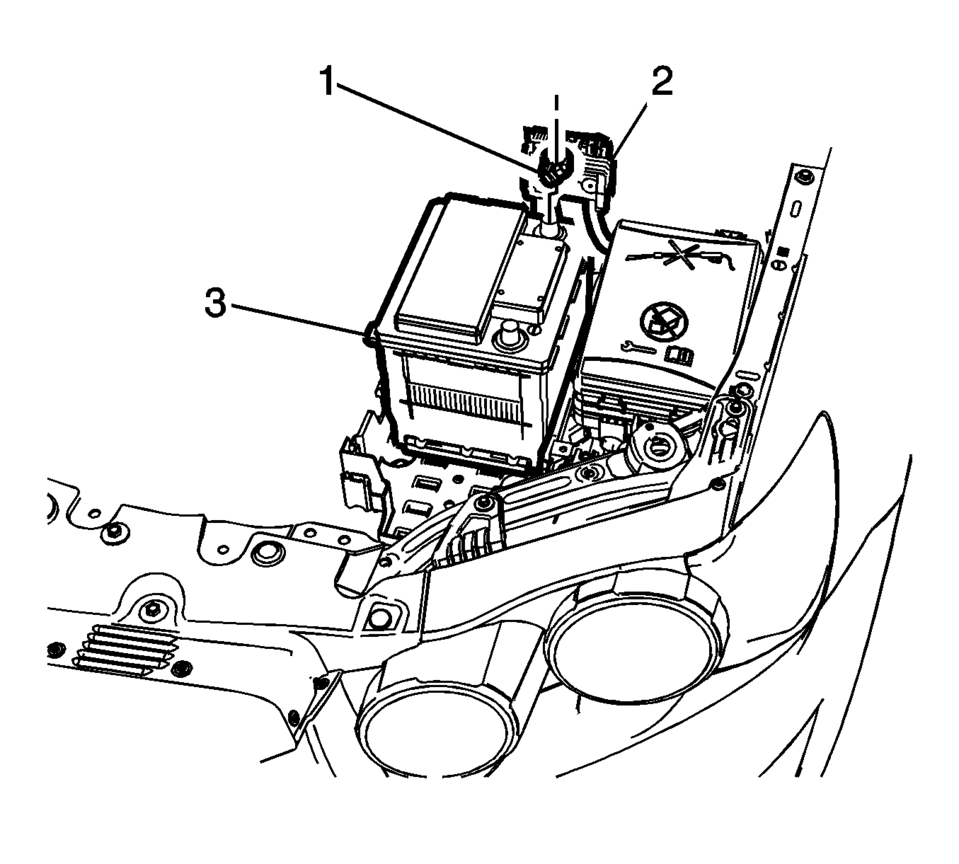
- Loosen the battery positive cable junction bolt (1).
- Remove the battery positive cable with the junction block (2) from the battery.
- Remove the battery (3) from the battery tray floor.
- Installation Procedure
-
- Install the battery (3) to the battery tray floor..
- Install the battery positive cable with junction block (2) to the battery (3).
- Install the battery retainer (2).
- Tighten the battery retainer bolt (1) to 22 Y (16 lb ft)
.
- Connect the negative battery cable. Refer to Battery Negative Cable Disconnection and Connection.
Caution:
Refer to Fastener Caution.
 Battery Positive and Negative Cable Replacement
Removal Procedure
Disconnect the negative battery cable. Refer to Battery Negative Cable
Disconnection and Connection.
Remove the fuse block and battery positive cable cover.
...
 Battery Tray Replacement
Battery Tray Replacement
Callout
Component Name
Preliminary Procedures
Remove the battery. Refer to Battery Replacement.
Uncli ...
Other materials:
Overview (Radio with Touchscreen)
z VOL
y (Volume)
Press to decrease or increase the volume.
O (Power)
Press and hold to turn the power on or off.
D (Home Page)
Press to go to the Home Page. See Home Page.
...
Vehicle Yaw Sensor Learn
The yaw sensor does not require calibration often. Calibration of the yaw rate
sensor might be required after certain service procedures are performed. Some of
these procedures are as follows:
Electronic brake control module (EBCM) replacement
Multi-axis acceleration sensor replacement
...
Tire Rotation
In order to equalize wear, rotate the tires at the specified intervals. Also,
rotate the tire and wheel assembly whenever you notice uneven tire wear.
Radial tires tend to wear faster in the shoulder area, particularly in front
positions, due to design. Radial tires in non-drive locations may ...

0.0064