Chevrolet Sonic Repair Manual: Blower Motor Replacement
- Removal Procedure — Production Blower Motor
-
- Remove the passenger side instrument panel insulator. Refer to Instrument Panel Insulator Replacement.
- Remove the passenger side inflatable restraint instrument panel lower module. Refer to Instrument Panel Lower Airbag Replacement - Passenger Side.
- Remove the right side floor heater duct. Refer to Floor Air Outlet Duct Replacement - Right Side.
- Remove the 3 blower motor cover screws, and remove the blower motor cover.
- Disconnect the blower motor wire harness connector.
- Cut out the blower motor assembly using a utility knife, following the narrow groove around the blower motor assembly in the lower case.
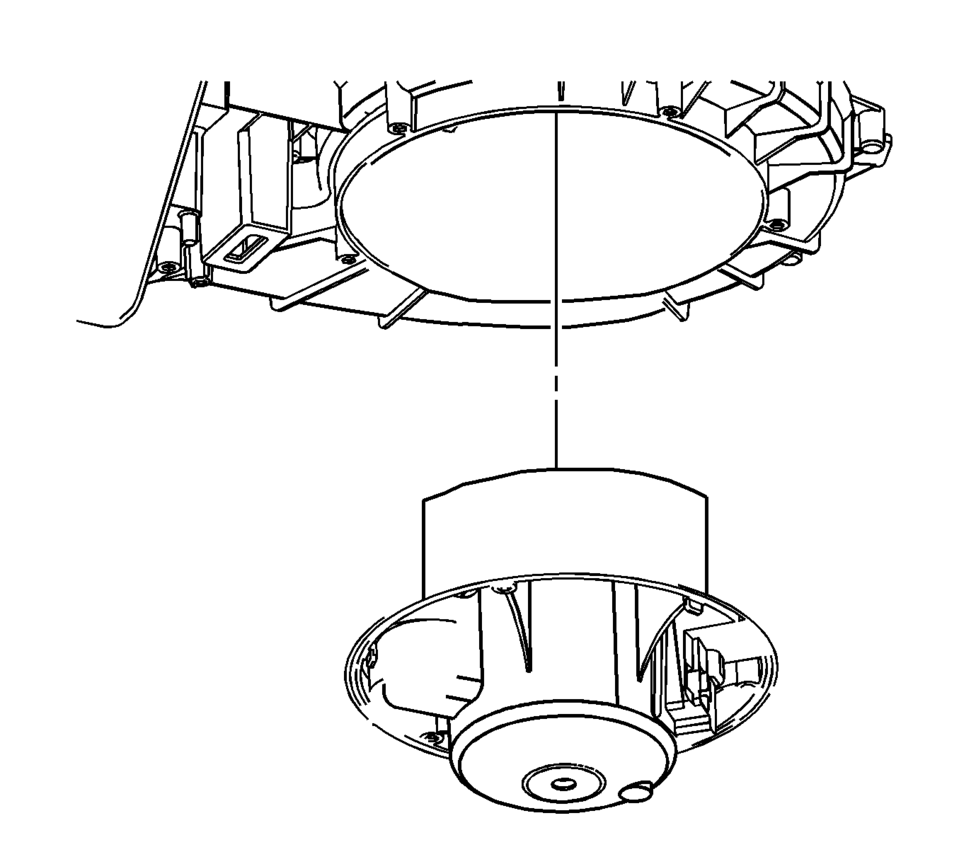
- Remove the blower motor assembly.
Note:
The blower motor is molded into heater and air conditioning evaporator and blower lower module case during the manufacturing process, therefore heater and air conditioning evaporator and blower lower module case must be cut to remove blower motor assembly. Cut through the case as straight as possible because the blower motor cup must be reused. In order to prevent damage to the component, do not cut any deeper than necessary to remove the blower motor cup.
- Removal Procedure - Service Blower Motor
-
- Remove the passenger side instrument panel insulator. Refer to Instrument Panel Insulator Replacement.
- Remove the passenger side inflatable restraint instrument panel lower module. Refer to Instrument Panel Lower Airbag Replacement - Passenger Side.
- Remove the right side floor heater duct. Refer to Floor Air Outlet Duct Replacement - Right Side.
- Remove the blower motor cover (if required).
- Disconnect the blower motor wire harness connector.
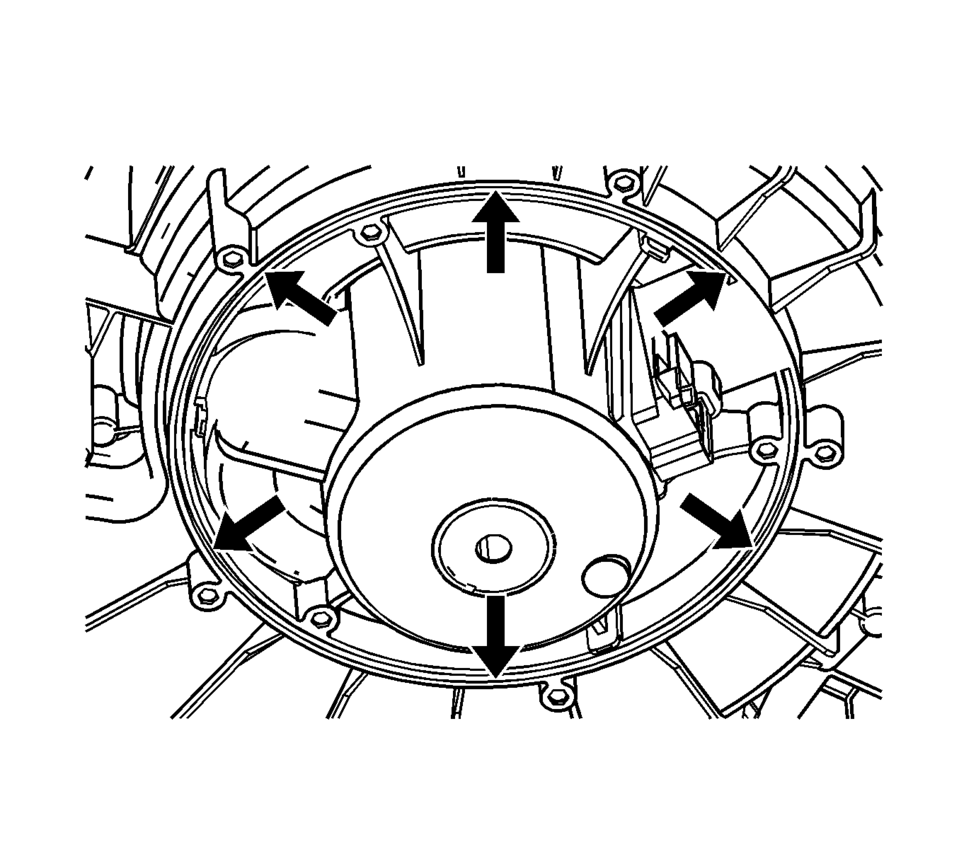
- Remove the 3 outer most screws from blower motor service ring, or blower integrated ring.
- Remove the blower motor assembly.
- Installation Procedure
-
- Clean and smooth the rough edges, and remove any burs of plastic from heater and air conditioning evaporator and blower lower module case, where the original blower motor assembly was cut out of the heater and air conditioning evaporator and blower lower module case.
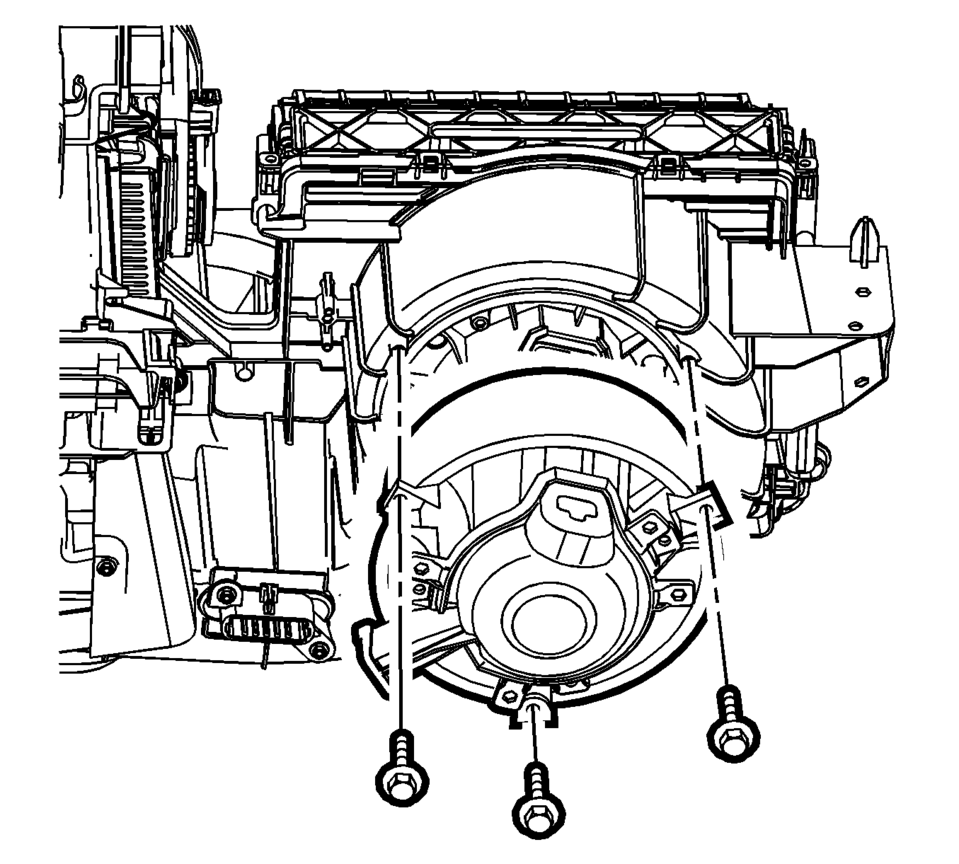
- Attach the blower motor service ring to the blower motor assembly using the service screws.
- When using the original blower motor assembly that has been cut out of the lower case, install the blower motor assembly with the service ring assembly to the heater and air conditioning evaporator and blower module lower case, with the additional service screws, and tighten the screws.
- When using the service blower motor kit, install the service blower motor assembly to the heater and air conditioning evaporator and blower lower module case, with additional service screws, and tighten the screws.
- Install the blower motor cover.
- Connect the blower motor wire harness connector.
- Install the right side floor heater duct. Refer to Floor Air Outlet Duct Replacement - Right Side.
- Install the passenger side inflatable restraint instrument panel lower module. Refer to Instrument Panel Lower Airbag Replacement - Passenger Side.
- Install the passenger side instrument panel insulator. Refer to Instrument Panel Insulator Replacement.
Caution:
Refer to Fastener Caution.
 Air Inlet Valve Actuator Replacement (LHD)
Air Inlet Valve Actuator Replacement
Callout
Component Name
Preliminary Procedures
Remove the instrument panel compartment. Refer t ...
 Blower Motor Resistor Replacement
Blower Motor Resistor Replacement
Callout
Component Name
Preliminary Procedure
Remove the instrument panel insulator, if equipp ...
Other materials:
Driver or Passenger Seat Back Cushion Frame Replacement
Driver or Passenger Seat Back Cushion Frame Replacement
Callout
Component Name
Preliminary Procedures
Remove the driver or passenger seat. Refer to Driver or Passenger
Seat Removal and Installation
Remove the front seat c ...
Wheel Stud Replacement
Special Tools
CH 43631 Ball Joint Separator
For equivalent regional tools, refer to Special Tools.
Removal Procedure
Raise and support the vehicle. Refer to Lifting and Jacking the Vehicle.
Remove the tire and wheel assembly. Refer to Tire and Wheel Removal
and In ...
Air Conditioning Compressor Replacement (LUV)
Air Conditioning Compressor Replacement
Callout
Component Name
Preliminary Procedure
Recover the refrigerant. Refer to Refrigerant Recovery and Recharging.
Raise and support the vehicle. Refer to Lifting and Jacking the
...

0.0069