
Chevrolet Sonic Repair Manual: Camshaft Position Actuator Adjuster Installation
Special Tools
- EN-6340 Camshaft Adjuster Locking Tool
- EN-6628-A Camshaft Locking Tool
- EN-45059 Angle Meter
For equivalent regional tools, refer to Special Tools.
- Turn the camshaft by the hexagon until the groove on the end of the camshafts is horizontal.
- Install the EN-6628-A locking tool (1).
- Install intake camshaft position actuator adjuster and/or the exhaust camshaft position actuator adjuster (3).
- Install a NEW intake camshaft position actuator adjuster bolt and/or a NEW exhaust camshaft position actuator adjuster bolt (2). DO NOT tighten the bolts yet.
- Install the EN-6340 locking tool into the camshaft position actuator adjusters.
- Install the EN-6340-left locking tool (1) in the camshaft position actuator adjusters as shown.
- Install the EN-6340-right locking tool (2) in the camshaft position actuator adjusters as shown.
- Install the camshaft position actuator adjuster bolts (2) and tighten the bolts in 3 passes using the EN-45059 meter.
- First pass to 50 Y (37 lb ft)
- Second pass to an additional 150 degrees
- Final pass to an additional 15 degrees
- Install the 2 camshaft position actuator adjuster closure plugs (1) and
tighten to 30 Y (22 lb ft)
.
- Remove the EN-6628-A locking tool.
- After the installation of the timing belt, rotate the engine 720 degrees and check the position of the crankshaft and camshafts, again. Refer to Timing Belt Adjustment.
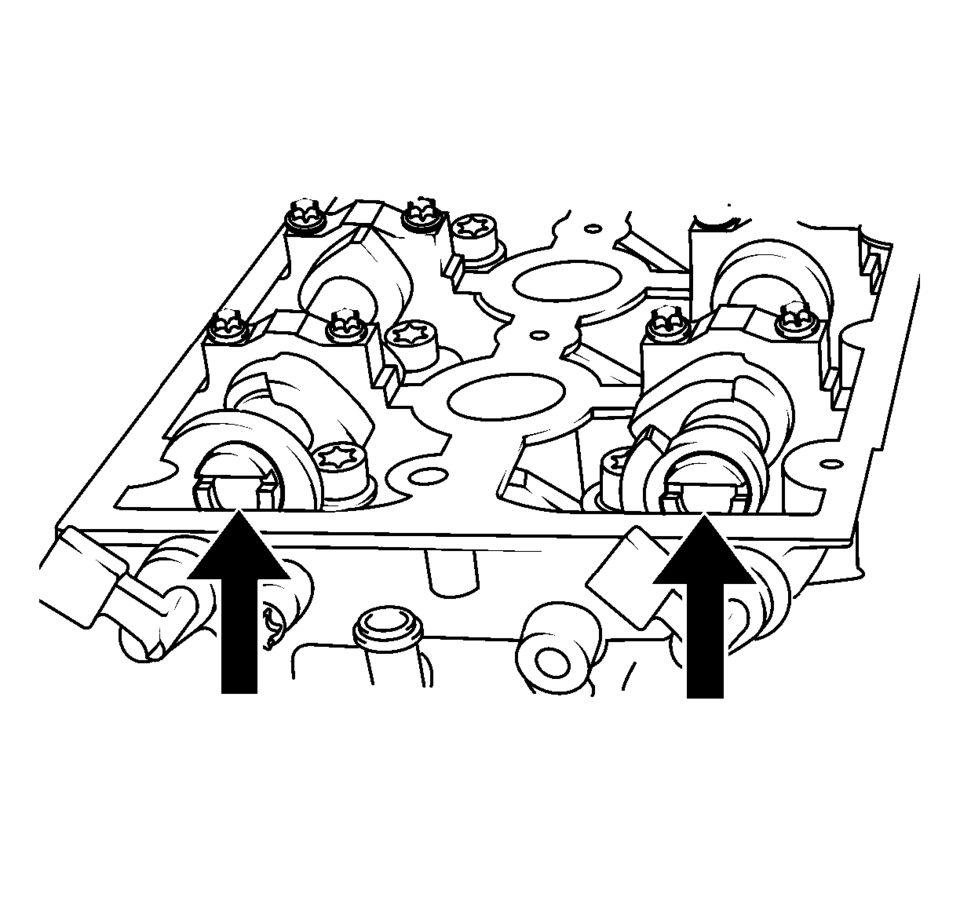
Note:
Note the arrows.
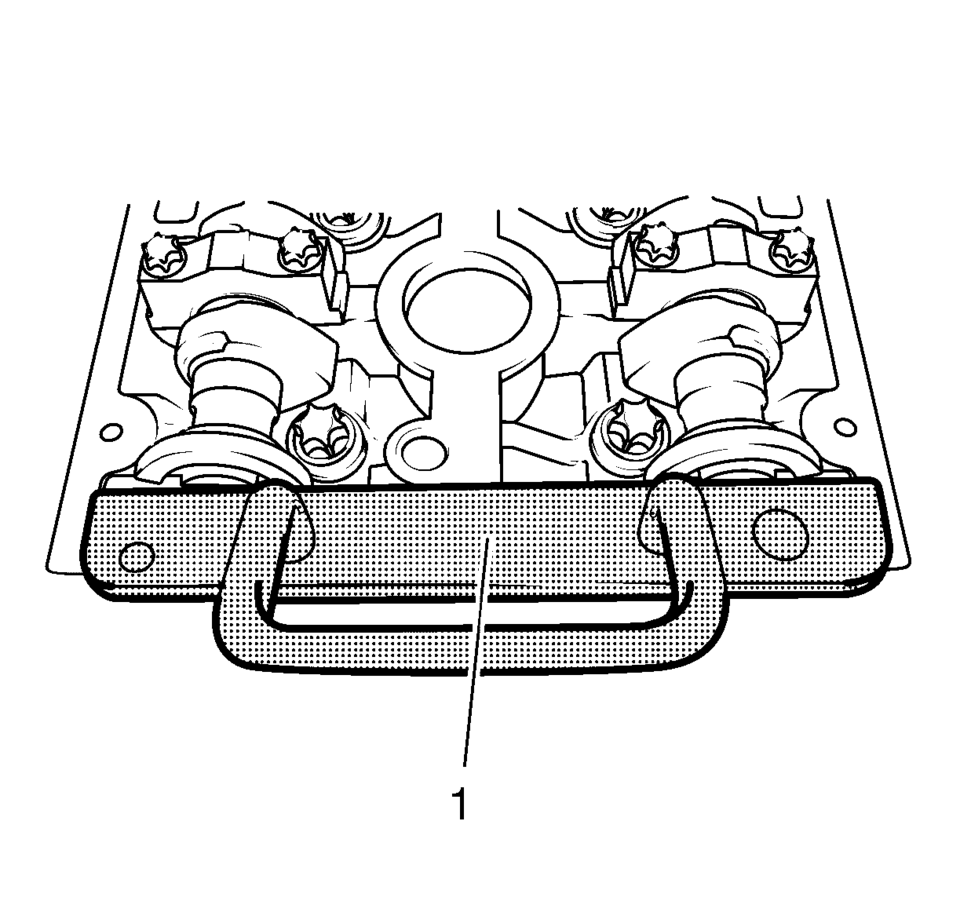
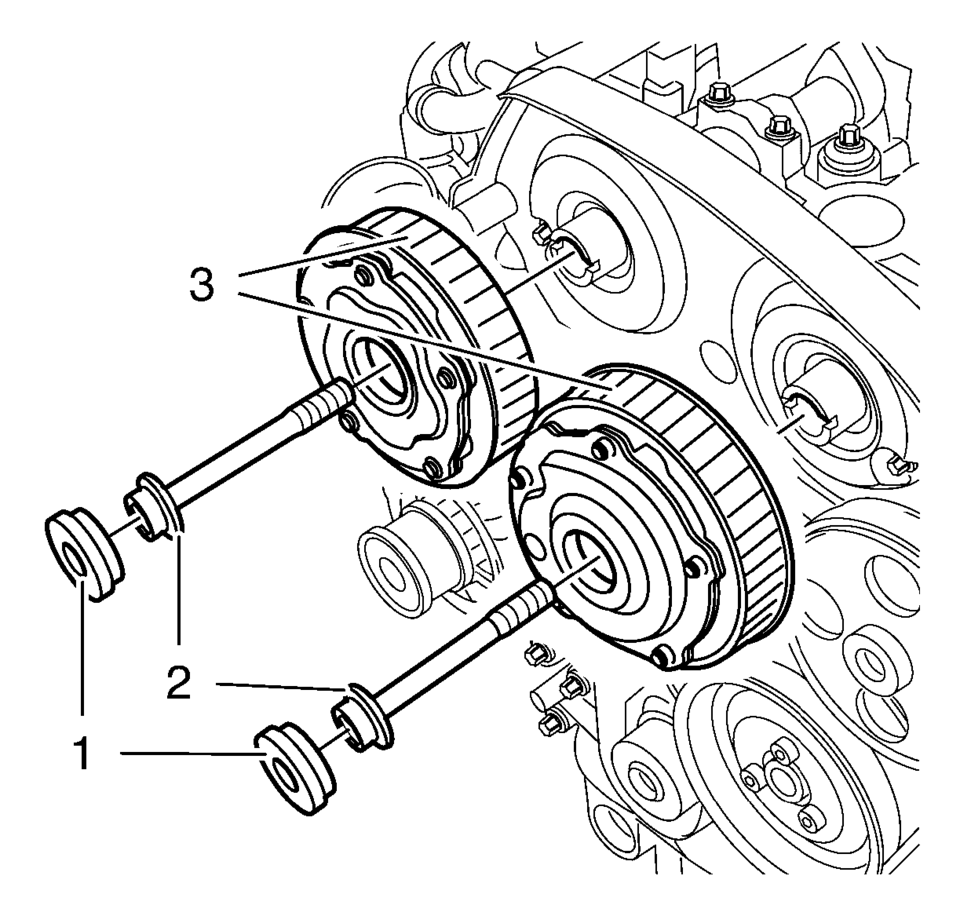
Note:
If the cover is contaminated with oil, you have to clean it close.
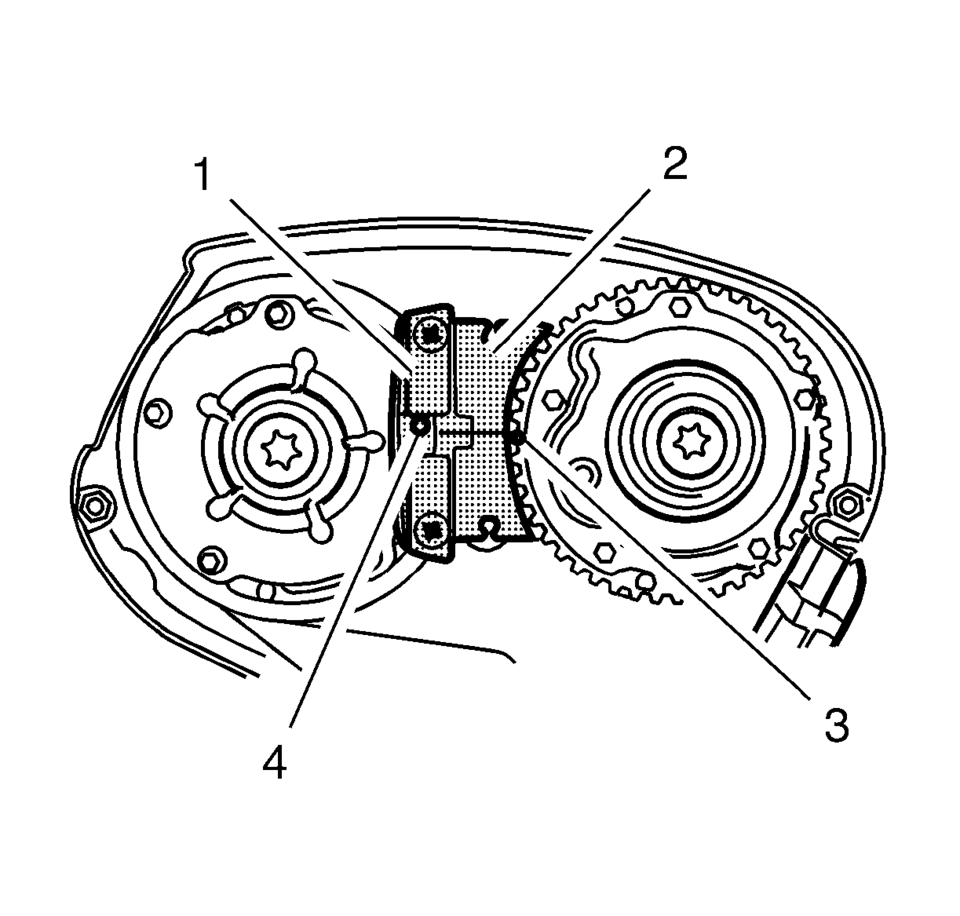
Note:
The spot type marking (4) on the intake camshaft position actuator adjuster does not correspond to the groove of EN-6340-left locking tool - left during this process but must be somewhat above as shown.
Note:
The spot type marking (3) on the exhaust camshaft position actuator adjuster must correspond to the groove on EN-6340-left locking tool - right.
Caution:
Refer to Fastener Caution.
Caution:
Refer to Torque-to-Yield Fastener Caution.
Note:
A second technician is required.
Note:
Use an appropriate open-end wrench in order to counterhold the camshaft hexagon. A thin cross-section wrench is required for a better fit. The usage of EN-6628-A locking tool is for the camshaft adjustment to prevent misalignment of the camshafts. The wrench is required to counterhold the camshafts during bolt torque procedure.
Note:
Check the closure bolt seal ring.
 Camshaft Intake and Exhaust Sprocket Replacement
Special Tools
EN-955-A Locking Pin
For equivalent regional tools, refer to Special Tools.
Removal Procedure
Remove the air cleaner assembly. Refer to Air Cleaner Assembly Replacemen ...
 Camshaft Position Actuator Adjuster Removal
Special Tools
EN-6340 Camshaft Adjuster Locking Tool
EN-6628-A Camshaft Locking Tool
For equivalent regional tools, refer to Special Tools.
Note: The right half of the EN-6340 ...
Other materials:
Off-Road Recovery
The vehicle's right wheels can drop off the edge of a road onto the shoulder
while driving. Follow these tips:
1. Ease off the accelerator and then, if there is nothing in the way, steer the
vehicle so that it straddles the edge of the pavement.
2. Turn the steering wheel about one-eight ...
Rear Wheelhouse Liner Replacement (Hatchback - Right)
Rear Wheelhouse Liner Replacement
Callout
Component Name
Preliminary Procedure
Remove the tire and wheel assembly. Refer to Tire and Wheel Removal and
Installation.
1
Rear Wheelhouse Panel Liner ...
Roof Rail Rear Assist Handle Replacement
Roof Rail Rear Assist Handle Replacement
Callout
Component Name
1
Roof Rail Rear Assist Handle Fastener (Qty:?€‰2)
Caution: Refer to Fastener Caution.
Procedure
Fold the assist handle downward an ...

0.0057