Chevrolet Sonic Repair Manual: Catalytic Converter Replacement (LUV)
- Removal Procedure
-
Warning:
Refer to Exhaust Service Warning.
Warning:
Refer to Protective Goggles and Glove Warning.
- Remove the exhaust manifold heat shield. Refer to Exhaust Manifold Heat Shield Replacement.
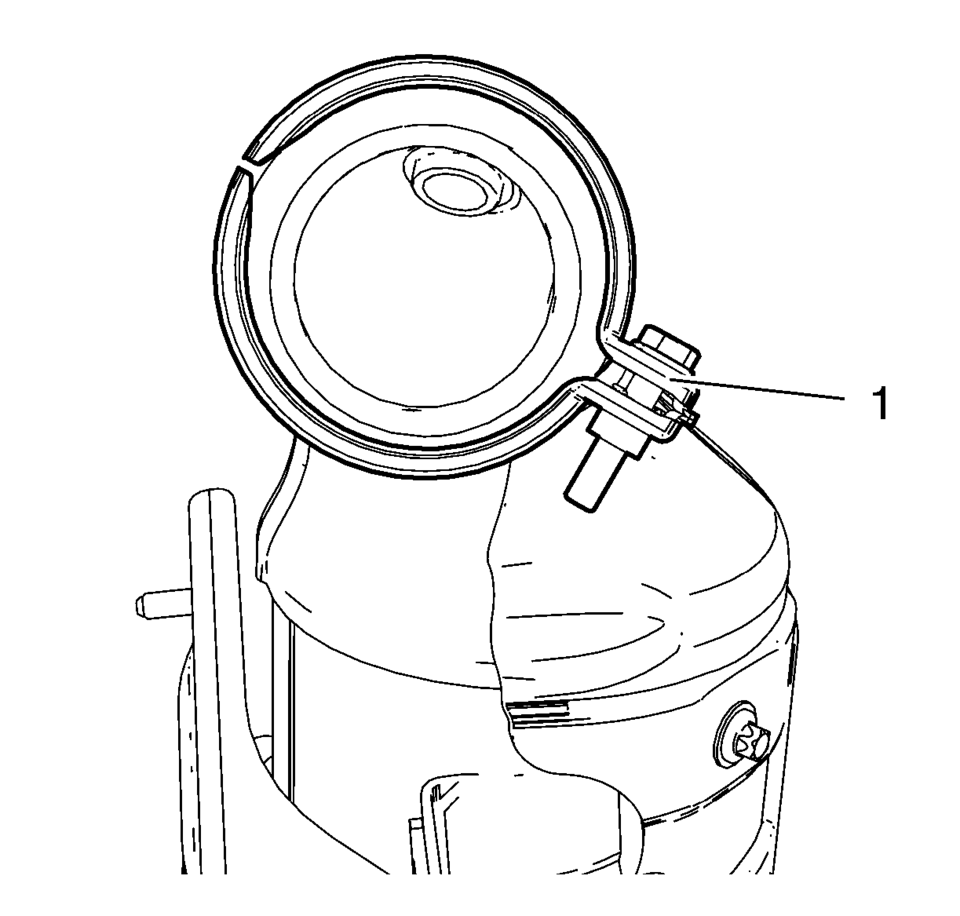
- Remove the catalytic converter heated oxygen sensor - 1. Refer to Heated Oxygen Sensor Replacement - Sensor 1.
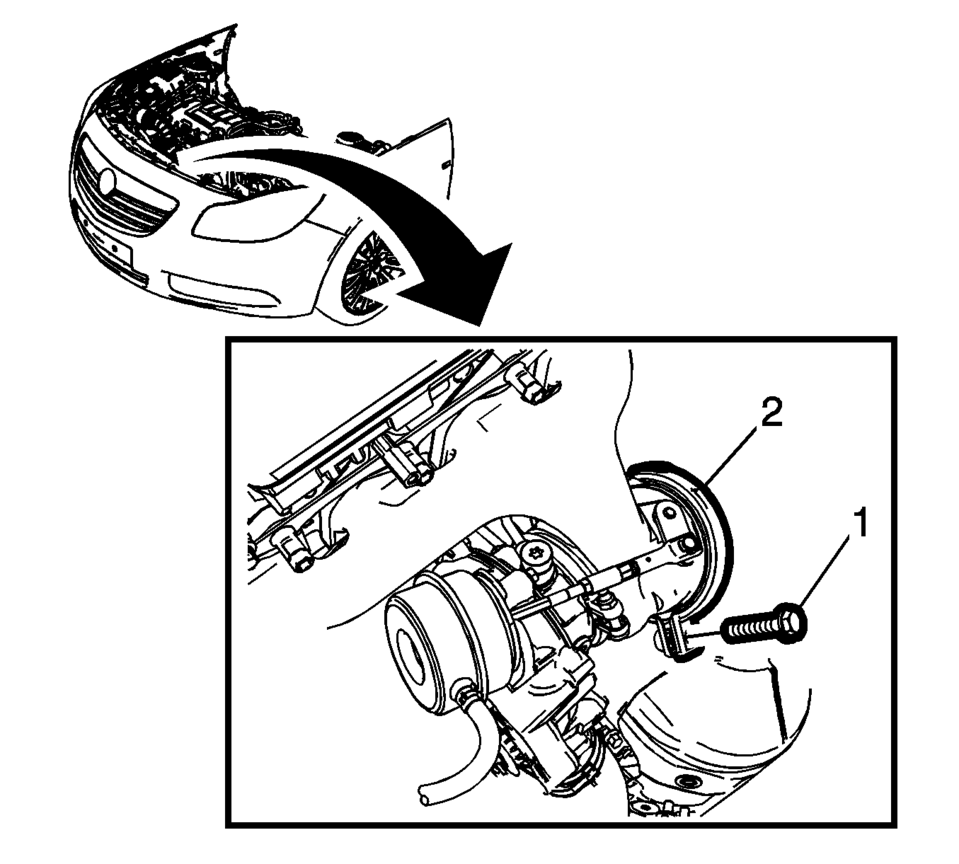
- Remove the catalytic converter to the turbocharger clamp fastener (1) and discard the clamp (2).
- Raise and support the vehicle. Refer to Lifting and Jacking the Vehicle.
- Remove the drivetrain and front suspension frame skid plate. Refer to Drivetrain and Front Suspension Frame Skid Plate Replacement.
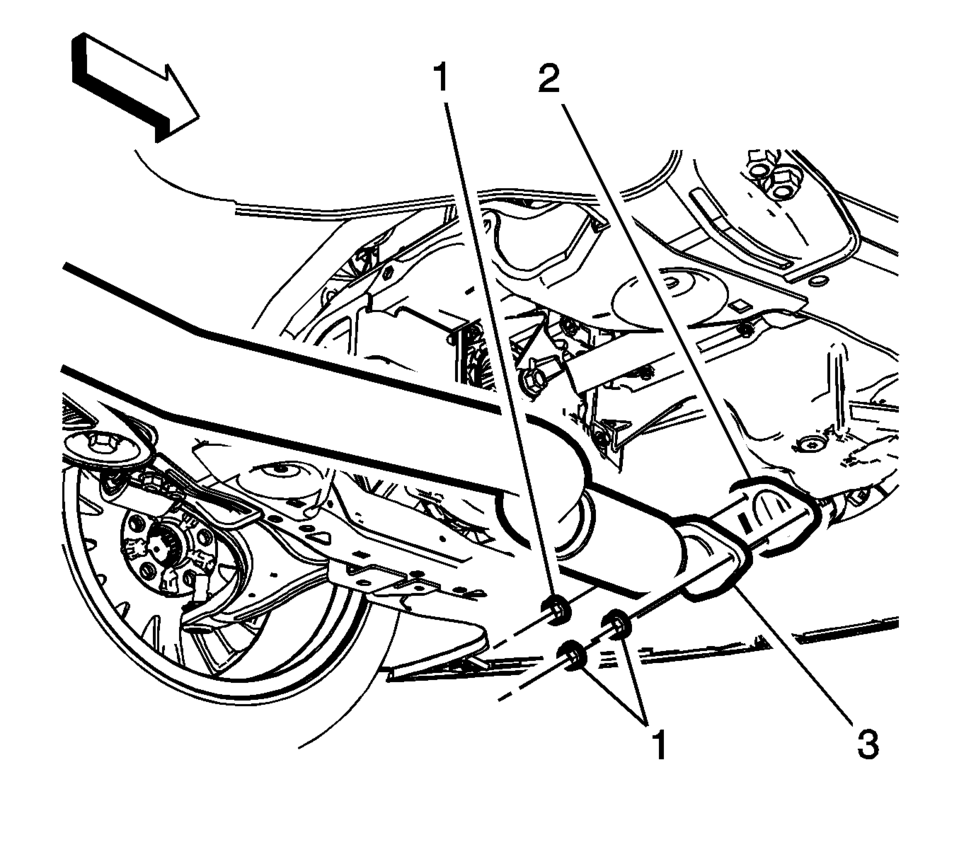
- Remove the exhaust front pipe fasteners (1) and discard the exhaust gasket (2).
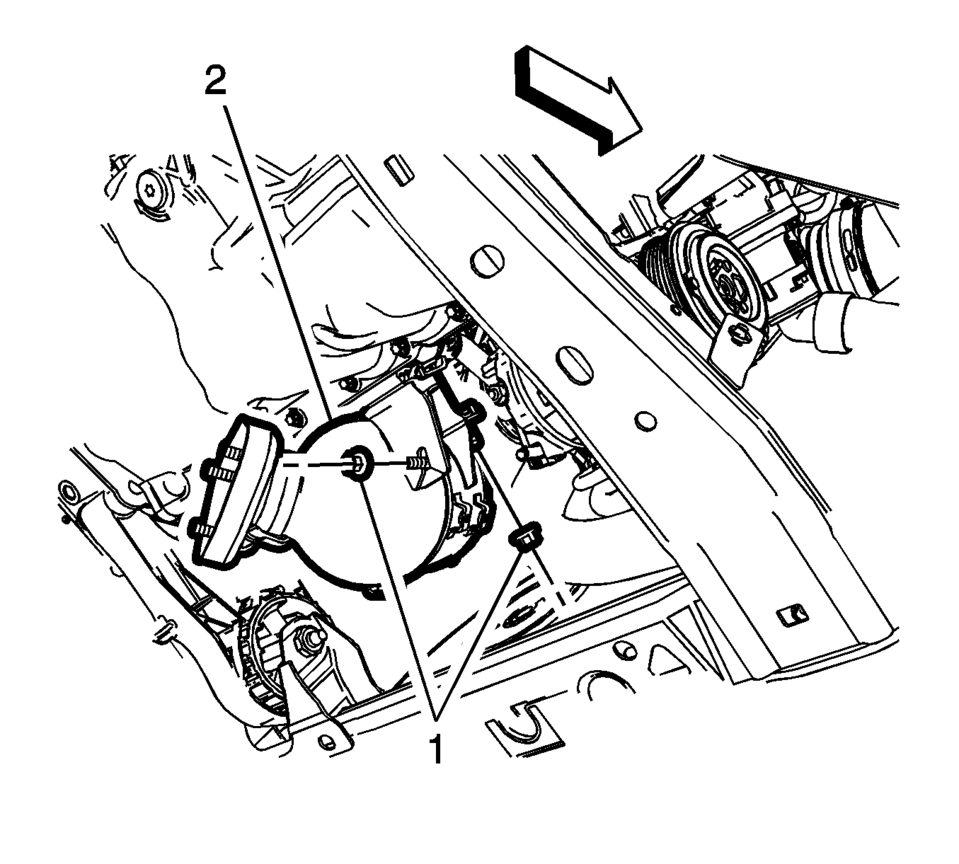
- Remove the catalytic converter brace fasteners (1) from the catalytic converter brace (2).
- Remove the catalytic converter.
- Installation Procedure
-
- Install the catalytic converter into the catalytic converter brace (2) and loosely tighten the fasteners (1).
- Install a NEW clamp into the position shown and loosely tighten the clamp fastener (1).
- Install the exhaust front pipe (3) to the catalytic converter with a
NEW gasket (2) and tighten the fasteners (1) to 22 Y (16 lb ft)
.
- Tighten the catalytic converter brace fasteners (1) to 22 Y (16 lb ft)
.
- Install the drivetrain and front suspension frame skid plate. Refer to Drivetrain and Front Suspension Frame Skid Plate Replacement.
- Lower the vehicle.
- Tighten the turbocharge clamp fastener (1) to 13 Y (115 lb in)
.
- Install the exhaust manifold heat shield. Refer to Exhaust Manifold Heat Shield Replacement.
- Install the catalytic converter heated oxygen sensor - 1. Refer to Heated Oxygen Sensor Replacement - Sensor 1.
- Start the engine and check for exhaust leaks.
Caution:
Refer to Fastener Caution.
 Catalytic Converter Heat Shield Replacement (LUV)
Catalytic Converter Heat Shield Replacement
Callout
Component Name
Warning: Refer to Exhaust Service Warning.
...
 Exhaust Manifold with Catalytic Converter Replacement (LUW)
Exhaust Manifold with Catalytic Converter Replacement
Callout
Component Name
Warning: Refer to Protective Goggles and Glove Wa ...
Other materials:
Hood Hinge Replacement
Hood Hinge Replacement
Callout
Component Name
Preliminary Procedures
Remove the hood. Refer to Hood Replacement.
Remove the front fender. Refer to Front Fender Replacement.
1
Hood Hinge Bolt (Q ...
Rear Compartment Stowage Shelf Replacement (Hatchback)
Rear Compartment Stowage Shelf Replacement
Callout
Component Name
1
Rear Compartment Stowage Shelf Assembly
...
Replacing Safety Belt System Parts after a Crash
Warning: A crash can damage the safety belt system in the vehicle.
A damaged safety belt system may not properly protect the person using it, resulting
in serious injury or even death in a crash. To help make sure the safety belt
systems are working properly after a crash, have them insp ...

0.0058