
Chevrolet Sonic Repair Manual: Charge Air Cooler Outlet Air Hose Replacement
- Removal Procedure
-
- Remove the front bumper fascia. Refer to Front Bumper Fascia Replacement.
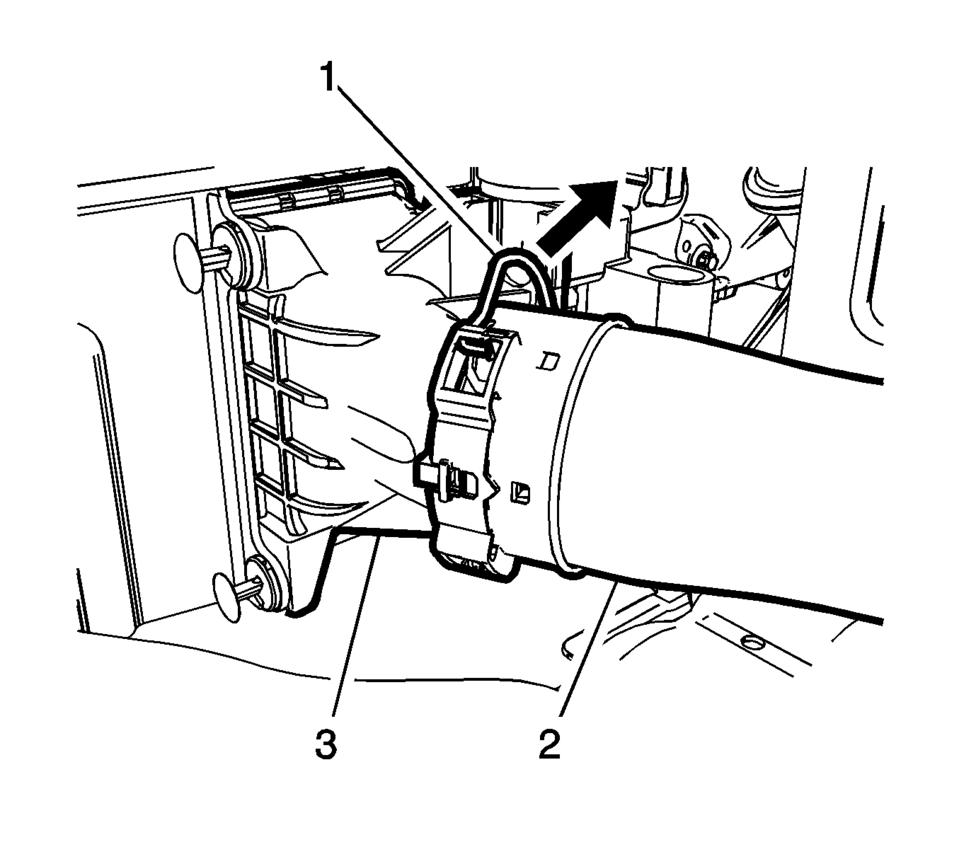
- Loosen the clamp (1) at the charge air cooler outlet pipe (2) to throttle body (3).
- Disconnect the intake air pressure and temperature sensor harness connector.
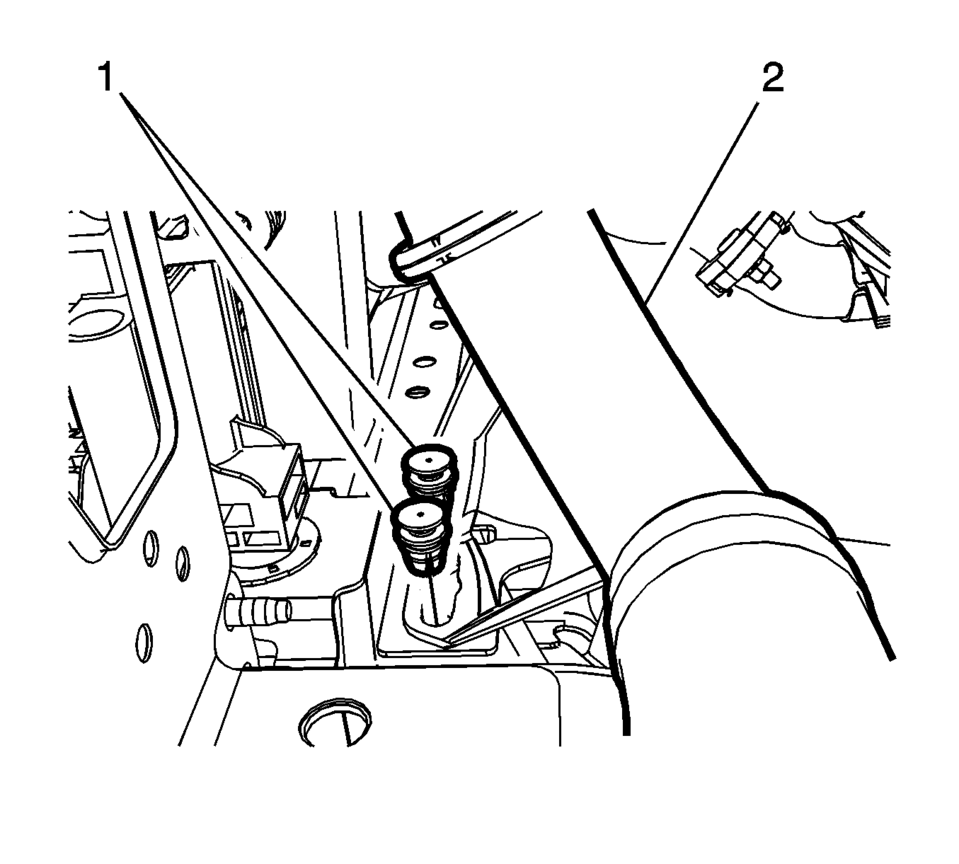
- Remove the plastic fasteners (1) from the charge air cooler outlet air pipe to frame bracket (2).
- Unclip the retainer spring (1).
- Remove the charge air cooler outlet air hose (2) from the charge air cooler (3).
- Transfer parts as necessary.

- Installation Procedure
-
- Install the charge air cooler outlet air hose (2) to charge air cooler (3).
- Clip the in retainer spring (1).
- Connect the intake air pressure and temperature sensor harness connector.
- Install the plastic fasteners (1) to the charge air cooler outlet air pipe to frame bracket (2).
- Install the charge air cooler inlet air pipe to the turbocharger.
- Tighten the clamp (1).
- Install the front bumper fascia. Refer to Front Bumper Fascia Replacement.
Caution:
Refer to Fastener Caution.
 Charge Air Cooler Inlet Air Hose Replacement
Removal Procedure
Disconnect the battery negative cable. Refer to Battery Negative Cable
Disconnection and Connection.
Remove the front bumper fascia. Refer to Front Bumper Fascia ...
 Charge Air Cooler Replacement
Charge Air Cooler Replacement
Callout
Component Name
Preliminary Procedures
Disconnect the negative battery cable. Refer to Battery ...
Other materials:
Traction Off Light
This light comes on briefly while starting the engine. If it does not, have the
vehicle serviced by your dealer. If the system is working normally, the indicator
light then turns off.
The traction off light comes on when the Traction Control System (TCS) has been
turned off by pressing and ...
Radiator Mounting Stud Repair
Repair Procedure
Note: If the radiator is leaky, replace it. Refer to Radiator
Replacement.
Pressure test the cooling system. Refer to Cooling System Leak Testing.
Grind the fracture surface (1) with a proper tool.
Drill a hole in the cente ...
Fluid Cooler Inlet Hose Replacement
Removal Procedure
Remove the battery tray. Refer to
Battery Tray Replacement
Remove the front bumper fascia opening lower cover.
Refer to Front Bumper Fascia Opening Lower Cover
Replacement
Remove the front wheelhouse liner inner front extension.
Refer to Front Wh ...

0.006