Chevrolet Sonic Repair Manual: Control Valve Body Replacement
|
Callout |
Component Name |
|---|---|
|
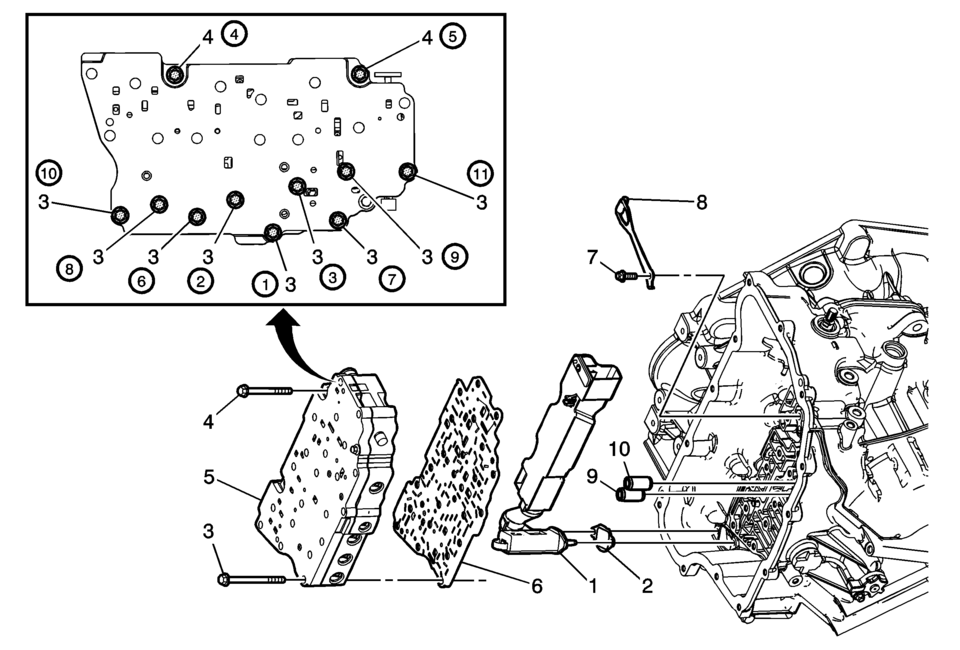
Preliminary Procedure
Remove the control solenoid valve and transmission control module assembly. Refer to Control Solenoid Valve and Transmission Control Module Assembly Replacement. |
|
|
1 |
Fluid Level Control Valve |
|
2 |
Fluid Level Control Valve Gasket Procedure
DISCARD the Gasket. Use a NEW gasket ONLY. |
|
3 |
Control Valve Body Bolt M6 x 60 (Qty: 9) Caution: Refer to Fastener Caution. Tip: Tighten in specified sequence.
11 Y (97 lb in) |
|
4 |
Control Valve Body Bolt M6 x 53 (Qty: 2) Tip: Tighten in specified sequence.
11 Y (97 lb in) |
|
5 |
Control Valve Body Assembly Procedure
|
|
6 |
Control Valve Body Spacer Plate Assembly |
|
7 |
Manual Shaft Detent Spring Bolt M6 x 16 (Qty: 1) Tighten
12 Y (106 lb in) |
|
8 |
Manual Shaft Detent Lever Spring Assembly |
|
9 |
1-2-3-4 Clutch Fluid Passage Seal Tip: Discard the seal. It is not reusable. |
|
10 |
Low/Reverse Clutch Fluid Passage Seal Tip: Discard the seal. It is not reusable. |
 Control Valve Body Cover Replacement
Removal Procedure
Disconnect the battery negative cable. Refer to
Battery Negative Cable Disconnection and Connection.
Raise and support the vehicle. Refer to
Lifting and Jac ...

Other materials:
Rear Window Panel Trim Replacement
Rear Window Panel Trim Replacement
Callout
Component Name
Preliminary Procedures
Remove the body lock pillar upper trim panel. Refer to Body Lock
Pillar Upper Trim Panel Replacement.
Remove the body rear seat back trim pa ...
Charging System Description and Operation
Electrical Power Management Overview
The electrical power management system is designed to monitor and control
the charging system and send diagnostic messages to alert the driver of possible
problems with the battery and generator. This electrical power management system
primarily ...
Catalytic Converter Heat Shield Replacement (LUV)
Catalytic Converter Heat Shield Replacement
Callout
Component Name
Warning: Refer to Exhaust Service Warning.
1
Catalytic Converter Heat Shield Fasteners (Qty: 4)
Caution: Refer ...

0.0083