Chevrolet Sonic Repair Manual: Drive Belt Replacement
Special Tools
- EN-48488 Holding Wrench
- EN-955 Locking Pin
For equivalent regional tools, refer to Special Tools.
- Removal Procedure
-
- Remove the right front wheelhouse liner extension. Refer to Front Wheelhouse Liner Inner Front Extension Replacement.
- Install the engine support fixture. Refer to Engine Support Fixture.
- Remove the engine mount bracket. Refer to Engine Mount Bracket Replacement - Right Side.
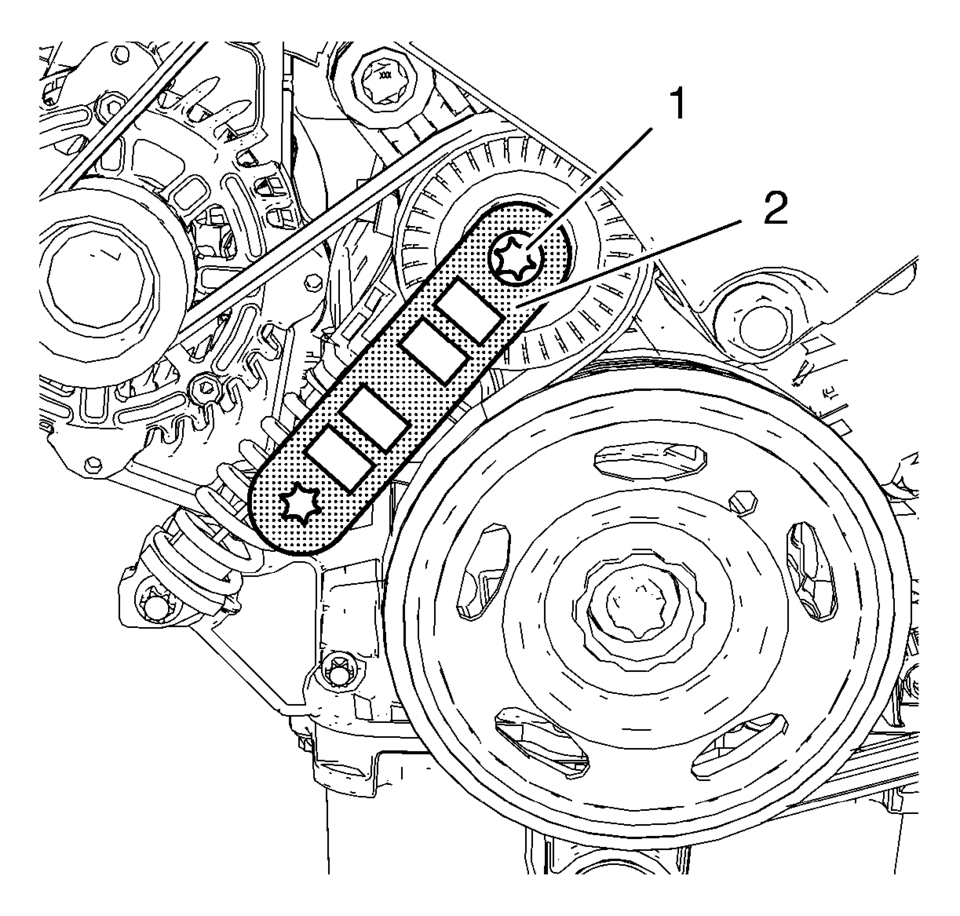
- Install EN-48488 holding wrench (2) to the drive belt tensioner (1).
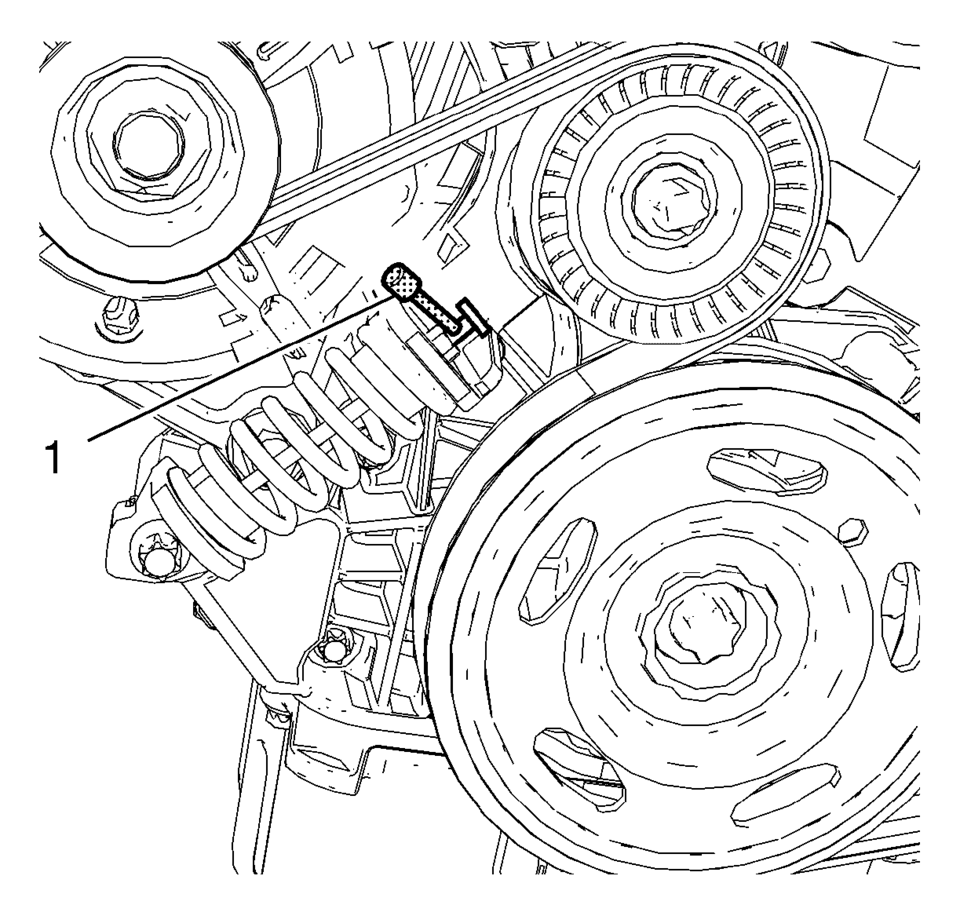
- Move the drive belt tensioner clockwise until the drive belt tensioner can be fixed with EN-955 locking pin (1).
- Remove the EN-48488 holding wrench .
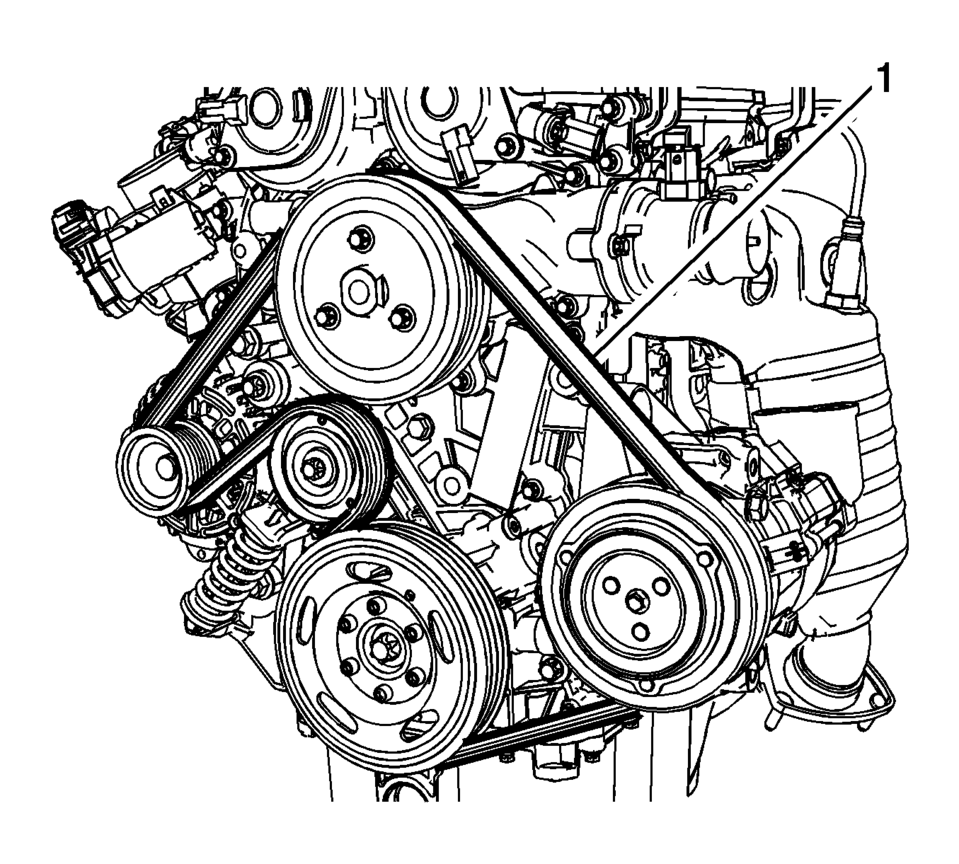
- Remove the drive belt (1).
- Installation Procedure
-
- Install the drive belt (1).
- Install the EN-48488 holding wrench (2) to the drive belt tensioner (1).
- Move the drive belt tensioner clockwise until EN-955 locking pin (1) can be removed.
- Allow the tensioner to slide back slowly.
- Remove the EN-48488 holding wrench .
- Install the engine mount bracket. Refer to Engine Mount Bracket Replacement - Right Side.
- Install the right front wheelhouse liner extension. Refer to Front Wheelhouse Liner Inner Front Extension Replacement.
- Remove the engine support fixture. Refer to Engine Support Fixture.
 Drive Belt Removal
Special Tools
EN-955 Locking Pins
EN-48488 Holding Wrench
For equivalent regional tools, refer to Special Tools.
Install EN-48488 wrench (1) to the drive belt tensioner.
...
 Power Steering Pump Belt Installation
Special Tools
EN-50098 Belt Installer
For equivalent regional tools, refer to Special Tools.
Install EN-50098 installer (2) and a NEW power steering pump belt (1)
to wat ...
Other materials:
Wireless Communication Interface Antenna Replacement
Wireless Communication Interface Antenna Replacement
Callout
Component Name
Preliminary Procedure
Remove the communication interface module. Refer to
Communication Interface Module Replacement
1
...
Air Inlet Assembly Replacement
Air Inlet Assembly Replacement
Callout
Component Name
Preliminary Procedures
Remove the Heater and Air Conditioning Evaporator and Blower Module.
Refer to Heater and Air Conditioning Evaporator and Blower Module Removal
a ...
Intelligent Key battery discharge
If the Intelligent Key battery in your Nissan Armada becomes discharged, or if
external conditions such as interference affect its operation, the engine can still
be started using an alternative method. This ensures continued usability of the
Nissan Armada even in low-battery situations. ...

0.0055