Chevrolet Sonic Repair Manual: Driver or Passenger Seat Cushion Frame Replacement
|
Callout |
Component Name |
|---|---|
Preliminary Procedures
|
|
|
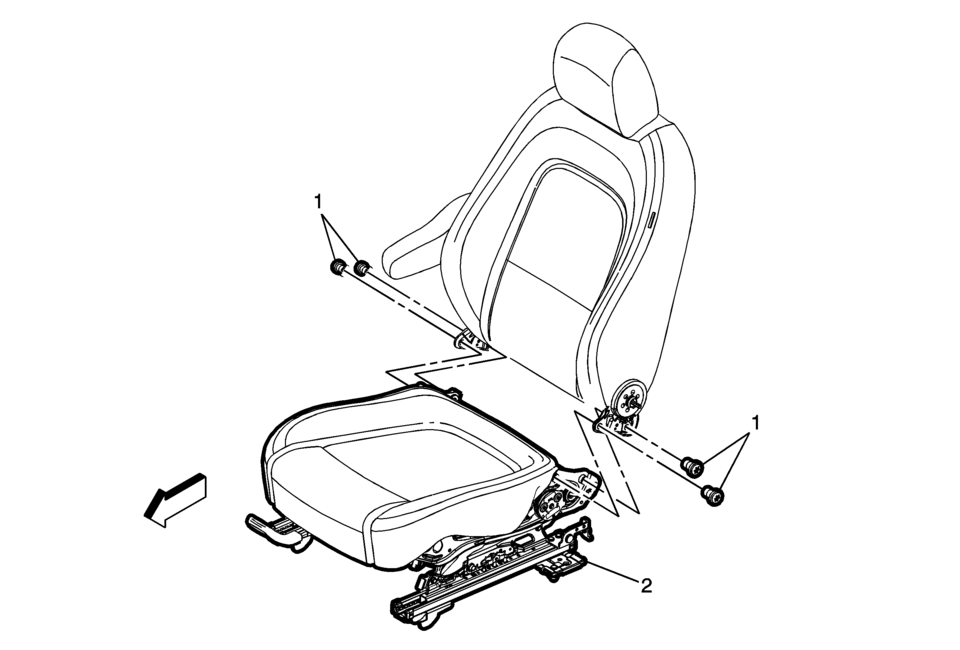
1 |
Front Seat Cushion Frame Bolt (Qty:?€‰4) Caution: Refer to Fastener Caution.
22?€‰Y (16?€‰lb?€‰ft) |
|
2 |
Driver or Passenger Seat Cushion Frame Procedure
|
 Driver or Passenger Seat Back Cushion Frame Replacement
Driver or Passenger Seat Back Cushion Frame Replacement
Callout
Component Name
Preliminary Procedures
Remove the driver or passenge ...
 Drivetrain and Front Suspension Frame Replacement
Special Tools
EN-45059 Angle Meter
For equivalent regional tools, refer to Special Tools.
Removal Procedure
Support the radiator and condenser from above using the upper brackets
...
Other materials:
Antilock Brake System (ABS) Warning Light
This light comes on briefly when the engine is started.
If the light stays on, turn the ignition to LOCK/OFF or if the light comes on,
stop as soon as possible and turn the ignition off. Then start the engine again
to reset the system. If the light still stays on, or comes on again while driv ...
Exterior Lighting Systems Description and Operation
Exterior Lamps
The exterior lighting system consist of the following lamps if equipped:
Backup lamps
Front fog lamps
Hazard warning lamps
Headlamps
Park, tail and license lamps
Stop lamps
Turn signal lamps
Low Beam Headlamps
The body control module ...
Drum Brake Hardware Replacement (J93, J94)
Removal Procedure
Warning: Refer to Brake Dust Warning.
Raise and support the vehicle. Refer to Lifting and Jacking the Vehicle.
Remove the tire and wheel assembly. Refer to Tire and Wheel Removal
and Installation.
Remove the brake drum. Refer to Brake Drum R ...

0.005