Chevrolet Sonic Repair Manual: Drivetrain and Front Suspension Frame Skid Plate Replacement
- Removal Procedure
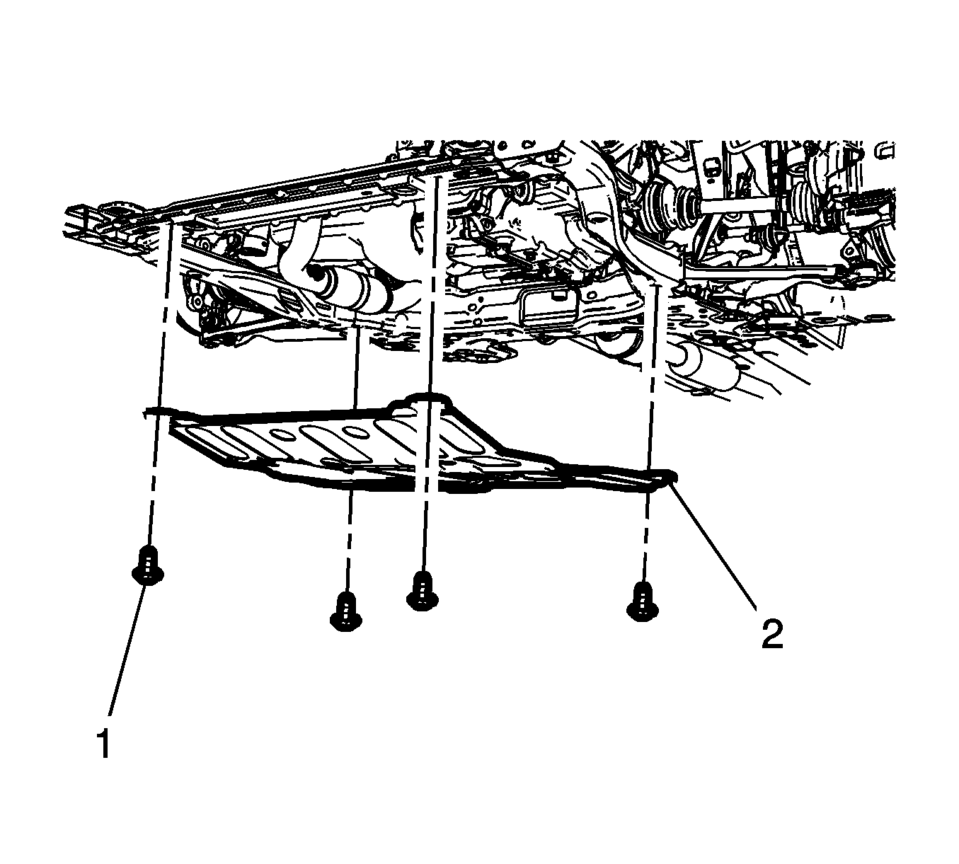
-
- Raise and support the vehicle. Refer to Lifting and Jacking the Vehicle.
- Remove the mounting bolts (1) for the front suspension frame skid plate.
- Remove the front suspension frame skid plate (2).
- Installation Procedure
-
- Position the front suspension frame skid plate (2) on the frame.
- Install the front suspension frame skid plate mounting bolts (2) and
tighten to 22 Y (16 lb ft)
.
Caution:
Refer to Fastener Caution.
 Drivetrain and Front Suspension Frame Replacement
Special Tools
EN-45059 Angle Meter
For equivalent regional tools, refer to Special Tools.
Removal Procedure
Support the radiator and condenser from above using the upper brackets
...
 Front Suspension Description and Operation
The front suspension has 2 primary purposes:
Isolate the driver from irregularities in the road surface.
Define the ride and handling characteristics of the vehicle.
The front suspension ab ...
Other materials:
Tire Rotation and Required Services Every 12 000 km/ 7,500 mi
Rotate the tires, if recommended for the vehicle, and perform the following services.
See Tire Rotation.
Check engine oil level and oil life percentage. If needed, change engine
oil and filter, and reset oil life system. See Engine Oil and Engine
Oil Life System.
Check engine coo ...
Vehicle Personalization
Personalization Menu (Radio without Touchscreen)
Use the audio system controls to access the personalization menus for customizing
vehicle features.
The following are all possible personalization features. Depending on the
vehicle, some may not be available.
CONFIG (Configur ...
Inspection/Maintenance System Check
Diagnostic Instructions
Perform the Diagnostic System Check - Vehicle
prior to using this diagnostic procedure.
Review Diagnostic System Check - Vehicle
for an overview of the diagnostic approach.
Diagnostic Procedure Instructions provides
an overview of each diagn ...

0.006