
Chevrolet Sonic Repair Manual: Drum Brake Adjusting Hardware Replacement (J93, J94)
- Removal Procedure
-
- Raise and support the vehicle. Refer to Lifting and Jacking the Vehicle.
- Remove the tire and wheel assembly. Refer to Tire and Wheel Removal and Installation.
- Remove the brake drum. Refer to Brake Drum Replacement.
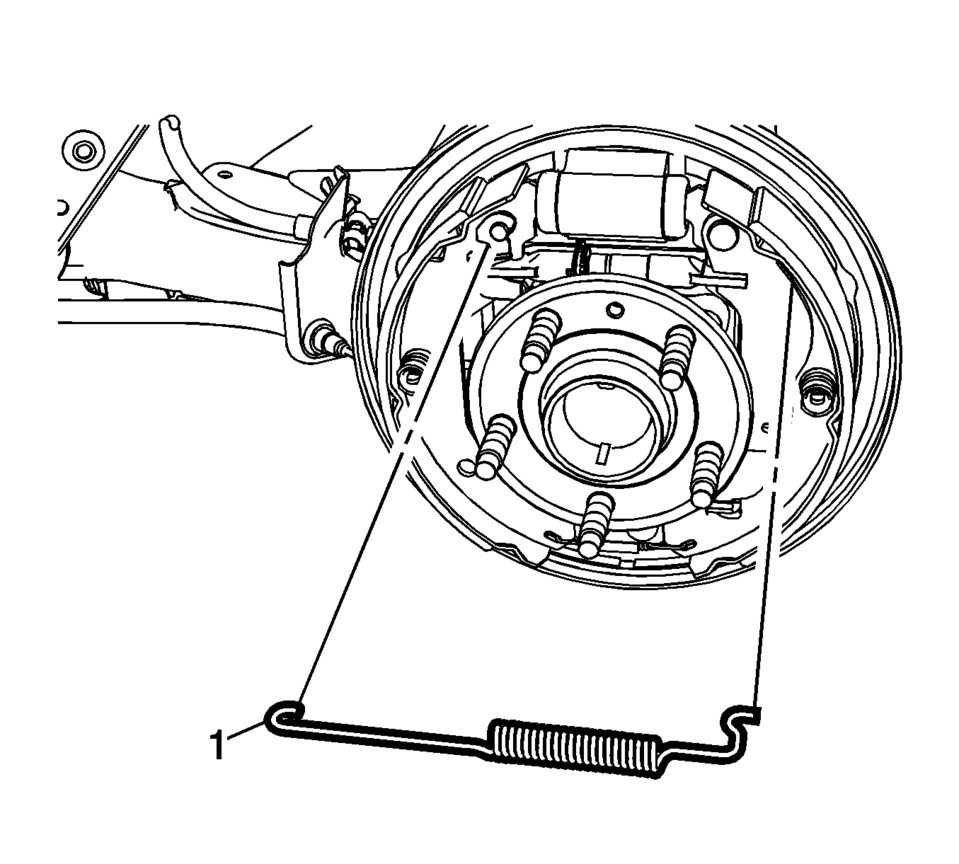
- Remove the upper brake shoe return spring (1).
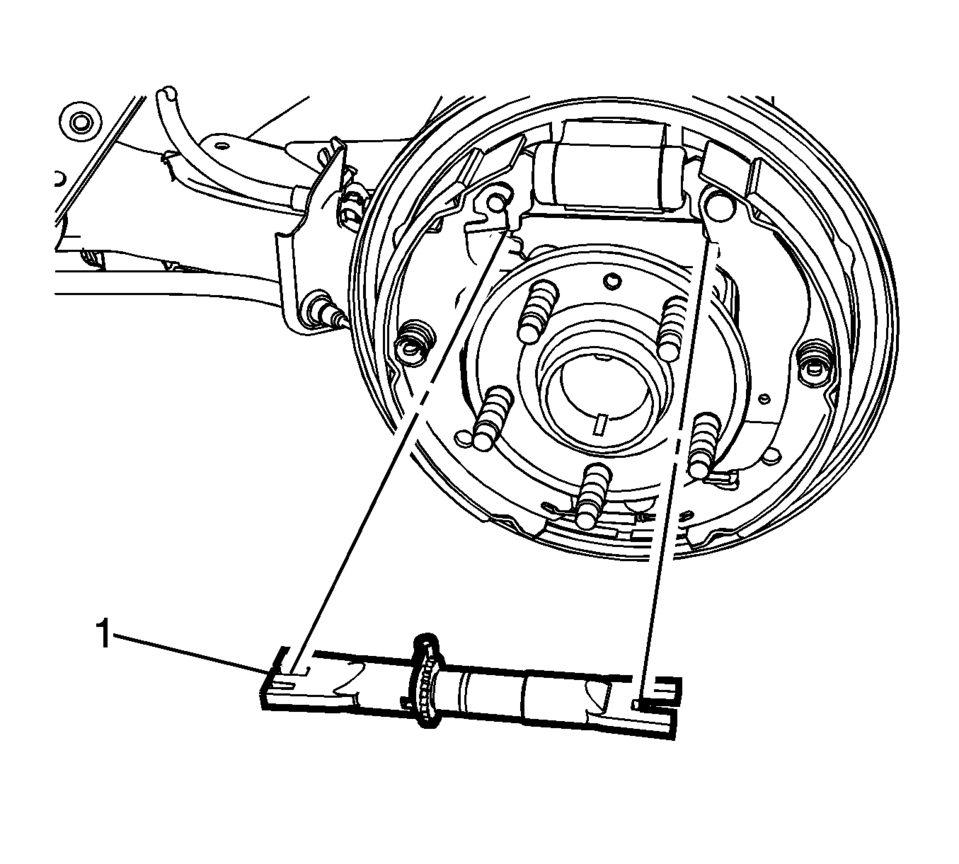
- Remove brake shoe adjuster (1).
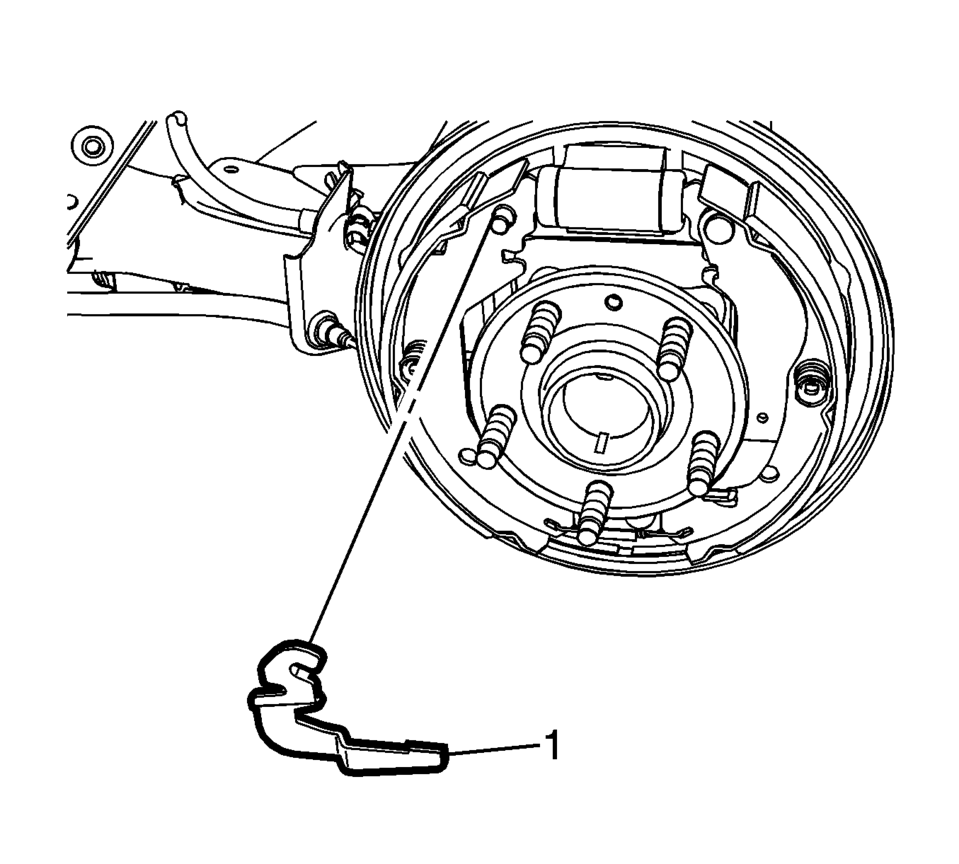
- Remove the brake shoe adjuster actuator lever (1).
- Inspect the drum brake adjusting hardware and replace any damaged components as necessary. Refer to Drum Brake Adjusting Hardware Inspection.
- Disassemble the brake shoe adjuster and thoroughly clean the adjuster screw threads of any corrosion.
- Apply a light coat of high temperature brake lubricant to the brake shoe adjuster screw threads.
Warning:
Refer to Brake Dust Warning.
- Installation Procedure
-
- Assemble the brake shoe adjuster, setting the adjuster to the fully retracted position.
- Clean the drum brake backing plate of any dirt and debris.
- Apply a light coat of high temperature brake lubricant to the brake drum backing plate shoe contact surfaces.
- Install the brake shoe adjuster actuator lever (1).
- Install brake shoe adjuster (1).
- Install the upper brake shoe return spring (1).
- Adjust the drum brakes. Refer to Drum Brake Adjustment.
- Install the brake drum. Refer to Brake Drum Replacement.
- Install the tire and wheel assembly. Refer to Tire and Wheel Removal and Installation.
 Drum Brake Adjusting Hardware Inspection
Warning: Refer to Brake Dust Warning.
Visually inspect the adjuster actuator spring (1) for the following conditions:
Excessive stretching
Excessive bending
Exces ...
 Drum Brake Adjustment
Special Tools
CH-21177-A Drum to Brake Shoe Clearance Gauge
For equivalent regional tools, refer to Special Tools.
Warning: Refer to Brake Dust Warning.
Ensure the park brake lever ...
Other materials:
Rear Side Door Check Link Replacement
Rear Side Door Check Link Replacement
Callout
Component Name
Preliminary Procedures
Move the window to the full up position.
Remove the rear side door trim panel. Refer to Rear Side Door Trim
Replacement
...
Special Tools
Illustration
Tool Number/Description
EL 38758
EL 50074
J 38758
Parasitic Draw Test Switch
EL 50313
EL 42000
EL 50076
J 42000
...
Basic information
Drive Mode Selector (example)
Vehicle information display (example)
The Nissan Armada features a versatile Drive Mode Selector system that allows
the driver to tailor vehicle performance to different driving conditions. By rotating
the selector dial to the left or right, you can quickl ...

0.007