Chevrolet Sonic Repair Manual: Electronic Brake Control Module Replacement
- Removal Procedure
-
Warning:
Refer to Brake Fluid Irritant Warning.
Caution:
Refer to Brake Fluid Effects on Paint and Electrical Components Caution.
- Remove the battery tray. Refer to Battery Tray Replacement.
- Disconnect the electronic brake control module (EBCM) electrical connector.
- Remove the EBCM bolts (1),
- Carefully separate the EBCM (1) from the BPMV.
- Clean the sealing surfaces of the EBCM and the BPMV with denatured alcohol and allow to dry.
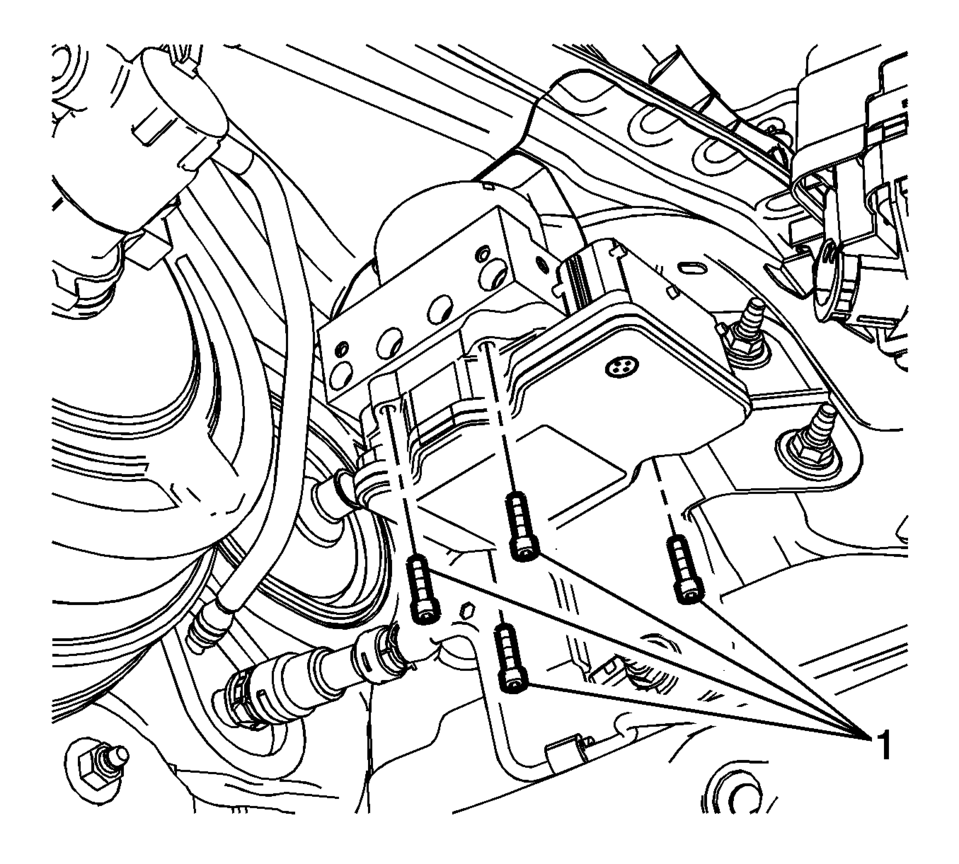
Note:
Do not pry the components apart.
- Installation Procedure
-
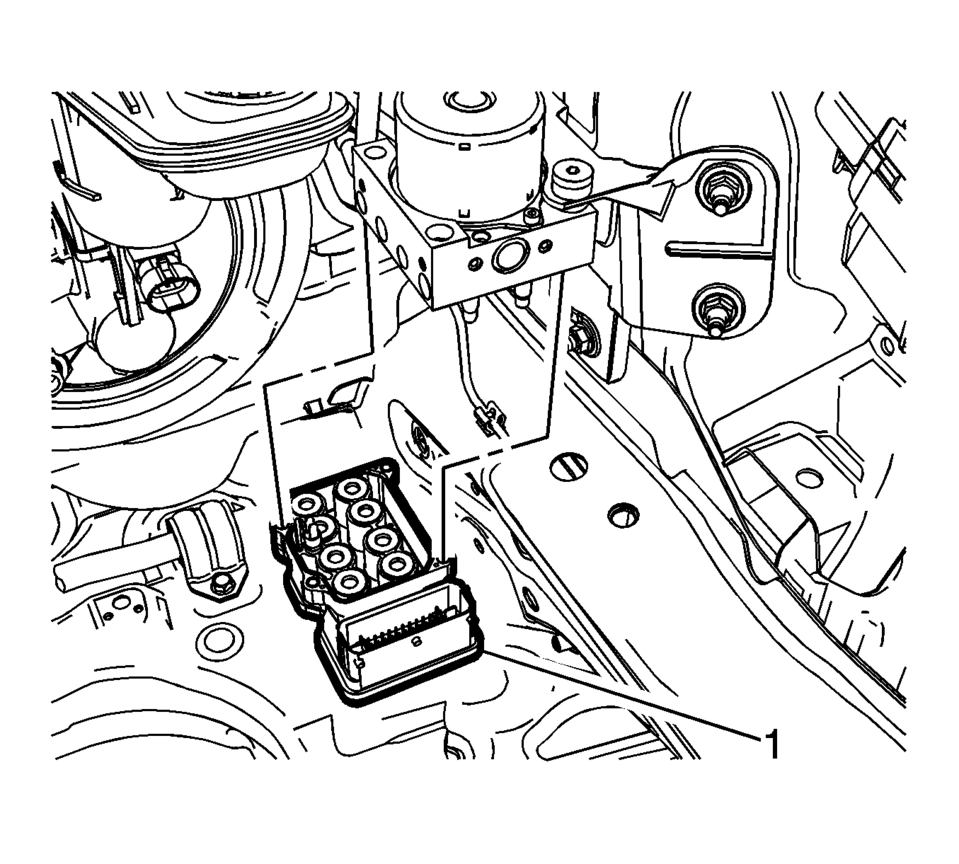
- Install the EBCM (1) to the BPMV.
- Install the EBCM bolts (1) and tighten to 3 Y (26 lb in)
.
- Connect the EBCM electrical connector.
- Install the battery tray. Refer to Battery Tray Replacement.
- Program the EBCM. Refer to Control Module References.
Caution:
Refer to Fastener Caution.
 Electronic Brake Control Module Programming and Setup
Note:
DO NOT program a control module unless directed to by a service procedure
or a service bulletin. If the ECU is not properly configured with the correct
calibration software, th ...
 Front Wheel Speed Sensor Replacement
Removal Procedure
Warning: Refer to Brake Dust Warning.
Raise and support the vehicle. Refer to Lifting and Jacking the Vehicle.
Remove the tire and wheel assembly. Refer ...
Other materials:
Paint Gauges
Paint thickness gauges measure the total thickness of the vehicle finish. It
is important to accurately measure the thickness of the finish on each vehicle as
the thickness of the finish will vary on each vehicle. Use a paint gauge before
the sanding process in order to accurately measure how ...
Rear Disc Brake Mounting and Hardware Inspection
Warning: Refer to Brake Dust Warning.
Caution: Support the brake caliper with heavy mechanic wire, or
equivalent, whenever it is separated from its mount and the hydraulic flexible
brake hose is still connected. Failure to support the caliper in this manner
will cause the f ...
Basic information
WARNING
Never leave children, individuals who require assistance, or pets unattended
inside the Nissan Armada. They may unintentionally operate vehicle systems or
place themselves and others at risk of injury. In addition, on hot and sunny
days, the interior temperature of a parked Niss ...

0.0072