Chevrolet Sonic Repair Manual: Engine Block Cleaning and Inspection
Special Tools
EN-8087 Cylinder Gauge
For equivalent regional tools, refer to Special Tools.
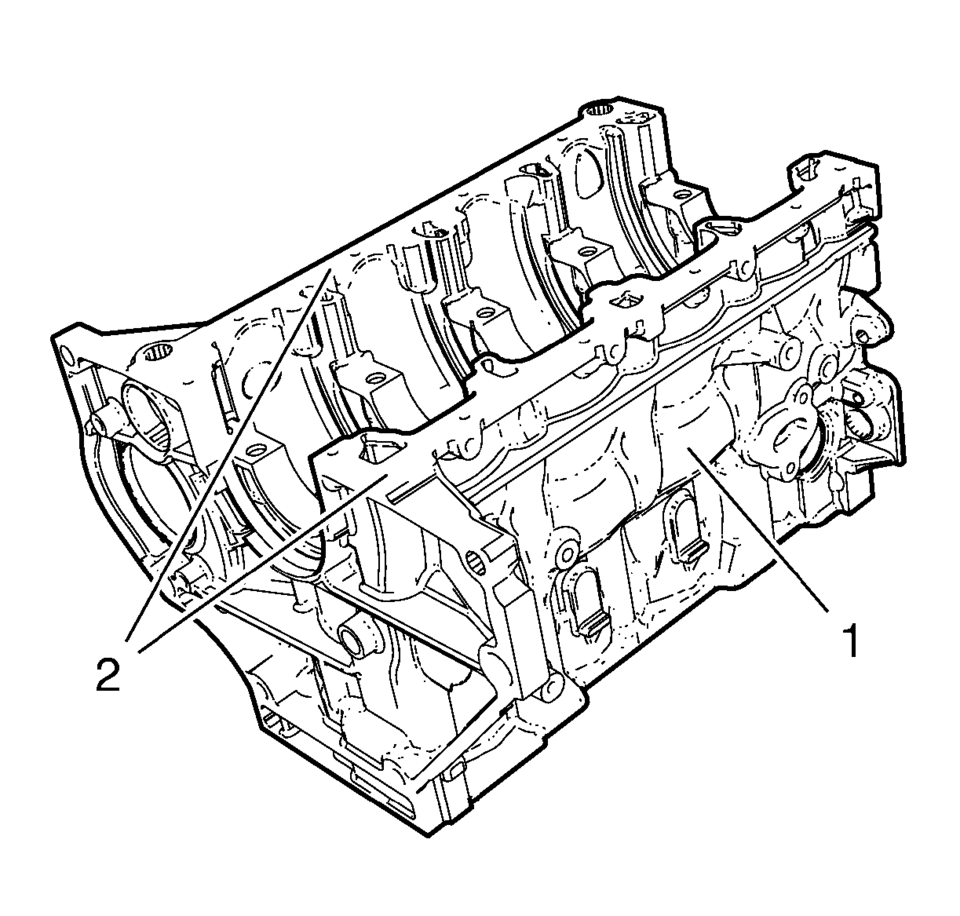
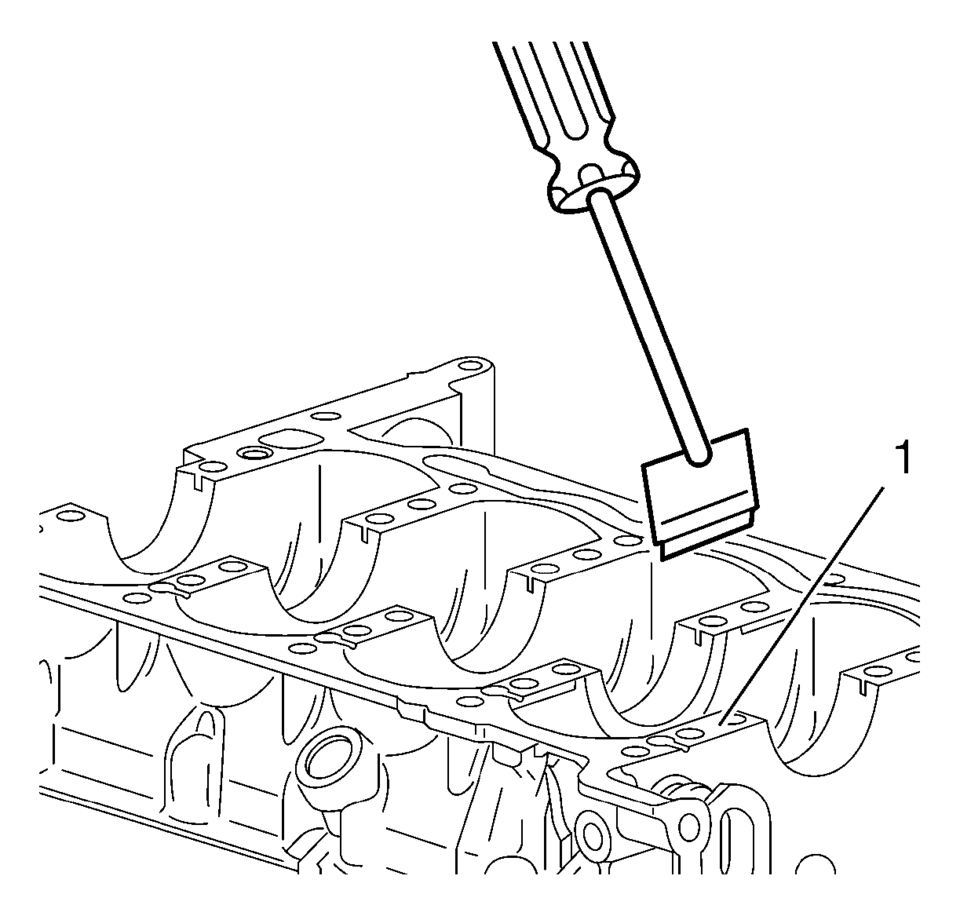
- Clean the sealing material from the gasket mating surfaces (2).
- Clean the engine block (1) and lower crankcase in a cleaning tank with solvent appropriate for aluminum. Refer to Adhesives, Fluids, Lubricants, and Sealers for the recommended solvent.
- Flush the engine block with clean water or steam.
- Clean the oil passages.
- Clean the blind holes.
- Spray the cylinder bores and the machined surfaces with engine oil.
- Inspect the threaded holes. Clean the threaded holes with a rifle brush. If necessary, drill out the holes and install thread inserts. Refer to Thread Inserts.
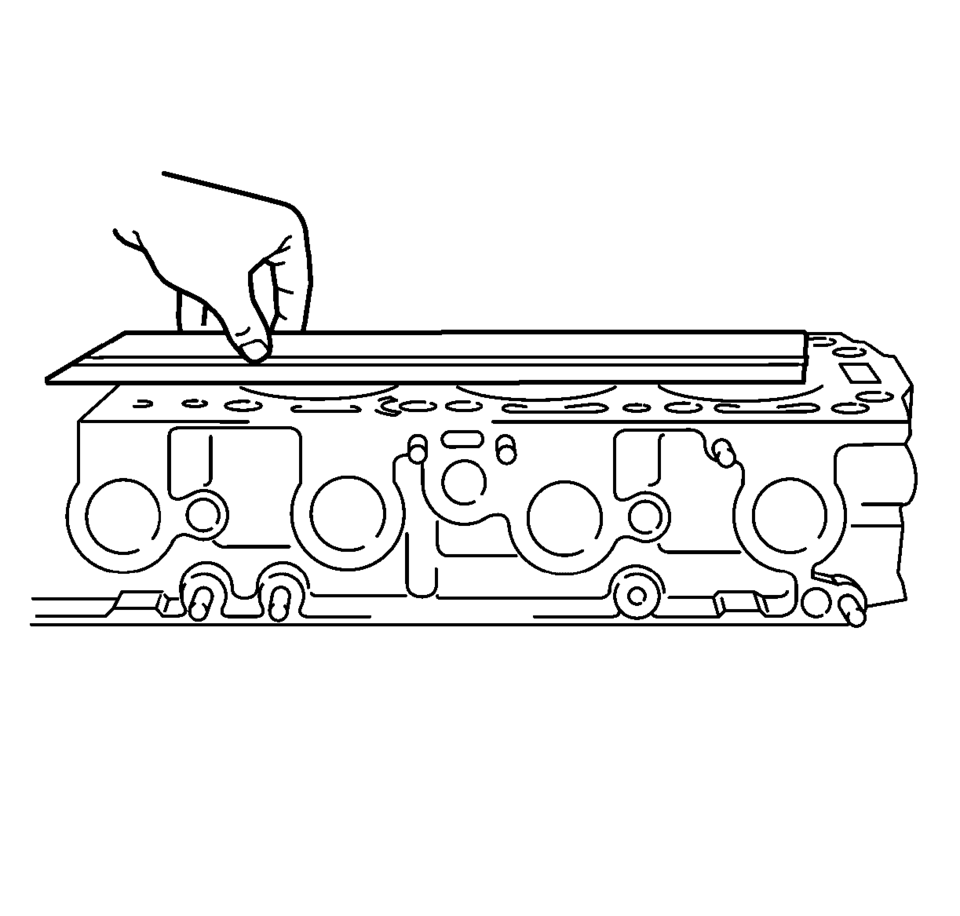
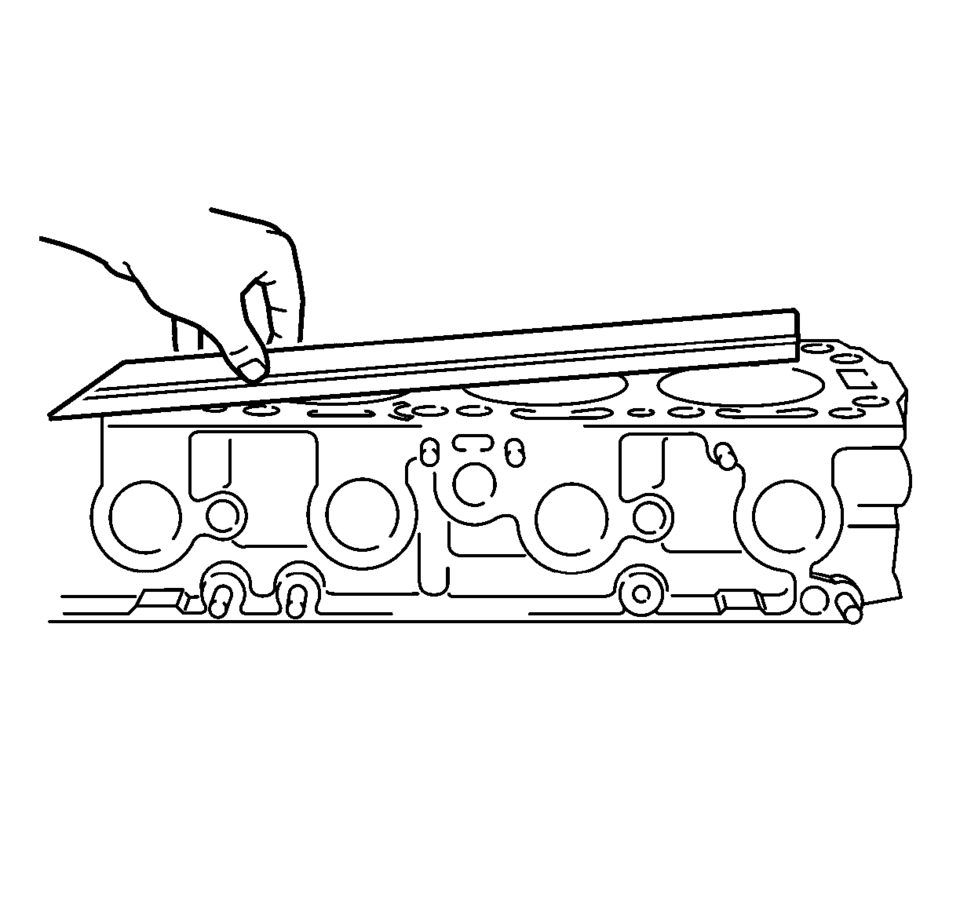
- Inspect the engine block for sag in length and width on the sealing surfaces.
- Inspect the engine block for distortion along the diagonals.
If the deck surface is out of specification, replace the block. Do not machine the block.
- Clean the sealing material from the gasket mating surfaces (1) on the lower crankcase oil pan side.
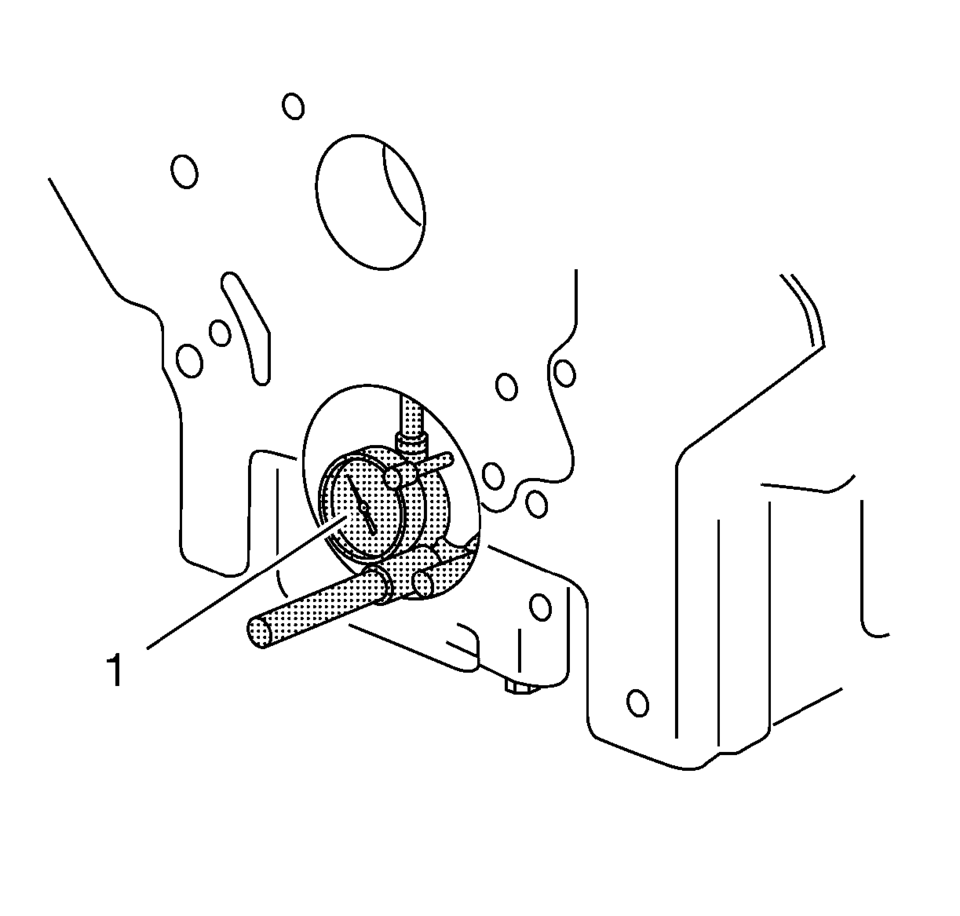
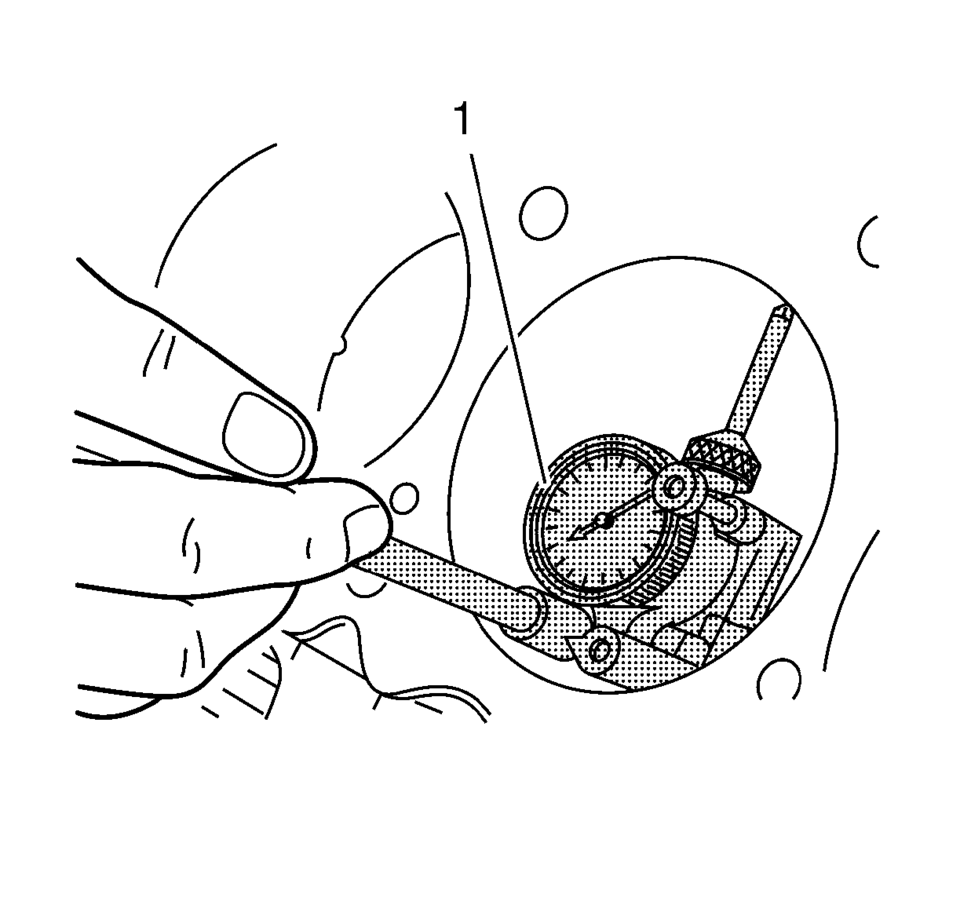
- Inspect the crankshaft main bearing bores. Use the EN-8087 gauge (1) to measure the bearing bore concentricity and alignment.
- Replace the engine block and bed plate if the crankshaft bearing bores are out of specification.
- Inspect the cylinder bores using the EN-8087 gauge (1). Inspect for the following items:
Note:
Do not attempt to machine the lower crankcase to engine block surfaces.
- Wear
- Taper
- Runout
- Ridging
 Engine Block Disassemble
Remove the cylinder head locating (1, 2).
Remove the oil pressure switch (1).
Remove the knock sensor bolt (2) and the knock sensor (1).
Clea ...
 Cylinder Block
...
Other materials:
Front Side Door Window Switch Replacement (Left Side)
Front Side Door Window Switch Replacement
Callout
Component Name
Preliminary Procedure
Remove the front side door window switch bezel. Refer to Front Side Door
Window Switch Bezel Replacement.
1
...
Airbag Side Impact Sensor Replacement (with AYF/AYO)
Airbag Side Impact Sensor Replacement
Callout
Component Name
Warning: Refer to SIR Warning.
Warning: Refer to SIR Inflator Module Handling and Storage
Warning.
Warning: Following the deployment o ...
Hydraulic Brake System Bleeding (Pressure)
Special Tools
CH-29532 Diaphragm Type Brake Pressure Bleeder
CH-35589-A Brake Pressure Bleeder Adapter
Warning: Refer to Brake Fluid Irritant Warning.
Caution: Refer to Brake Fluid Effects on Paint and Electrical Components
Caution.
Place a clean shop cloth beneath the b ...

0.005