Chevrolet Sonic Repair Manual: Engine Control Module Replacement
|
Callout |
Component Name |
|---|---|
|
Note: If the ECM is to be replaced, the ECM must be RESET (prepared for removal) prior to removal from the vehicle. Failing to reset the ECM will result in the following:
|
|
|
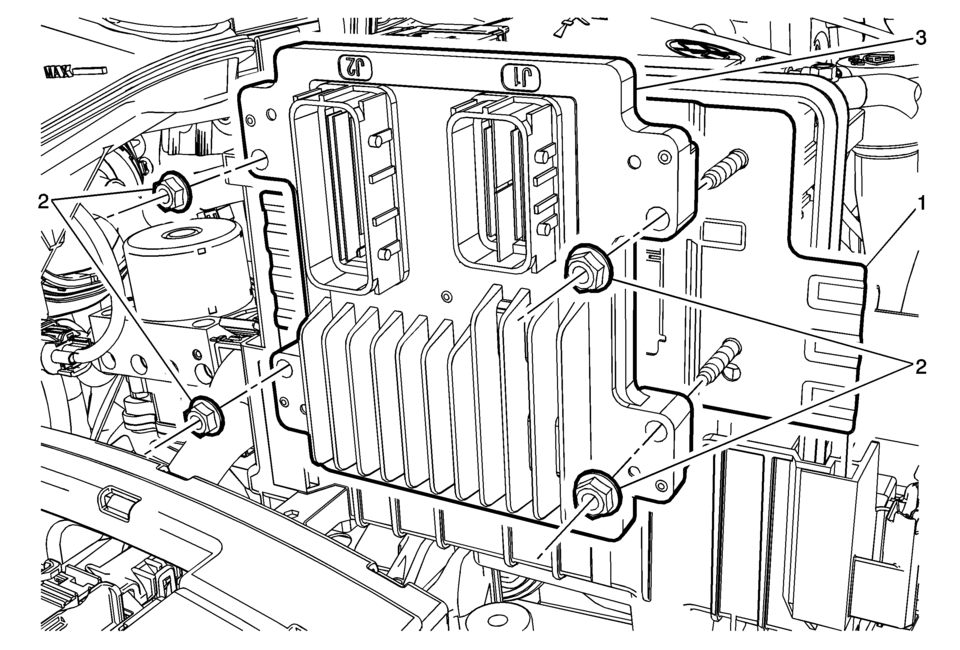
1 |
Engine Control Module Mounting Bracket Procedure
|
|
2 |
Engine Control Module Fasteners (Qty: 4) Caution: Refer to Fastener Caution.
9 Y (80 lb in) |
|
3 |
Engine Control Module Caution:
Note: Before removing the engine control module (ECM), record the oil life percentage remaining. Use the scan tool to reset the Engine Oil Life remaining back to the original percentage recorded. |
 Engine Control Module Description
The Engine Control Module (ECM) interacts with many emission related components
and systems, and monitors emission related components and systems for deterioration.
OBD II diagnostics monitor the ...
 K20 Engine Control Module: Programming and Setup
Special Tools
EL-49642 SPS Programming Support Tool
For equivalent regional tools, refer to Special Tools.
Note:
DO NOT program a control module unless directed to by a service procedu ...
Other materials:
Shifting out of Park (Automatic Transmission)
This vehicle is equipped with a shift lock control. The shift lock control is
designed to:
Prevent ignition key removal unless the shift lever is in P (Park) with
the shift lever button fully released.
Prevent movement of the shift lever out of P (Park) unless the ignition
is in ON/RUN ...
Engine Oil Cooler Assemble
Caution: Refer to Fastener Caution.
Install the engine oil filter cap (1) along with a NEW seal ring (2) and
a NEW oil filter element (3) and tighten to 25 Y (18 lb ft).
Install the engine oil pressure indicator switch (5) and ...
Fuel Tank Fuel Pump Module Replacement
Special Tools
EN-48279 Fuel Sender Lock Ring Tool
For equivalent regional tools, refer Special Tools.
Removal Procedure
Relieve the fuel system pressure. Refer to
Fuel Pressure Relief
Remove the fuel tank. Refer to
Fuel Tank Replacement.
Disconnect the elect ...

0.0074