Chevrolet Sonic Repair Manual: Engine Coolant Thermostat Housing Replacement (LUW)
- Removal Procedure
-
- Remove the battery tray. Refer to Battery Tray Replacement.
- Raise and support the vehicle. Refer to Lifting and Jacking the Vehicle.
- Drain the cooling system. Refer to Cooling System Draining and Filling.
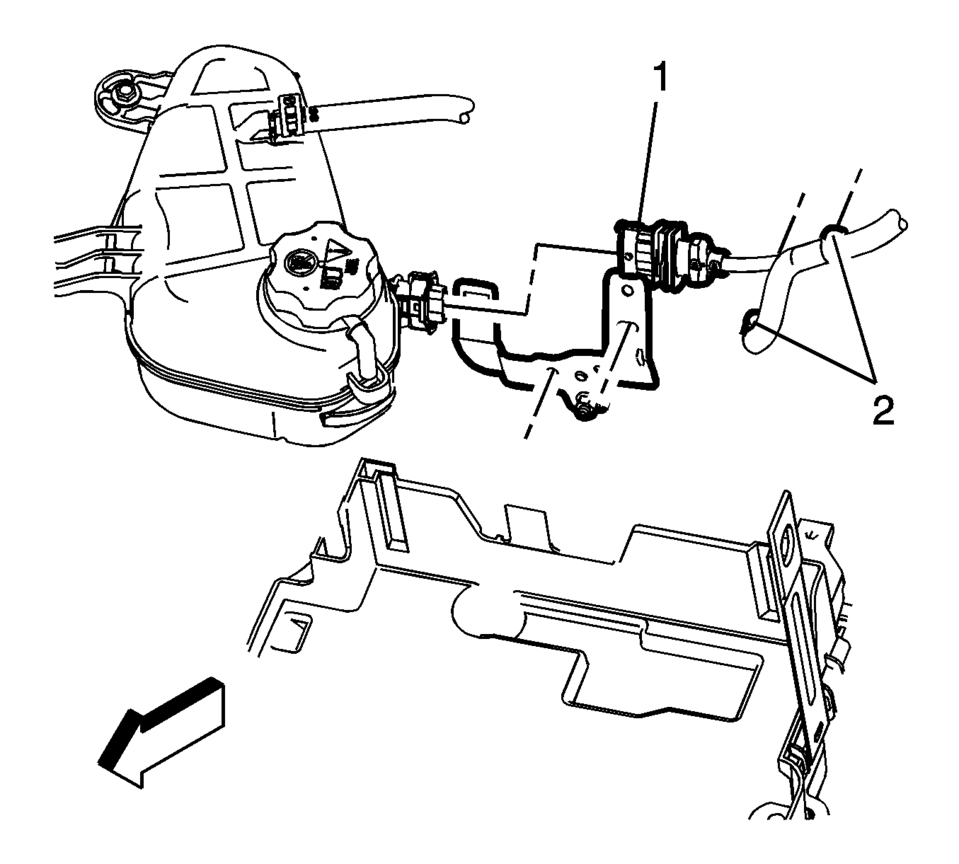
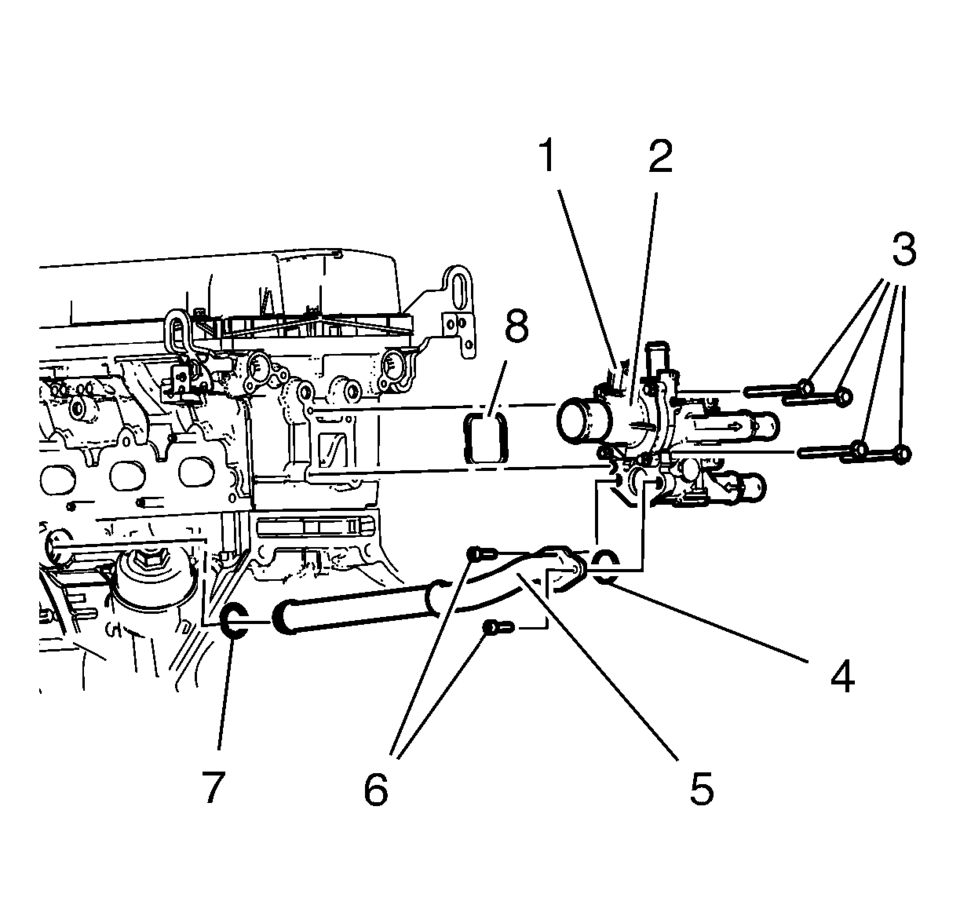
- Disconnect the engine harness connector (1) and harness fasteners (2) from the engine harness bracket, attached to the thermostat housing.
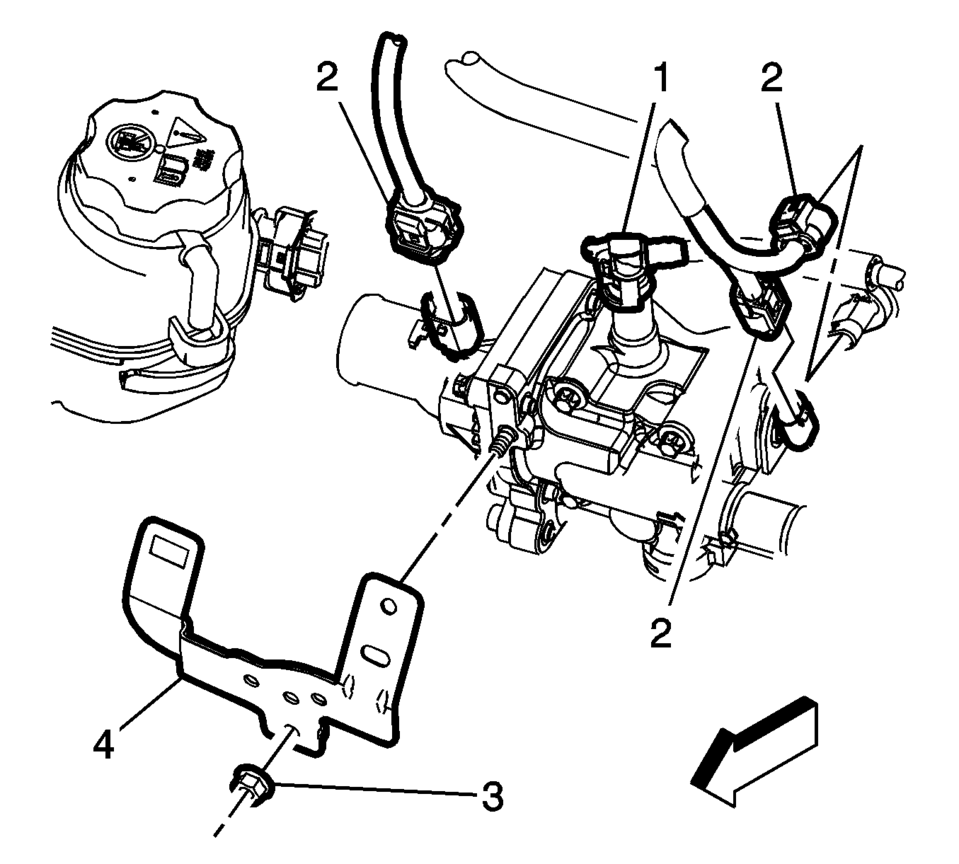
- Disconnect the throttle body heater inlet hose (1) and the electrical connectors (2) from the thermostat housing.
- Remove the engine harness bracket nut (3) and bracket (4) from the thermostat housing.
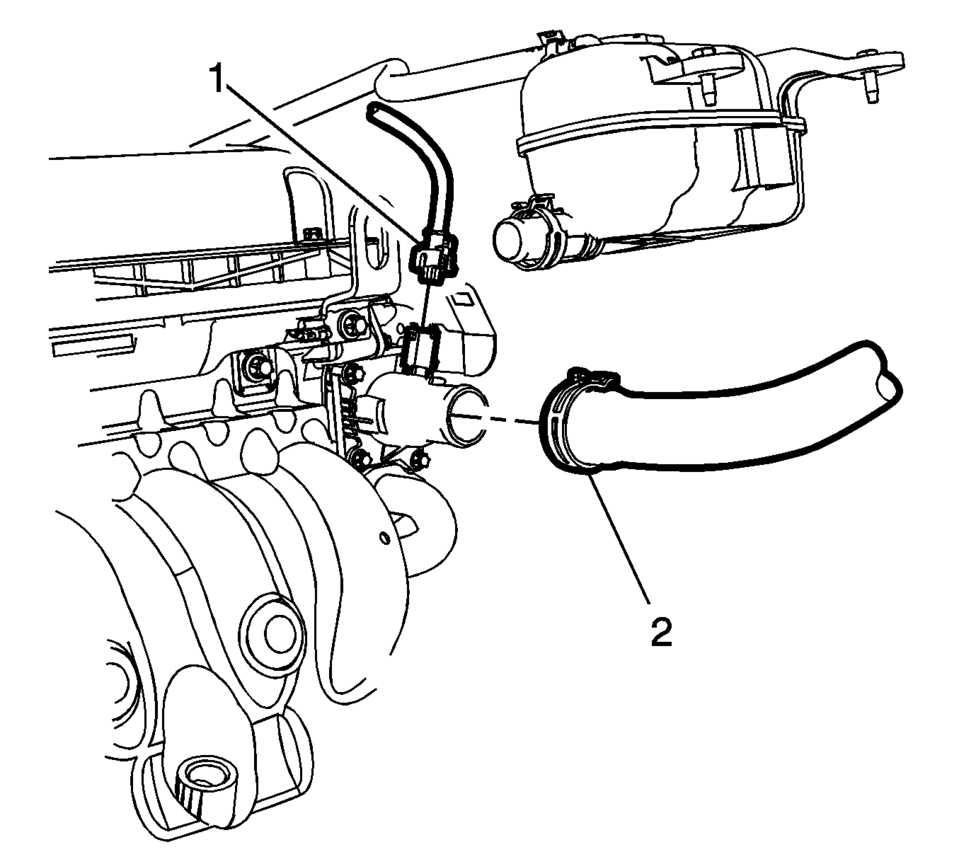
- Remove the radiator inlet hose (2) from the engine coolant thermostat housing.
- Remove the heater outlet hose from the engine coolant thermostat housing. Refer to Heater Outlet Hose Replacement.
- Remove the heater inlet hose from the engine coolant thermostat housing. Refer to Heater Inlet Hose Replacement.
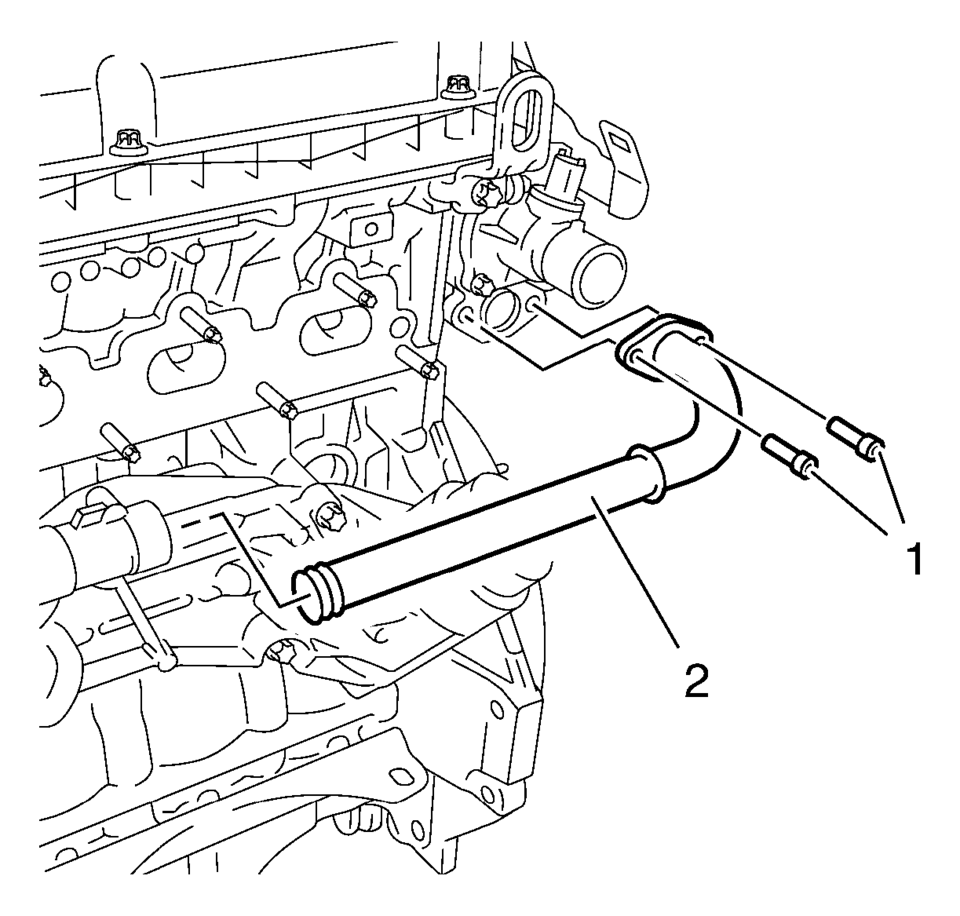
- Remove the engine oil cooler outlet pipe bolts (1).
- Remove the engine oil cooler outlet pipe (2) from the engine coolant thermostat housing.
- Remove the engine coolant thermostat housing mounting bolts (1) and discard the seal (2).
- Remove the engine coolant thermostat housing (3) from the engine.

- Installation Procedure
-
- Clean the sealing surface.
- Install a NEW engine coolant thermostat housing seal (2).
- Loosely install the engine coolant thermostat housing mounting bolts (1).
- Tighten the 4 engine coolant thermostat housing bolts to 8 Y (71 lb in)
in sequence (1?E?E?E).
- Install NEW engine oil cooler pipe seals (4, 7).
- Install the engine oil cooler pipe (5).
- Install the 2 engine oil cooler pipe bolts (6) and tighten to 8 Y
(71 lb in)
.
- Install the heater inlet hose to the engine coolant thermostat housing. Refer to Heater Inlet Hose Replacement.
- Install the heater outlet hose to the engine coolant thermostat housing. Refer to Heater Outlet Hose Replacement.
- Connect the electrical connectors (2) to the engine coolant thermostat housing.
- Install the throttle body heater inlet hose (1) to the engine coolant thermostat housing.
- Install the engine coolant thermostat housing bracket (4) and nut (3)
and tighten to 6 Y (53 lb in)
.
- Install the radiator inlet hose (2) to the engine coolant thermostat housing.
- Fill the cooling system. Refer to Cooling System Draining and Filling.
- Install the battery tray. Refer to Battery Tray Replacement.
- Start the engine and check for coolant leaks.

Caution:
Following the proper fastener tightening sequence and torque is essential. Failure to do so may fracture the thermostat housing.
Caution:
Refer to Fastener Caution.
Note:
Push the engine oil cooler pipe into the engine oil cooler.
 Engine Coolant Thermostat Housing Removal
Caution: Refer to Engine Coolant Thermostat Housing Caution.
Remove the engine coolant thermostat housing retainer nut (4).
Remove the engine coolant thermostat housing ...
 Engine Coolant Thermostat Installation
Caution: Refer to Engine Coolant Thermostat Housing Caution.
Clean the engine coolant sealing surfaces.
Install the engine coolant seal (1).
Install the engine coolant ...
Other materials:
Tires and Wheels Description and Operation (Tire Identification)
Identification
Accessory and warranty replacement must use TPC spec tires.
An outboard orientation stripe is added to the tread surface, with an
offset toward the outboard tire face.
All GM approved tires (Production, Service and Accessory) have a TPC
(Tire Performance C ...
Cylinder Head Disassemble
Special Tools
EN-840 Pliers/Remover
EN-8062 Valve Spring Compressor
EN-8062-5 Adapter
EN-50717-2 Compressor Assembly of EN-50717 Kit
For equivalent regional tools, refer to Special Tools.
Install the EN-50717?E assembly (1) to the EN-8062 compressor
(4).
Install the E ...
Front Differential Carrier Cleaning and Inspection
Front Differential Carrier Cleaning and Inspection
Callout
Component Name
Caution: After cleaning the transmission components, allow
to air dry. Do not use cloth or paper towels in order to dry any transmission
compo ...

0.0052