
Chevrolet Sonic Repair Manual: Engine Front Cover and Oil Pump Disassemble
- Engine Front Cover Disassemble
-
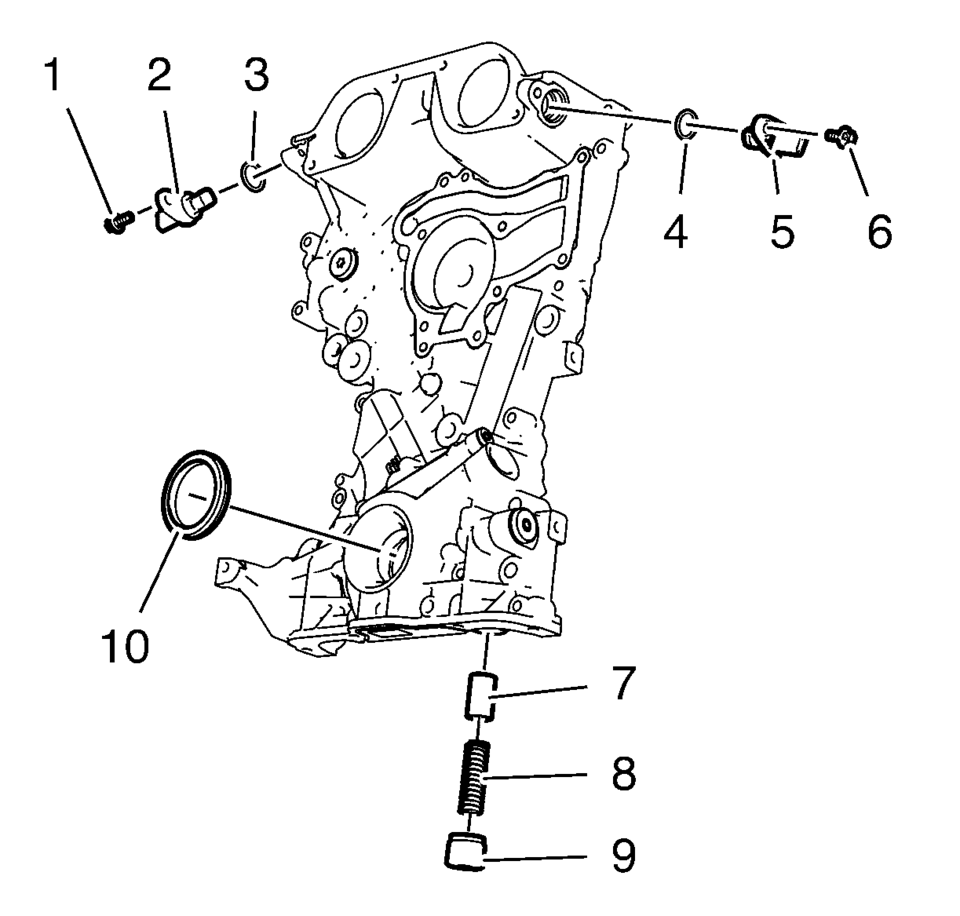
- Remove the intake camshaft position sensor bolt (1).
- Remove the intake camshaft position sensor (2) and the seal ring (3).
- Remove the exhaust camshaft position sensor bolt (6).
- Remove the exhaust camshaft position sensor (5) and the seal ring (4).
- Remove the oil pressure relief valve (7, 8 and 9)
- Remove the crankshaft front oil seal (10).
- Oil Pump Removal
-
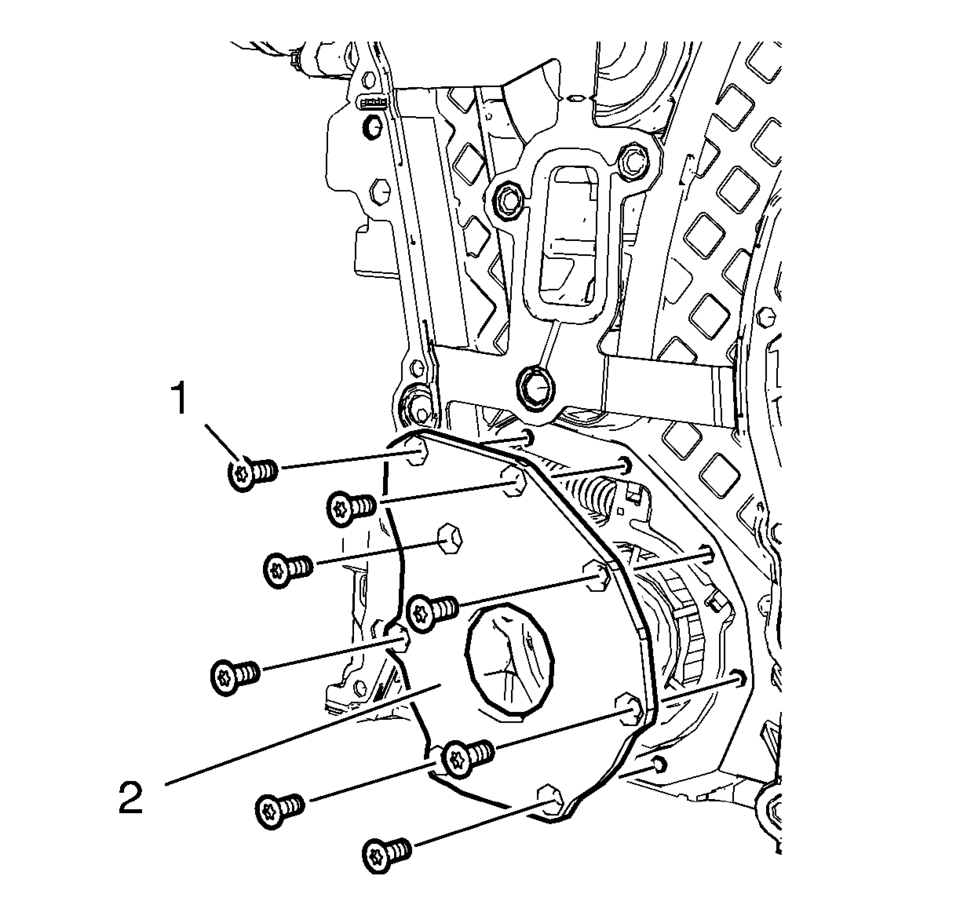
- Remove the 8 oil pump cover bolts (1).
- Remove the oil pump cover (2).
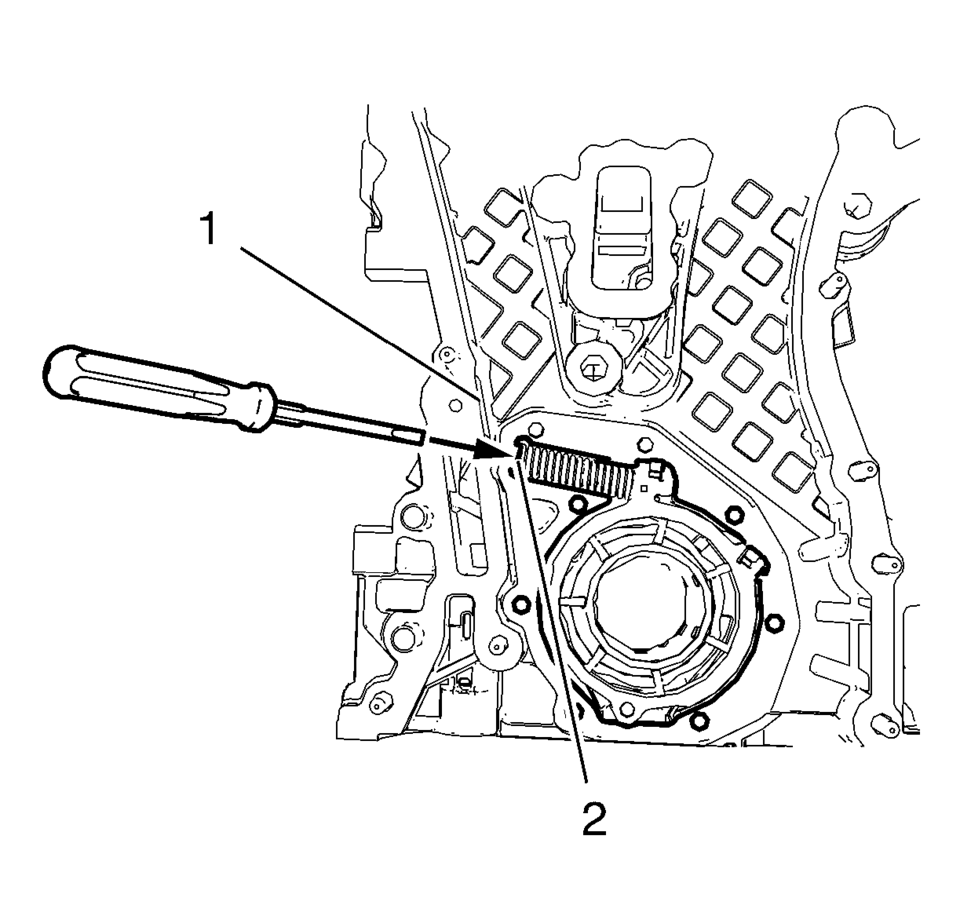
- Protect the engine front cover edge (1) with a suitable piece of plastic.
- Compress the oil pump slide spring with a screw driver and remove the oil pump slide spring along with the oil pump slide spring pin.
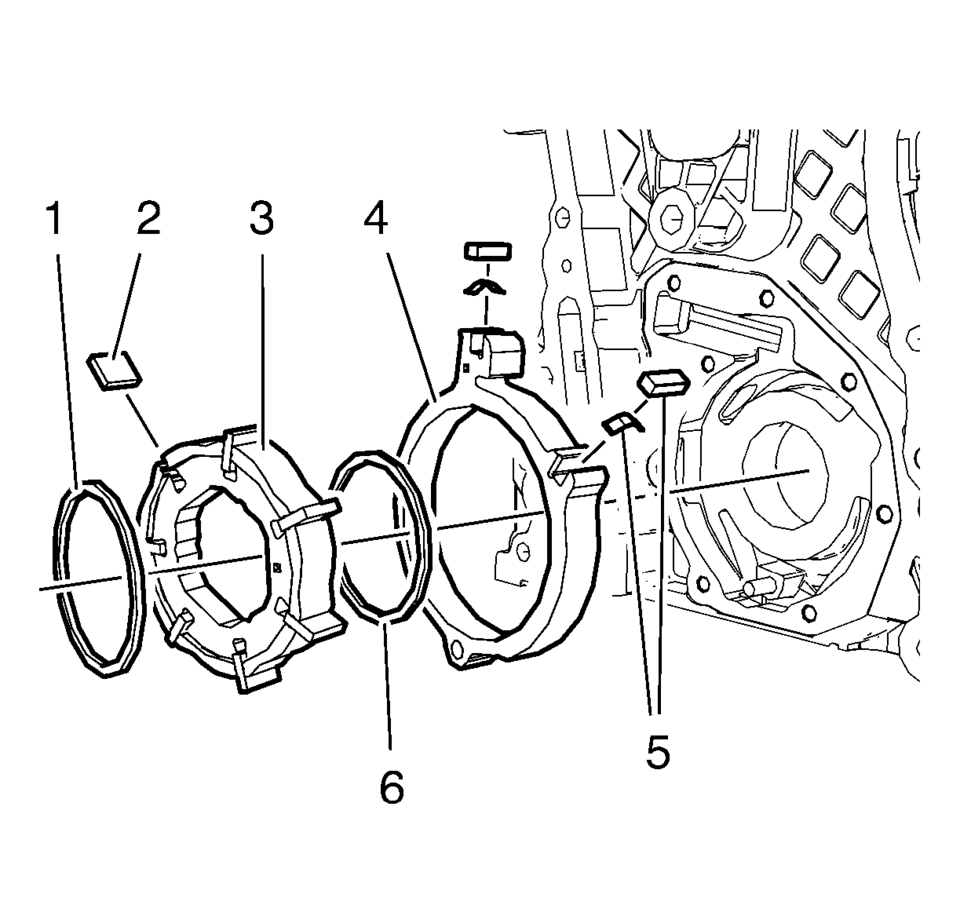
- Remove the oil pump components in the following order:
- Outer oil pump vane ring (1).
- Oil pump vane rotor (3) and the 7 oil pump vanes (2).
- Inner oil pump vane ring (6).
- Oil pump slide (4) and the 2 oil pump slide seals with the 2 oil pump slide seal springs (5).
Warning:
Before removing the spring, cover the spring with a towel to prevent the spring from flying and possibly causing damage or personal injury.
Note:
Position a screw driver between the oil pump slide spring windings (2).
Note:
Mind the installation position of the oil pump components.
 Engine Front Cover and Oil Pump Cleaning and Inspection
Engine Front Cover Cleaning Procedure
Clean the engine front cover sealing surface.
Warning: Wear safety glasses when using compressed air in
order to prevent eye injury. ...
 Engine Front Cover and Oil Pump Installation
Special Tools
EN-952 Fixing Pin
EN-953-A Fixing Tool
EN-49977-100 Transmitter Disc Fixation
EN-49977-200 Fixing Tool
For equivalent regional tools, refer to Special Tools.
...
Other materials:
Floor Carpet Drying
If the carpet or the pad or insulator is wet, use the following criteria for
drying or for replacing the components:
For a 1-piece carpet assembly bonded to a cotton or a fiber padding, replace
the entire assembly.
For a 2-piece carpet assembly with a cotton or a fiber padding, replace ...
Water Inlet Replacement (LUV)
Removal Procedure
Drain the cooling system. Refer to Cooling System Draining and Filling.
Remove the air cleaner outlet duct. Refer to Air Cleaner Outlet Duct
Replacement.
Remove the engine coolant temperature sensor connector (1) and the radiator
ou ...
2-6 Clutch Piston Installation (6T40/45/50)
2-6 Clutch Piston Installation
Callout
Component Name
1
2?E Clutch Piston Assembly
Note:
Position the 2?E piston air bleed and large slot toward the
top of the case.
DT-47796 seal protector ...

0.0057