Chevrolet Sonic Repair Manual: Engine Mount Bracket Replacement - Right Side
|
Callout |
Component Name |
|---|---|
Preliminary Procedures
|
|
|
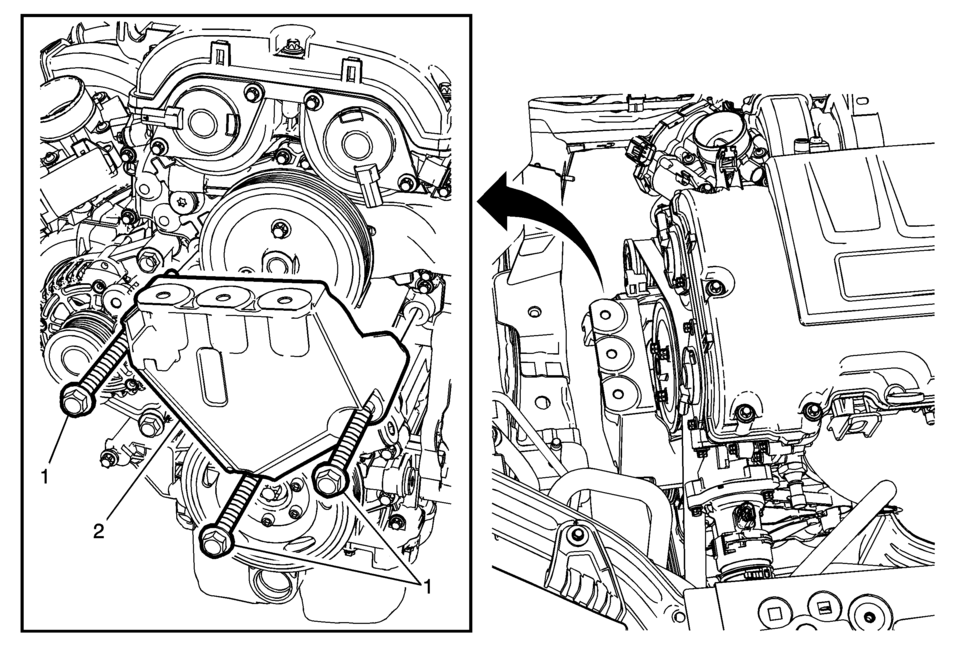
1 |
Engine Mount Bracket Fastener (Qty: 3) Caution: This component uses torque-to-yield bolts. When servicing this component do not reuse the bolts, New torque-to-yield bolts must be installed. Reusing used torque-to-yield bolts will not provide proper bolt torque and clamp load. Failure to install NEW torque-to-yield bolts may lead to engine damage. Caution: Refer to Fastener Caution. Procedure
Raise and lower the engine as needed to access the bolts. Tighten
62 Y (46 lb ft) |
|
2 |
Engine Mount Bracket |
 Engine Mount Bracket Replacement
Engine Mount Bracket Replacement
Callout
Component Name
Preliminary Procedure
Remove the engine mount. Refer to Engine Mount Re ...
 Engine Mount Replacement
Engine Mount Replacement
Callout
Component Name
Preliminary Procedures
Remove the air cleaner assembly. Refer to Air Cleaner Assemb ...
Other materials:
Hood Rear Weatherstrip Replacement
in
Hood Rear Weatherstrip Replacement
Callout
Component Name
1
Hood Rear Weatherstrip
Procedure
The hood rear weatherstrip is held in place with 10?€‰plastic retainers
that are part of the air inlet grille. ...
Transmission Control Replacement
Removal Procedure
Remove the floor console. Refer to
Front Floor Console Replacement.
Lift both cable adjustment retainers (1), one for
each cable, to release the shift lever and selector lever cable.
.1
Pull the shift lever and selector lever cable ret ...
Vehicle Dynamic Control (VDC) OFF switch
The Nissan Armada should normally be driven with the Vehicle Dynamic Control
(VDC) system enabled, as it helps maintain vehicle stability and traction.
In situations such as being stuck in mud, snow, or sand, the Nissan Armada VDC
system may reduce engine power to limit wheel spin. This can ...

0.0079