Chevrolet Sonic Repair Manual: Engine Mount Replacement
|
Callout |
Component Name |
|---|---|
Preliminary Procedures
|
|
|
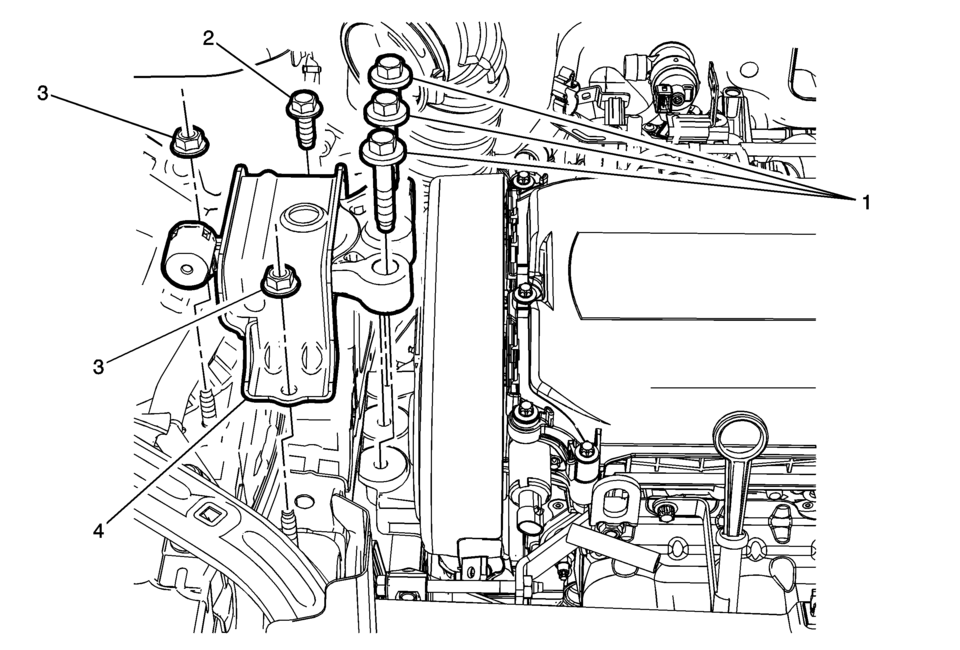
1 |
Engine Mount Bracket to Mount Bolt (Qty; 3) Caution: Refer to Fastener Caution. Note: Use NEW bolts whenever mount is removed.
58 Y (43 lb ft) Special Tools
EN-45059 Torque Angle Sensor Kit. For equivalent regional tools, refer to Special Tools |
|
2 |
Engine Mount Bracket Bolt (Qty; 1) Note: Ensure to use a NEW bolt whenever the mount is removed.
58 Y (43 lb ft) |
|
3 |
Engine Mount Nut (Qty; 2) Tighten
58 Y (43 lb ft) |
|
4 |
Engine Mount |
 Engine Mount Bracket Replacement - Right Side
Engine Mount Bracket Replacement - Right Side
Callout
Component Name
Preliminary Procedures
Remove the engine mount. Refer to Engin ...
 Engine Mount Replacement - Right Side
..
Engine Mount Replacement - Right Side
Callout
Component Name
Preliminary Procedures
Remove the air cleaner assembly. Refer to Air ...
Other materials:
Hydraulic Brake System Flushing
Warning: Refer to Brake Fluid Irritant Warning.
Caution: Refer to Brake Fluid Effects on Paint and Electrical Components
Caution.
Inspect the brake fluid for the following conditions, indicating brake fluid
contamination:
Fluid separation, indicating 2 types of fl ...
Engine Coolant Temperature Sensor Replacement (Radiator)
Engine Coolant Temperature Sensor Replacement - Radiator
Callout
Component Name
Preliminary Procedures
Drain the cooling system. Refer to Cooling System
Draining and Filling.
1
Retaining ...
STANDARD mode
The symbol of this Nissan Armada mode is
.
STANDARD mode is the default setting in the Nissan Armada and is optimized for
everyday driving. It provides a balanced combination of performance, comfort, and
efficiency suitable for most road conditions.
ECO mode
Basic information
The symbol of ...

0.0076