Chevrolet Sonic Repair Manual: Engine Mount Replacement - Right Side
|
Callout |
Component Name |
|---|---|
Preliminary Procedures
|
|
|
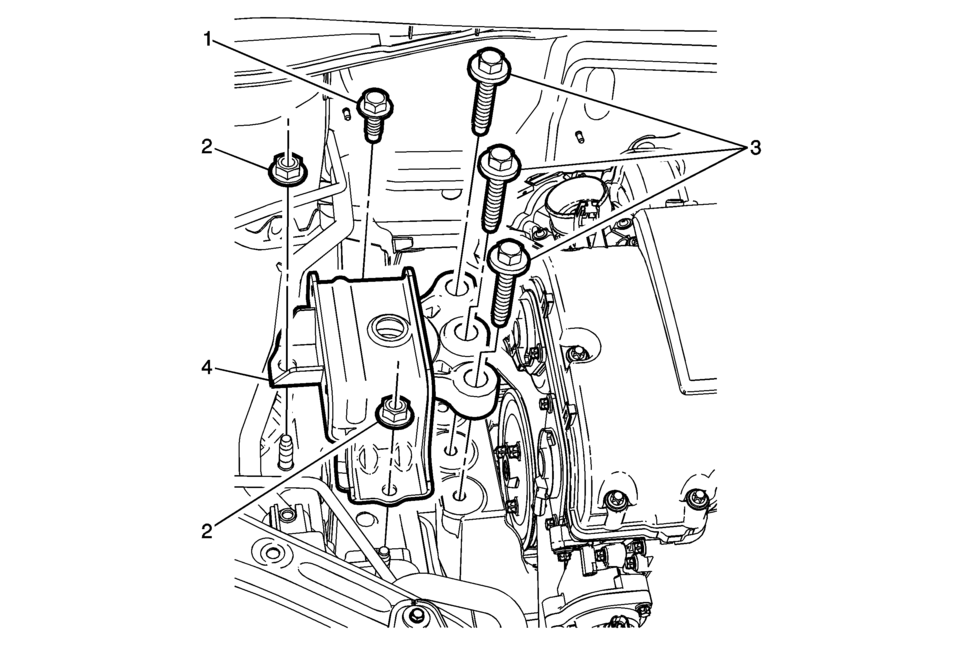
1 |
Engine Mount Bolt (Qty: 1) Caution: Refer to Fastener Caution.
62 Y (46 lb ft) |
|
2 |
Engine Mount Nut (Qty: 2) Tighten
62 Y (46 lb ft) |
|
3 |
Engine Mount Bracket to Mount Bolt (Qty: 3) Procedure
Ensure to use a NEW bolt whenever the mount is removed. . Tighten
50 Y+ 60° to 75° (37 lb ft + 60° to 75°) Special Tools
EN-470-B Angular Torque Wrench For equivalent regional tools, refer to Special Tools |
|
4 |
Engine Mount |
 Engine Mount Replacement
Engine Mount Replacement
Callout
Component Name
Preliminary Procedures
Remove the air cleaner assembly. Refer to Air Cleaner Assemb ...
 Engine Support Fixture
2-
Engine Support Fixture
Callout
Component Name
Preliminary Procedure
Remove the radiator opening upper cover. Refer to Front O ...
Other materials:
Special Tools
Illustration
Tool Number/Description
EL–50334–20
Multi-Media Interface Tester (MIT)
EL–50334–50
USB Cable and Adapter Kit
EL-48028
Digital Radio Test ...
Outside Rearview Mirror Replacement (Power)
Outside Rearview Mirror Replacement
Callout
Component Name
Preliminary Procedures
Remove the front side door upper front trim panel. Refer to Front
Side Door Upper Front Trim Panel Replacement.
Remove the outside rearview ...
Body Control System Description and Operation
The body control system consists of the body control module (BCM), communications,
and various input and outputs. Some inputs, outputs and messages require other modules
to interact with the BCM. The BCM also has discrete input and output terminals to
control the vehicle's body functions. ...

0.0053