Chevrolet Sonic Repair Manual: Front Brake Hose Replacement
- Removal Procedure
-
Warning:
Refer to Brake Dust Warning.
Warning:
Refer to Brake Fluid Irritant Warning.
- Raise and support the vehicle. Refer to Lifting and Jacking the Vehicle.
- Remove the tire and wheel assembly. Refer to Tire and Wheel Removal and Installation.
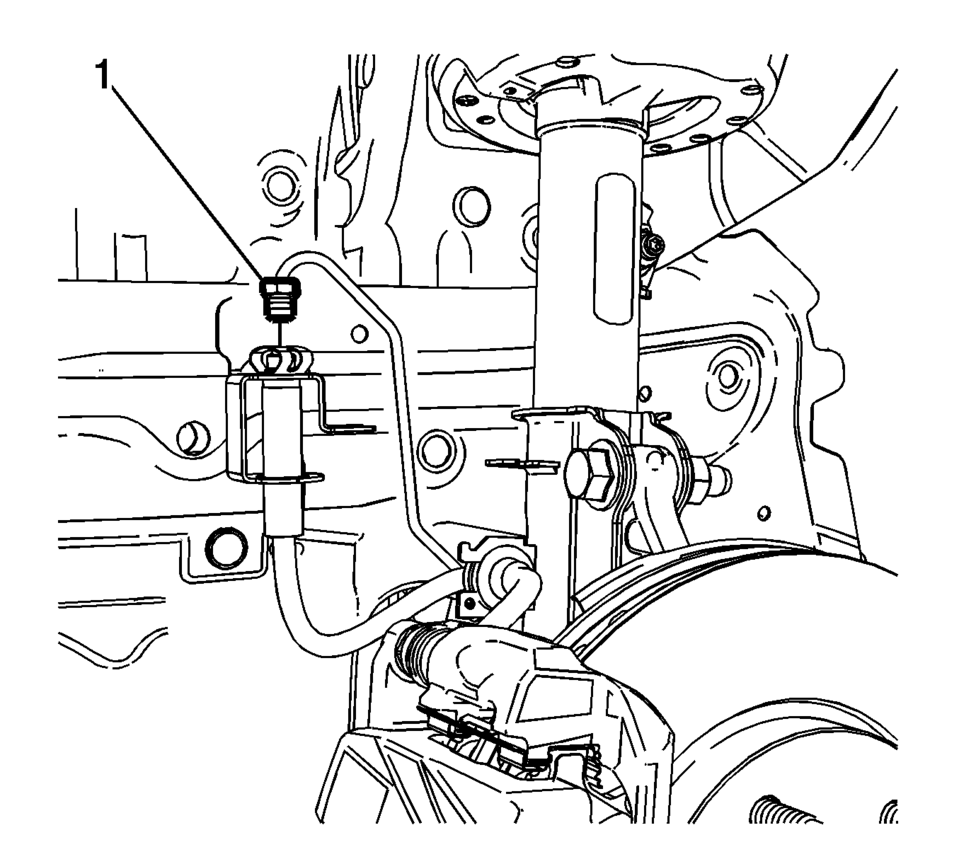
- Remove the brake pipe fitting (1) from the front brake hose.
- Cap the brake pipe fitting to prevent brake fluid loss and contamination.
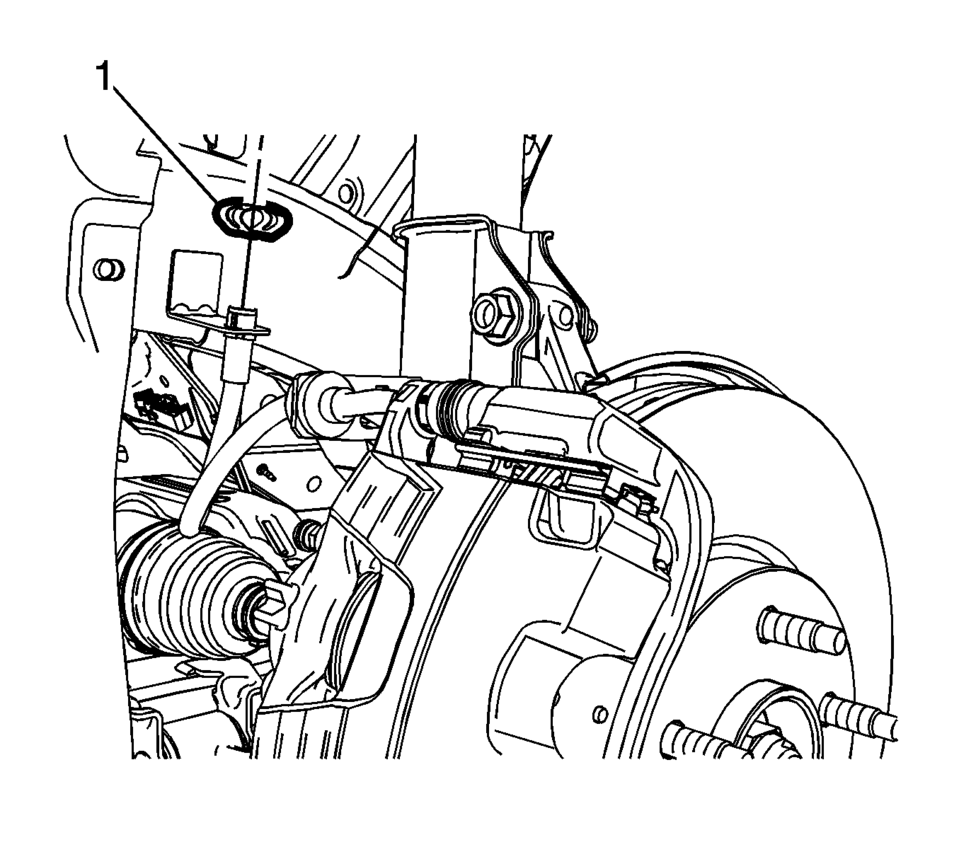
- Remove the brake hose retainer (1).
- Release the brake hose grommet (1) from the strut bracket.
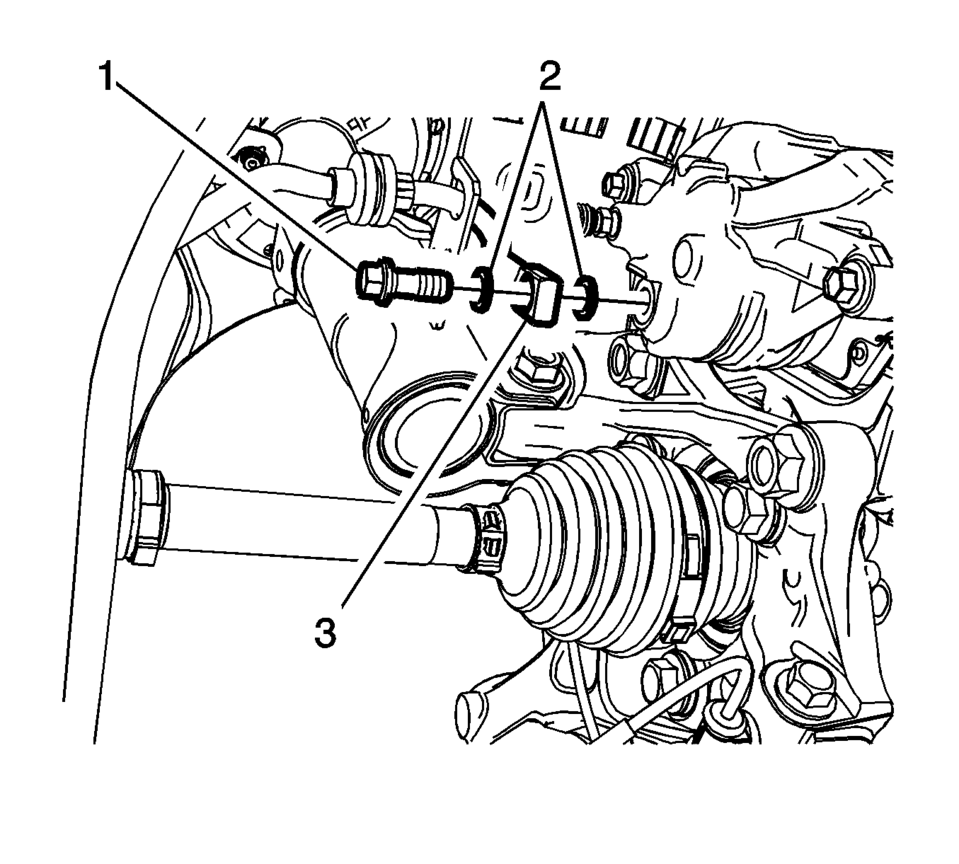
- Remove the brake hose fitting bolt (1).
- Remove and discard the brake hose fitting gaskets (2) from the brake hose fitting (3).
- Remove the brake hose.
Danger:
Do not use a service jack to lift this vehicle. Lifting the vehicle with a jack could cause the vehicle to slip off the jack and roll; this could cause injury or death.
- Installation Procedure
-
- Assemble the brake hose fitting bolt (1) and the new brake hose fitting gaskets (2) to the brake hose fitting (3).
- Install the brake hose assembly to the brake caliper and tighten the
fitting bolt to 40 Y (30 lb ft)
.
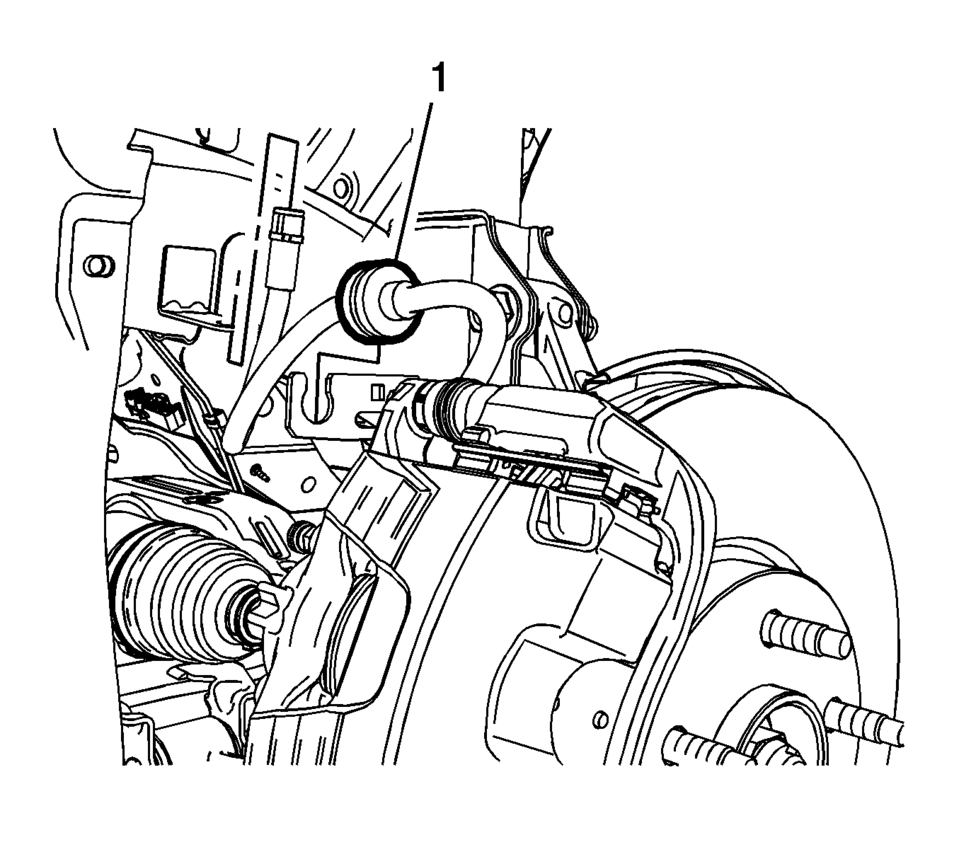
- Install the brake hose grommet (1) to the strut bracket.
- Install the brake hose to the wheelhouse bracket and install the retainer (1).
- Install the brake pipe fitting (1) to the front brake hose and tighten
the fitting to 18 Y (13 lb ft)
.
- Bleed the hydraulic brake system. Refer to Hydraulic Brake System Bleeding.
- Install the tire and wheel assembly. Refer to Tire and Wheel Removal and Installation.
Caution:
Refer to Fastener Caution.
 Master Cylinder Reservoir Replacement
Removal Procedure
Warning: Refer to Brake Fluid Irritant Warning.
Caution: Refer to Brake Fluid Effects on Paint and Electrical
Components Caution.
Remove the brak ...
 Brake Pedal Assembly Replacement
Removal Procedure
Remove the battery tray. Refer to Battery Tray Replacement.
Remove the power vacuum brake booster bolts (1).
Remove the brake pedal ass ...
Other materials:
Pairing with Touchscreen
A Bluetooth-enabled cell phone must be paired to the Bluetooth system and then
connected to the vehicle before it can be used. See your cell phone manufacturer's
user guide for Bluetooth functions before pairing the cell phone. If a Bluetooth
phone is not connected, calls will be made usin ...
Rear Wheelhouse Liner Replacement (Hatchback - Right)
Rear Wheelhouse Liner Replacement
Callout
Component Name
Preliminary Procedure
Remove the tire and wheel assembly. Refer to Tire and Wheel Removal and
Installation.
1
Rear Wheelhouse Panel Liner ...
Water Pump Pulley Replacement (LUV)
Removal Procedure
Remove the air cleaner assembly. Refer to Air Cleaner Assembly Replacement.
Remove the engine mount bracket. Refer to Engine Mount Bracket Replacement
- Right Side.
Remove the drive belt. Refer to Drive Belt Replacement.
Loosen the 3̴ ...

0.0053