Chevrolet Sonic Repair Manual: Front Brake Shield Replacement
- Removal Procedure
-
- Raise and support the vehicle. Refer to Lifting and Jacking the Vehicle.
- Remove the front tire and wheel assembly. Refer to Tire and Wheel Removal and Installation.
- Remove the front brake rotor. Refer to Front Brake Rotor Replacement.
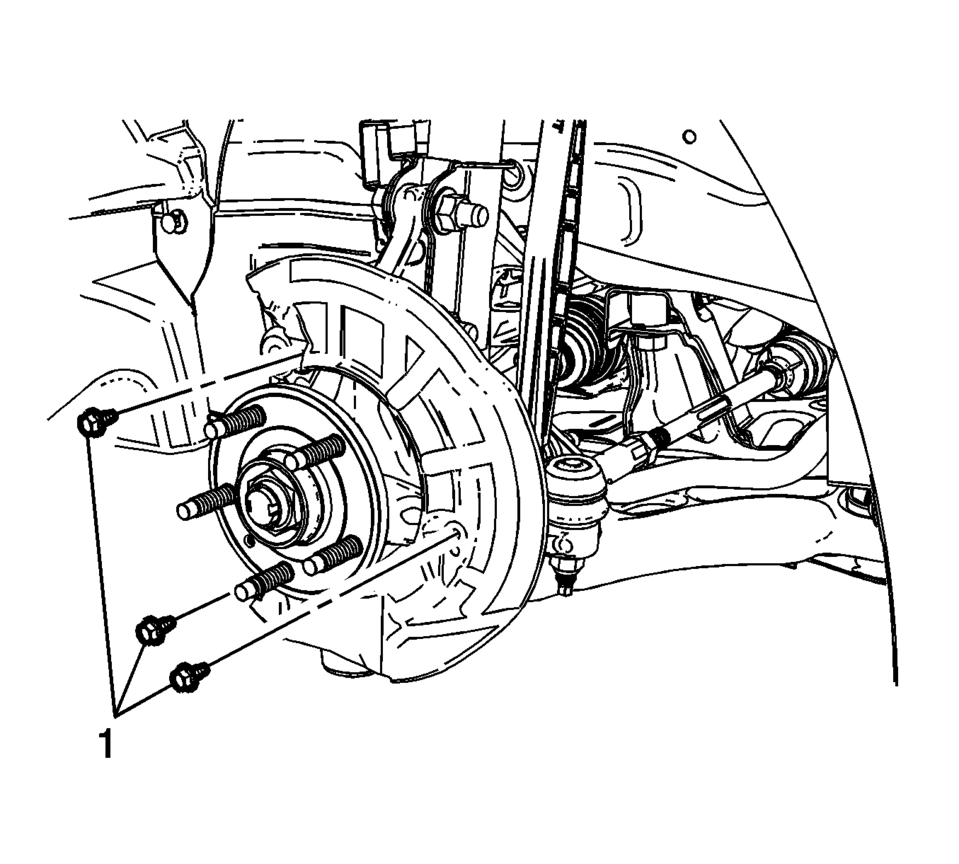
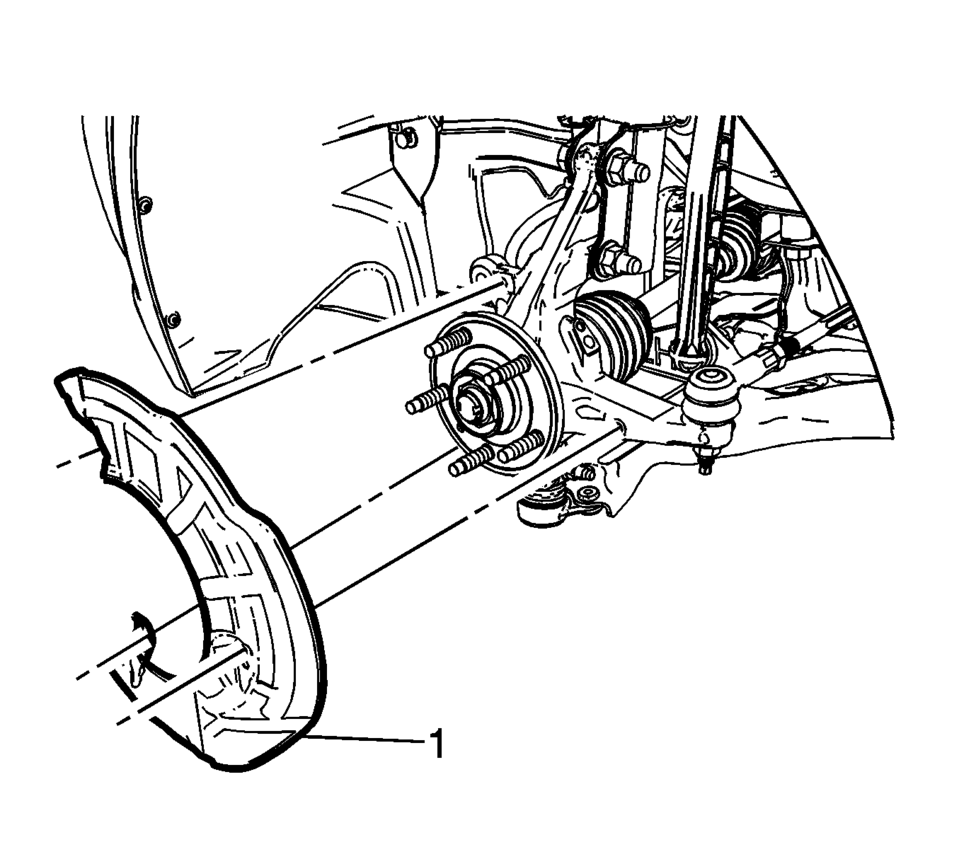
- Remove the front brake shield bolts (1).
- Remove the front brake shield (1).
Warning:
Refer to Brake Dust Warning.
pin.
- Installation Procedure
-
- Install the front brake shield (1).
- Install the front brake shield bolts (1) and tighten to 9 Y (80 lb in)
.
- Install the front brake rotor. Refer to Front Brake Rotor Replacement.
- Install the tire and wheel assembly. Refer to Tire and Wheel Removal and Installation.
pin.
Caution:
Refer to Fastener Caution.
 Front Brake Rotor Replacement
Special Tools
CH-41013 Rotor Resurfacing Kit
CH-42450-A Wheel Hub Resurfacing Kit
For equivalent regional tools, refer to Special Tools.
Removal Procedure
Warning: Refer to Bra ...
 Front Disc Brake Mounting and Hardware Inspection
Warning: Refer to Brake Dust Warning.
Inspect the fluid level in the brake master cylinder reservoir.
If the brake fluid level is midway between the maximum-full point and the
...
Other materials:
Ball Joint Inspection
Caution: Refer to Vehicle Lifting and Jacking Caution.
Raise the front of the vehicle to allow the front suspension to hang free.
Grasp the tire at the top and the bottom.
Move the top of the tire in an in-and-out motion.
Look for any horizontal movement of the knuckle relativ ...
Secondary Air Injection Check Valve Replacement
Secondary Air Injection Check Valve Replacement
Callout
Component Name
1
Secondary Air Injection Outlet Pipe
Note: Squeeze the retainer on opposite sides to release.
2
Seconda ...
How to enable/disable the I-BSI system
Example
ProPILOT Assist switch (design may vary depending on the Nissan Armada model)
Vehicle information display
Steering-wheel-mounted control (right side)
To configure the Nissan Armada Intelligent Blind Spot Intervention (I-BSI) system,
follow these steps:
1. Press the
butt ...

0.0072