Chevrolet Sonic Repair Manual: Front Bumper Impact Bar Replacement
- Removal Procedure
-
- Disable the SIR system. Refer to SIR Disabling and Enabling.
- Disconnect the negative battery cable. Refer to Battery Negative Cable Disconnection and Connection.
- Remove all related panels and components.
- Repair as much of the damage as possible to factory specifications. Refer to Dimensions - Body.
- Remove the sealers and anti-corrosion materials from the repair area. Refer to Anti-Corrosion Treatment and Repair.
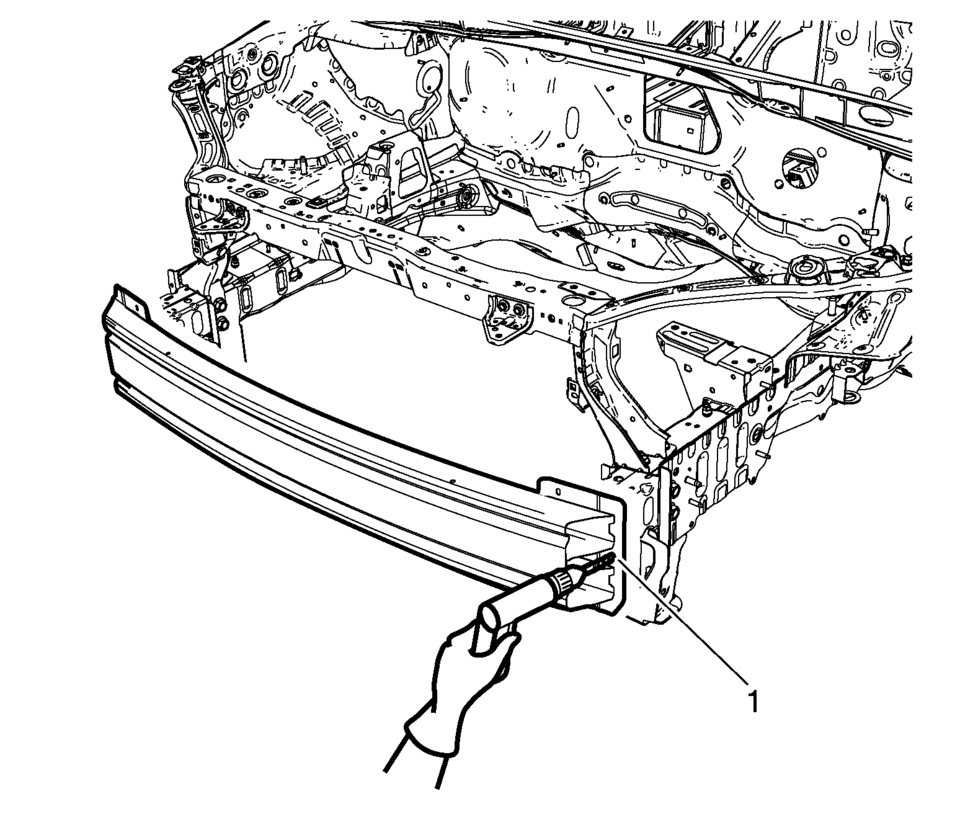
- Locate and mark all factory welds.
- Drill all factory welds (1). Note the number and location of welds for installation of the service assembly.
- Remove the damaged impact bar (1).
Warning:
Refer to Approved Equipment for Collision Repair Warning.
- Installation Procedure
-
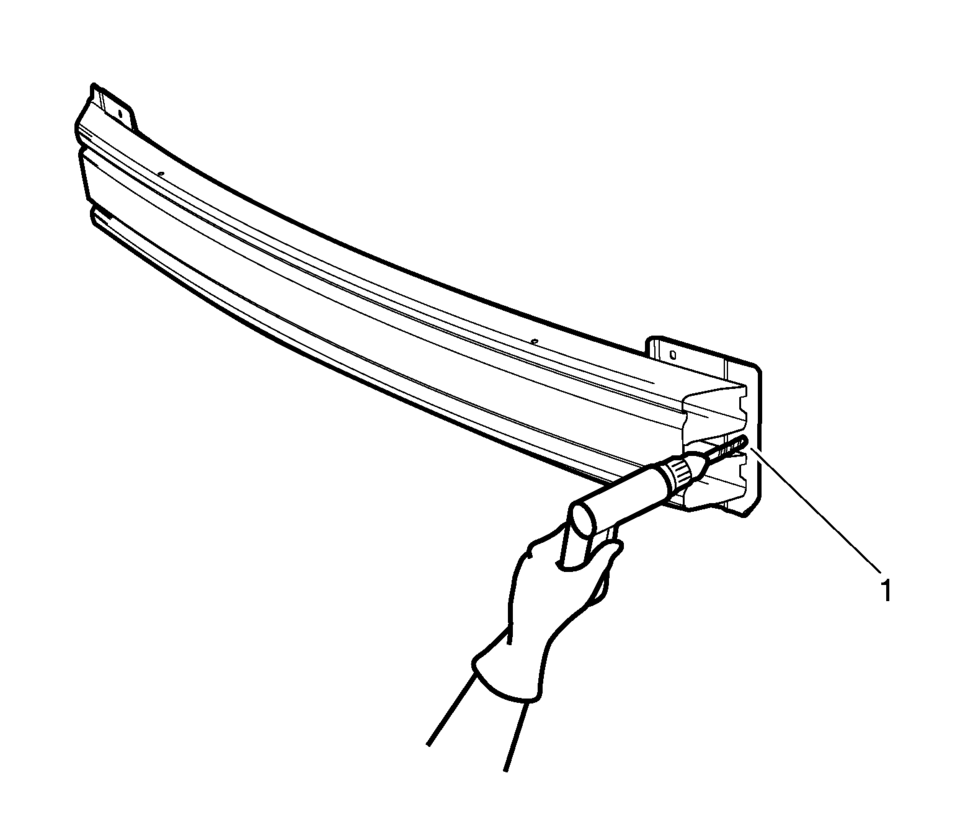
- Drill 8 mm (5/16 in) holes for plug welding along the edges of the service panel (1) as noted from the original panel.
- Clean and prepare the attaching surfaces for welding.
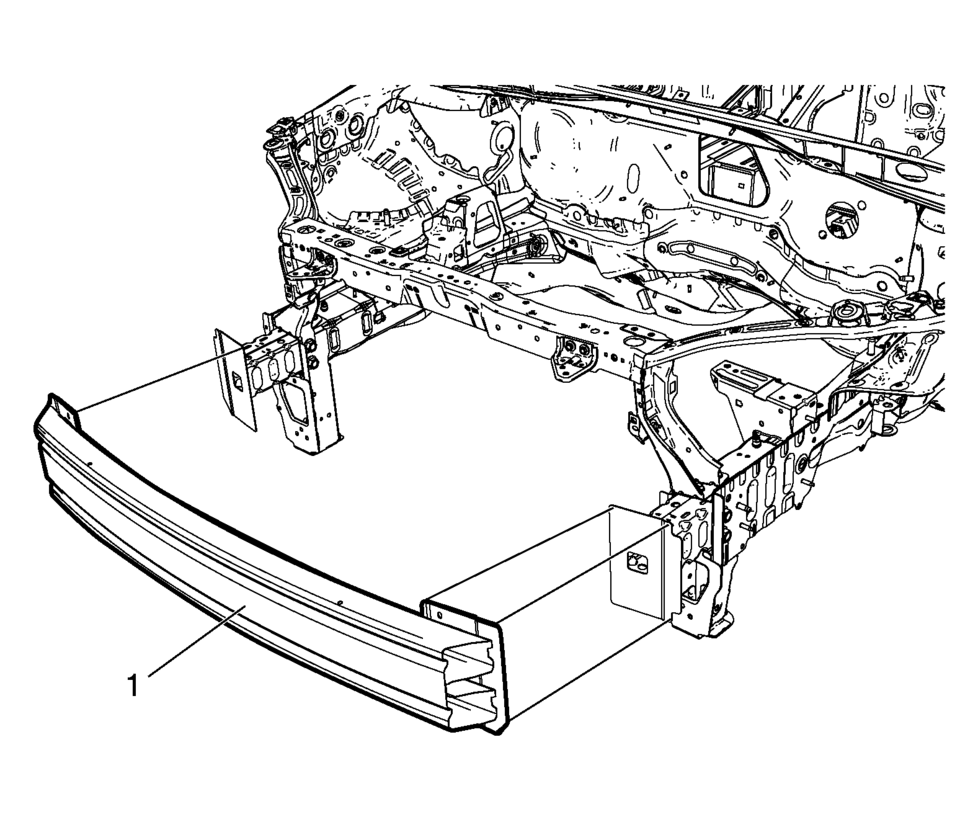
- Position the impact bar (1) on the vehicle.
- Verify the fit of the bar.
- Clamp the impact bar into position.
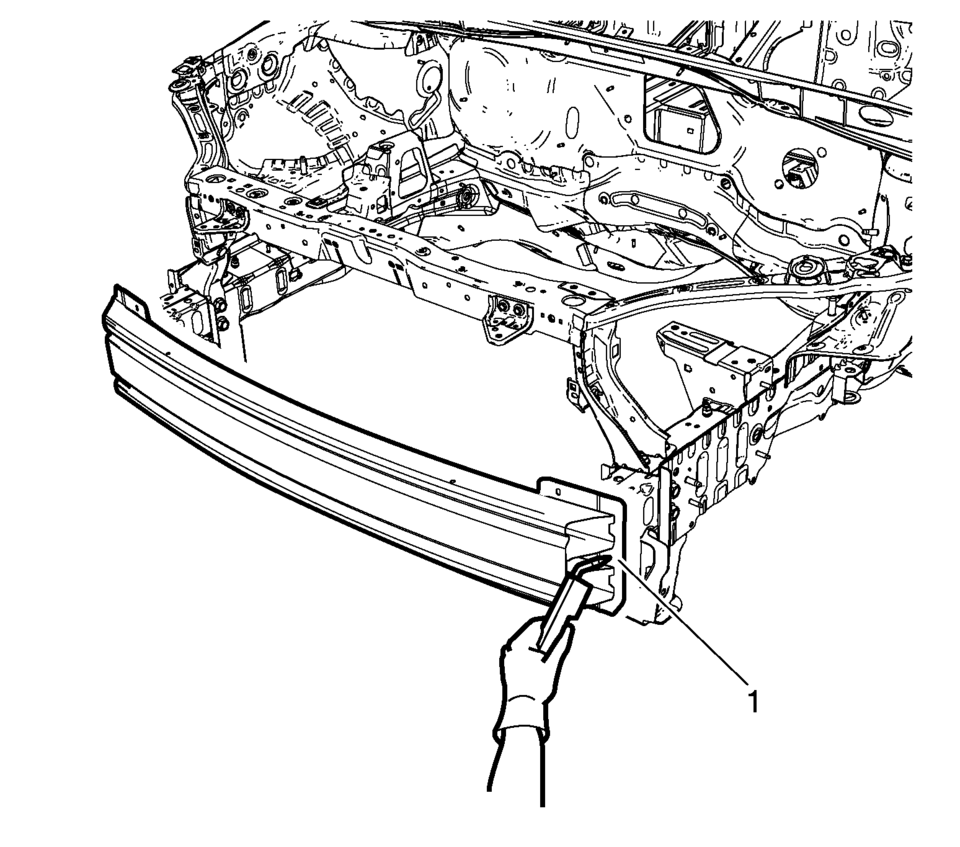
- Plug weld accordingly (1).
- Apply the sealers and anti-corrosion materials to the repair area, as necessary. Refer to Anti-Corrosion Treatment and Repair.
- Paint the repaired area. Refer to Basecoat/Clearcoat Paint Systems.
- Install all related panels and components.
- Connect the negative battery cable. Refer to Battery Negative Cable Disconnection and Connection.
- Enable the SIR system. Refer to SIR Disabling and Enabling.
 Front Bumper Impact Bar Lower Bracket Replacement
Front Bumper Impact Bar Lower Bracket Replacement
Callout
Component Name
Preliminary Procedure
Remove the front bumper opening ...
 Front Bumper Lower Impact Bar Replacement
Front Bumper Lower Impact Bar Replacement
Callout
Component Name
Preliminary Procedure
Remove the front bumper fascia. Refer to ...
Other materials:
Input Speed Sensor Replacement
Removal Procedure
Remove the control solenoid valve and transmission control module assembly.
Refer to Control Solenoid Valve and Transmission Control Module Assembly
Replacement.
Remove the input speed sensor bolt (2) M6 x 23.
Unlock t ...
Fastener Tightening Specifications - Wheels
Fastener Tightening Specifications
Application
Specification
Metric
English
Clamp Fit TPM Stem Locknut
7 Y Dynamically
62 lb in
Clamp ...
Heater Outlet Hose Replacement (LUV)
Heater Outlet Hose Replacement
Callout
Component Name
Preliminary Procedures
Drain the engine coolant. Refer to Cooling System Draining and Filling.
Remove the air cleaner assembly. Refer to Air Cleaner Assembly Replacemen ...

0.006