
Chevrolet Sonic Repair Manual: Front End Inflatable Restraint Discriminating Sensor Replacement
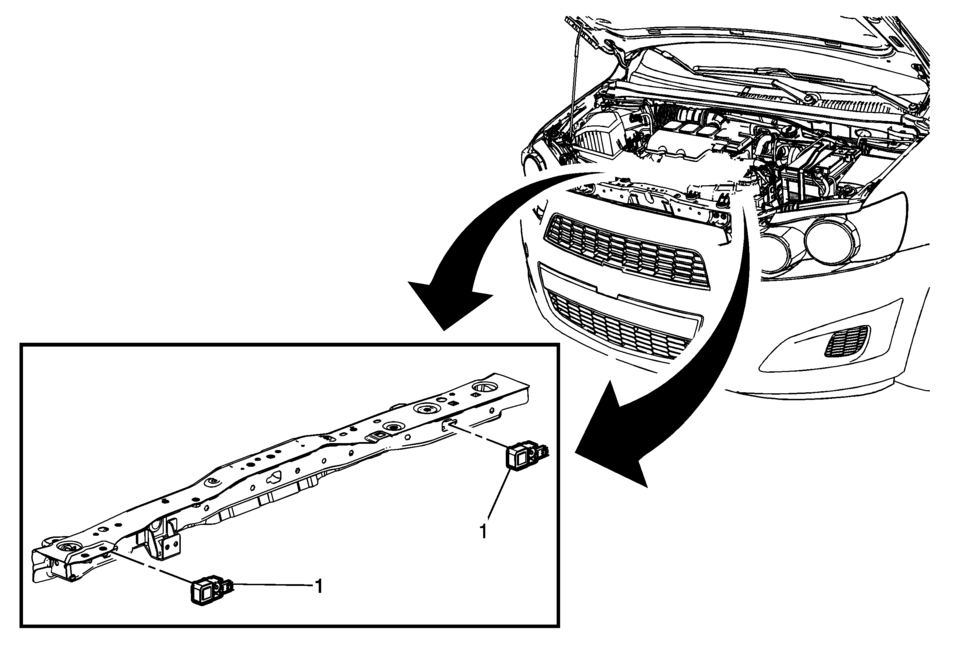
|
Callout |
Component Name |
|---|---|
|
Warning: Refer to SIR Warning. Warning: Refer to SIR Inflator Module Handling and Storage Warning. Warning: Following the deployment of a side impact air bag, inspect the following parts for damage. Replace these parts if necessary:
Failure to do so may cause future personal injury.
|
|
|
1 |
Front End Inflatable Restraint Discriminating Sensor Assembly (Qty:?€‰2) Caution: Refer to Fastener Caution.
7.5?€‰Y?€‰(66?€‰lb?€‰in) |
 Driver or Passenger Seat Shoulder Belt Replacement (without A69)
Driver or Passenger Seat Shoulder Belt Replacement
Callout
Component Name
Warning: Refer to SIR Warning.
Warning: ...
 Front Seat Belt Anchor Plate Tensioner Replacement
Front Seat Belt Anchor Plate Tensioner Replacement
Callout
Component Name
Warning: Refer to SIR Warning.
Warning: ...
Other materials:
Remote Keyless Entry (RKE) System Operation
The RKE transmitter may work up to 60?€‰m (195?€‰ft) away from the vehicle.
Other conditions can affect the performance of the transmitter. See Remote Keyless
Entry (RKE) System.
RKE without Remote Start Shown
The following buttons are on the transmitter:
Q ...
Drivetrain and Front Suspension Frame Replacement
Special Tools
EN-45059 Angle Meter
For equivalent regional tools, refer to Special Tools.
Removal Procedure
Support the radiator and condenser from above using the upper brackets
on each side.
Raise the vehicle on a hoist. Refer to Lifting and Jacking the Vehicle.
Re ...
Transmission Identification Information
mmmmmmmmmmm1c
The code for the M32-6 transmission will be found on the back of the transmission
housing, above the axle shaft. In addition, an Alphacode sticker will be placed
on the cover of the differential.
Transmission type (M32) (1)
Design (2)
Engine family (3) ...

0.0049