Chevrolet Sonic Repair Manual: Front End Upper Tie Bar Replacement
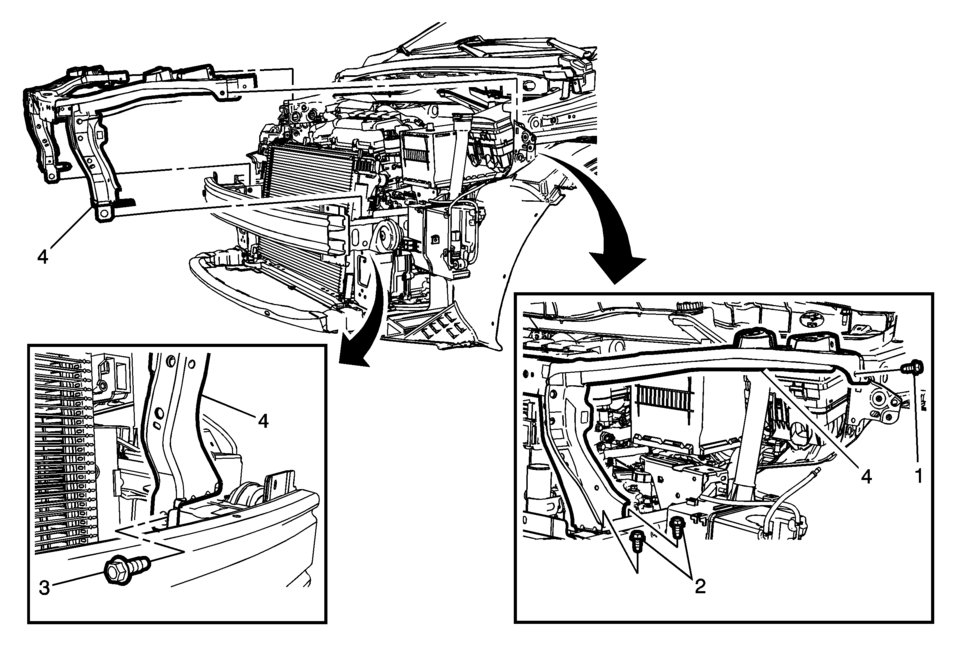
|
Callout |
Component Name |
|---|---|
Preliminary Procedures
|
|
|
1 |
Front End Upper Tie Bar Bolt (Qty:?‚ā¨‚Äį2) Caution: Refer to Fastener Caution.
9?‚ā¨‚ÄįY (80?‚ā¨‚Äįlb?‚ā¨‚Äįin) |
|
2 |
Front End Upper Tie Bar Lower Bolt (Qty:?‚ā¨‚Äį4) Tighten
22?‚ā¨‚ÄįY (16?‚ā¨‚Äįlb?‚ā¨‚Äįft) |
|
3 |
Front Bumper Impact Bar Bolt (Qty:?‚ā¨‚Äį2) Tighten
100?‚ā¨‚ÄįY (74?‚ā¨‚Äįlb?‚ā¨‚Äįft) |
|
4 |
Front End Upper Tie Bar Procedure
|
 Body Panel Paint Protector Replacement (VGC)
The paint protective film and vehicle surface temperature should be 13?‚ā¨‚Äú32?¬įC
(55?‚ā¨‚Äú90?¬įF) for best results.
Automatic car washes should be avoided for at least 24?‚ā¨‚Äįhours afte ...
 Front Opening Upper Cover Replacement
Front Opening Upper Cover Replacement
Callout
Component Name
1
Radiator Opening Upper Cover Screw (Qty:?‚ā¨‚Äį10)
...
Other materials:
Driver or Passenger Seat Head Restraint Guide Replacement
Driver or Passenger Seat Head Restraint Guide Replacement
Callout
Component Name
Preliminary Procedure
Remove the seat head restraint. Refer to Driver or Passenger Seat Head
Restraint Replacement.
1
...
Radiator Upper Bracket Replacement
Radiator Upper Bracket Replacement
Callout
Component Name
Preliminary Procedure
Remove the front bumper fascia assembly. Refer to Front Bumper Fascia
Replacement.
1
Radiator Upper Bracket Fasten ...
Lane Change Assist (ProPILOT Assist 2.1)
Basic information
Lane Change Assist in the Nissan Armada is an advanced feature of ProPILOT Assist
2.1, designed to support the driver during lane changes under appropriate conditions.
Before using this system, it is recommended to fully understand the ProPILOT Assist
functionality and its o ...

0.005