Chevrolet Sonic Repair Manual: Front Fender Replacement
|
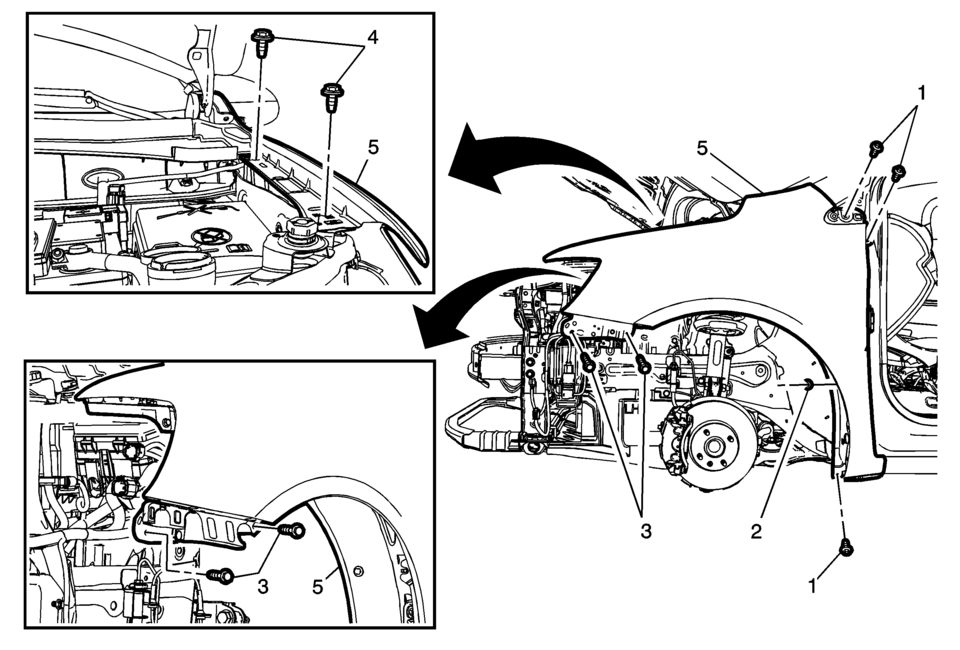
Callout |
Component Name |
|---|---|
Preliminary Procedures
|
|
|
1 |
Front Fender Bolt (Qty:?€‰3) Caution: Refer to Fastener Caution.
9?€‰Y (80?€‰lb?€‰in) |
|
2 |
Front Fender Nut Tighten
9?€‰Y (80?€‰lb?€‰in) |
|
3 |
Front Fender Bolt (Qty:?€‰2) Tighten
9?€‰Y (80?€‰lb?€‰in) |
|
4 |
Front Fender Bolt (Qty:?€‰2) Tighten
9?€‰Y (80?€‰lb?€‰in) |
|
5 |
Front Fender Procedure
|
 Tire and Wheel Removal and Installation
Special Tools
CH-41013 Rotor Resurfacing Kit
CH-42450-A Wheel Hub Resurfacing Kit
For equivalent regional tools, refer to Special Tools.
Removal Procedure
Raise and support the ...
 Rear End Panel Replacement
Removal Procedure
Warning: Refer to Approved Equipment for Collision Repair
Warning.
Warning: Refer to Glass and Sheet Metal Handling Warning.
Note ...
Other materials:
Older Children
Older children who have outgrown booster seats should wear the vehicle safety
belts.
The manufacturer instructions that come with the booster seat state the weight
and height limitations for that booster. Use a booster seat with a lap-shoulder
belt until the child passes the fit test below: ...
Underbody Rear Side Rail Extension Replacement
Removal Procedure
Warning: Refer to Approved Equipment for Collision Repair
Warning.
Warning: Refer to Glass and Sheet Metal Handling Warning.
Disable the SIR System. Refer to SIR Disabling and Enabling.
Disconnect the negative battery cable. Refer ...
Basic information
WARNING
In the Nissan Armada, always keep the doors securely locked while driving.
Combined with proper seat belt use, this significantly enhances passenger safety
by reducing the risk of ejection during an accident and preventing unauthorized
access from outside.
Before opening any d ...

0.0055