Chevrolet Sonic Repair Manual: Front Hinge Pillar Body Sectioning
- Removal Procedure
-
- Disable the SIR system. Refer to SIR Disabling and Enabling.
- Disconnect the negative battery cable. Refer to Battery Negative Cable Disconnection and Connection.
- Remove all the related panels and components.
- Visually inspect the damage. Repair as much of the damage as possible.
- Remove the sealers and anti-corrosion materials from the repair area, as necessary. Refer to Anti-Corrosion Treatment and Repair.
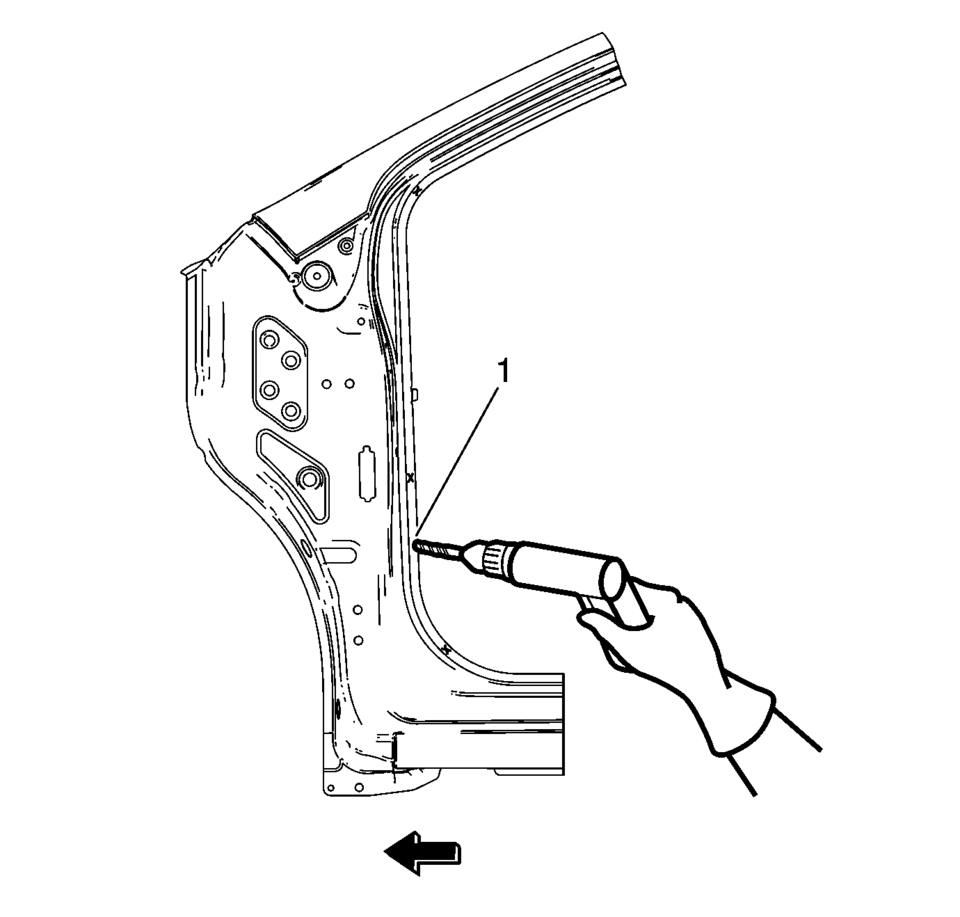
- Create cut lines?€‰(1) on the front hinge pillar body.
- Cut the panel where sectioning is to be performed (1).
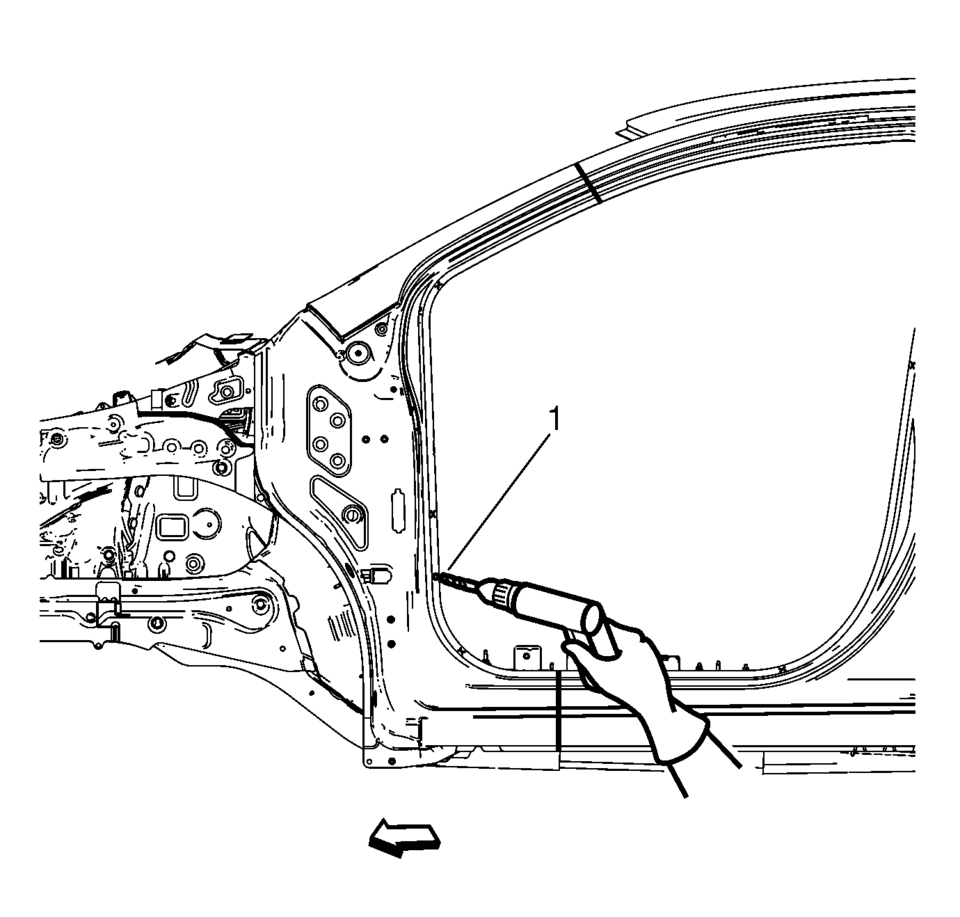
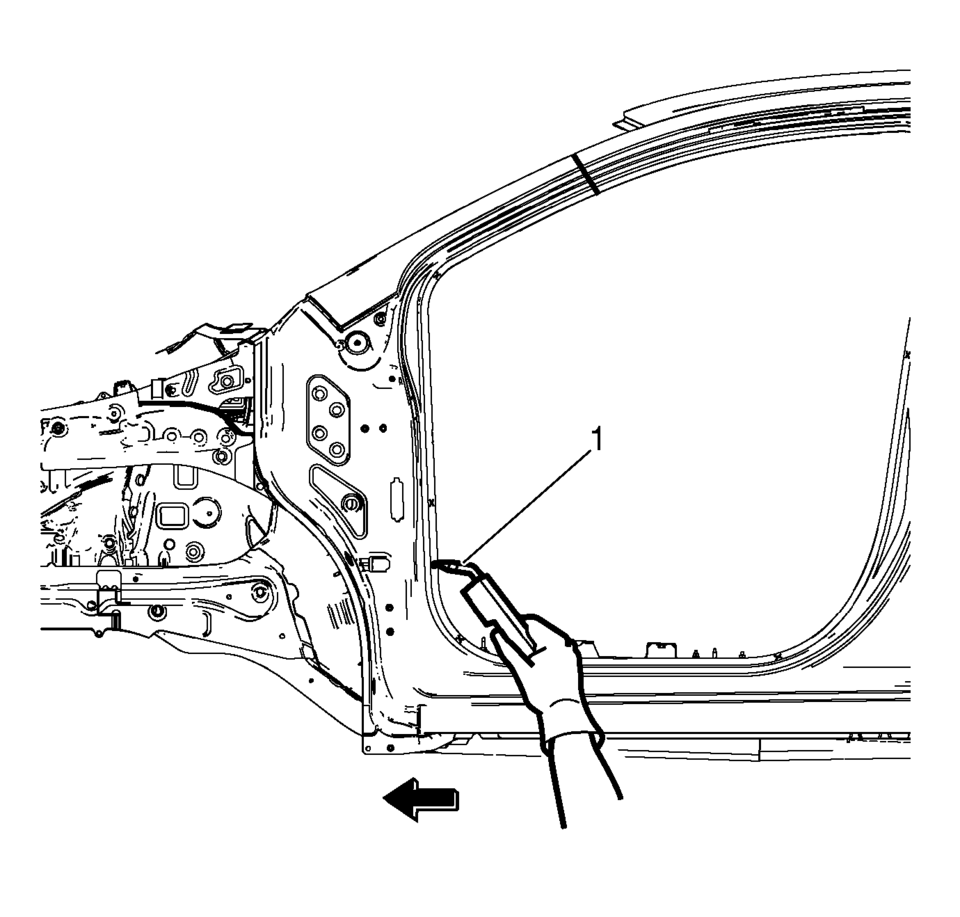
- Locate and mark all the necessary factory welds of the front hinge pillar body.
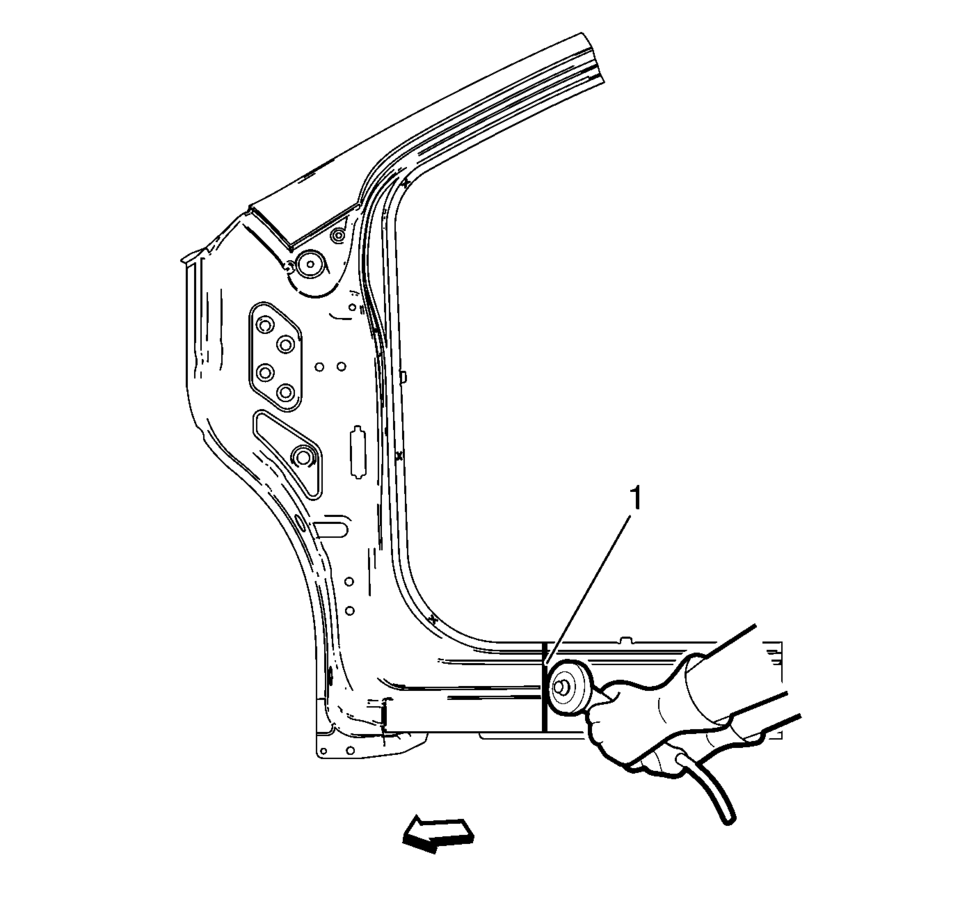
- Drill all the factory welds (1). Note the number and location of welds for installation of the service assembly.
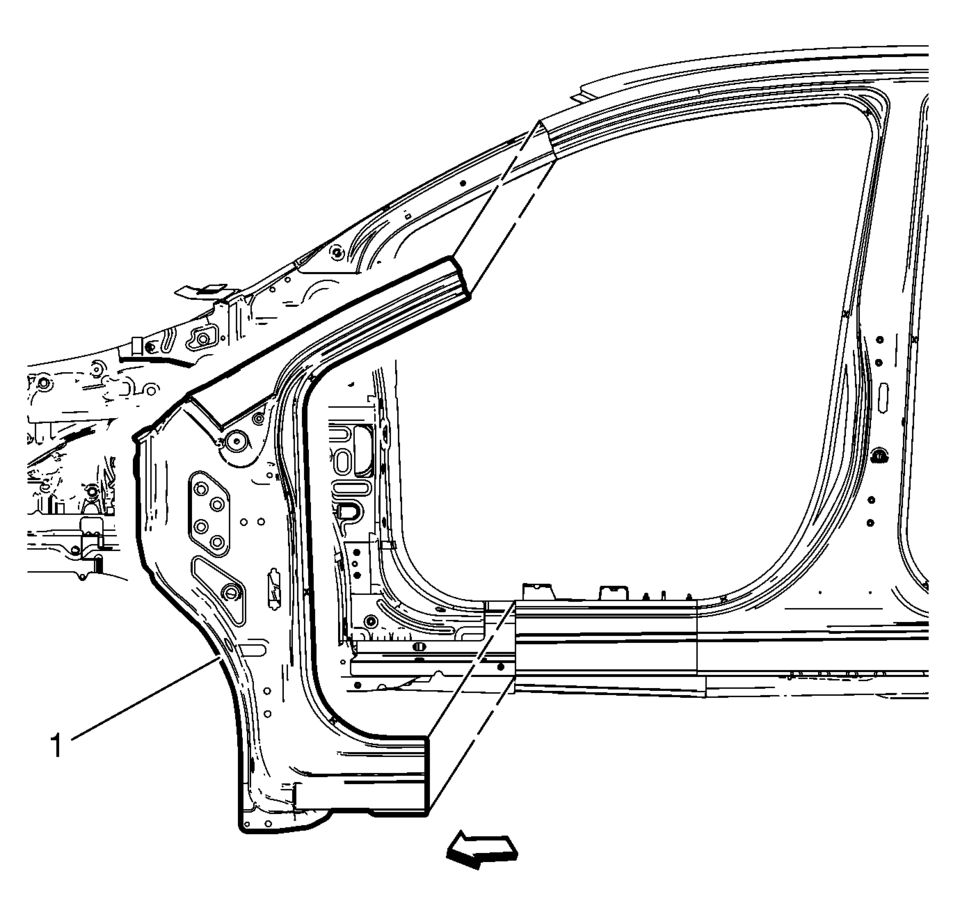
- Remove the damaged front hinge pillar body (1).
Warning:
Refer to Approved Equipment for Collision Repair Warning.
Warning:
Refer to Collision Sectioning Warning.
Warning:
Refer to Glass and Sheet Metal Handling Warning.
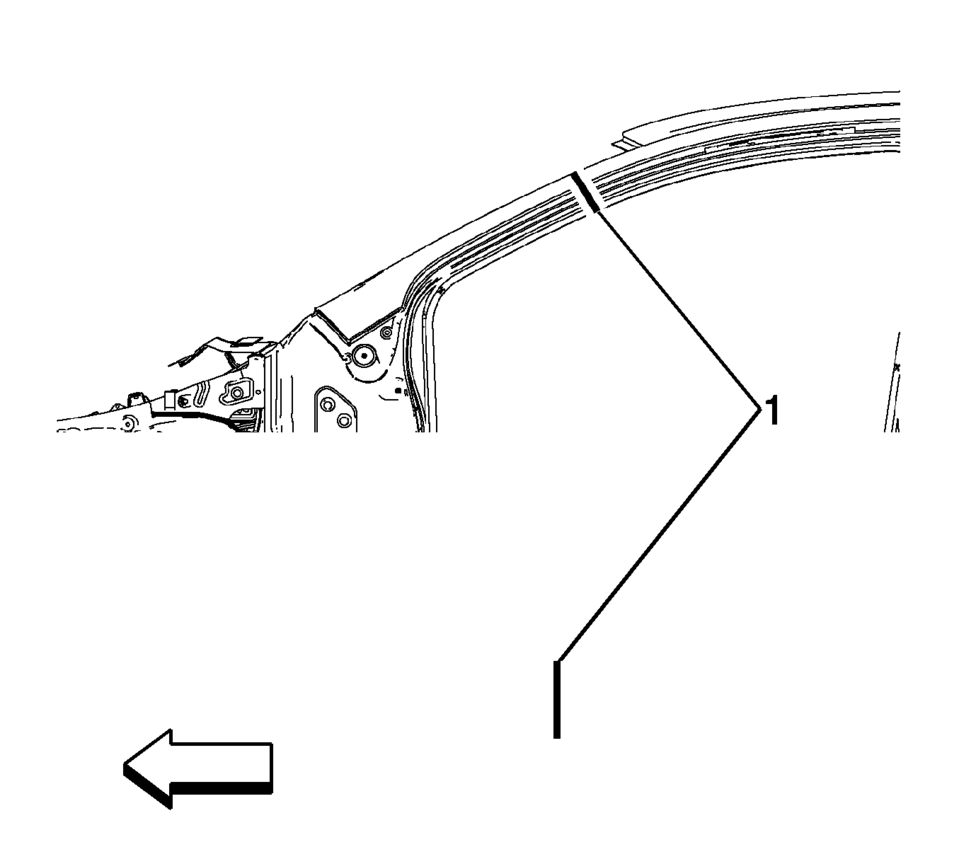
Note:
Sectioning can be done anywhere in the straight area along the rocker panel.
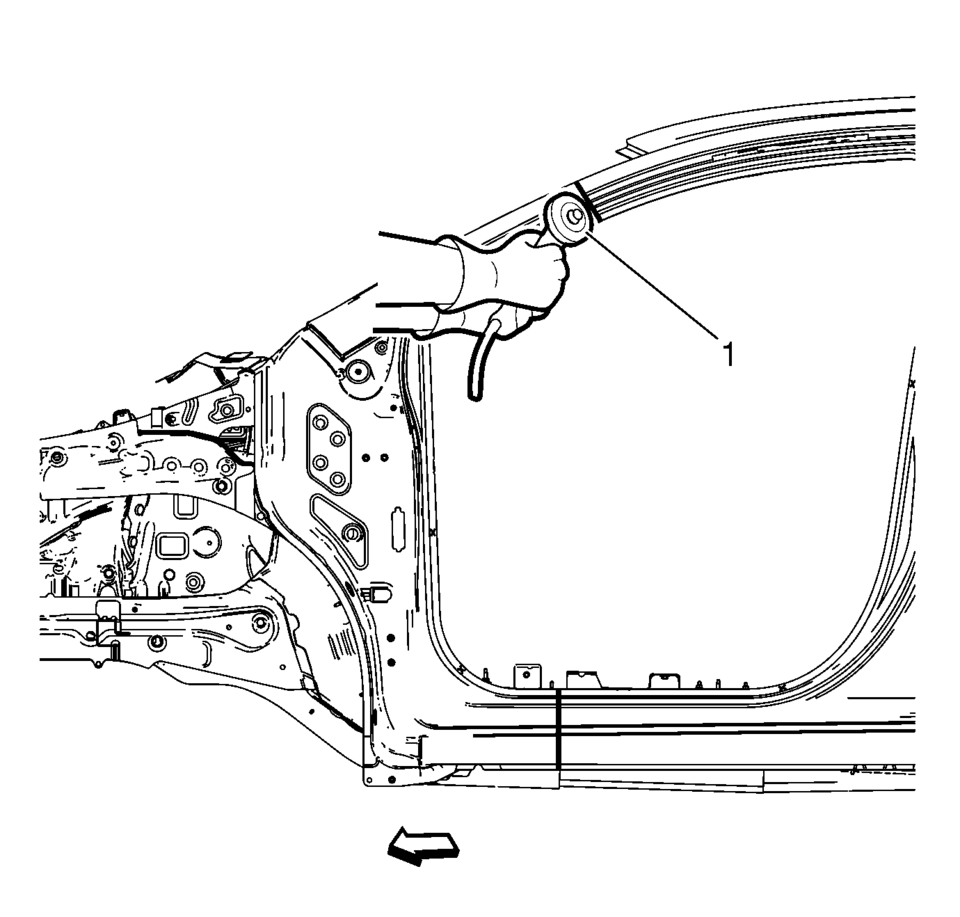
Note:
Do not damage any inner panels or reinforcements.
- Installation Procedure
-
- Cut the front hinge pillar body in corresponding locations to fit the
remaining original panel. The sectioning joint should be trimmed to overlap
the remaining original panel by 25?€‰mm (1?€‰in)
at each joint location (1).
- Prepare all mating surfaces as necessary.
- Drill 8 mm (5/16 in)
holes for plug welding along the edges of the front hinge pillar body as noted from the original panel (1).
- Clean and prepare the attaching surfaces for welding.
- Position the front hinge pillar body on the vehicle (1).
- Verify the fit of the front hinge pillar body.
- Clamp the front hinge pillar body into position.
- Plug weld accordingly (1).
- To create a solid weld at the sectioning joint, with minimum heat distortion,
make 25?€‰mm (1?€‰in)
stitch welds along the seam with 25?€‰mm (1?€‰in)
gaps between them. Then go back and complete the stitch weld.
- Apply the sealers and anti-corrosion materials to the repair area, as necessary. Refer to Anti-Corrosion Treatment and Repair.
- Paint the repaired area. Refer to Basecoat/Clearcoat Paint Systems.
- Install all related panels and components.
- Connect the negative battery cable. Refer to Battery Negative Cable Disconnection and Connection.
- Enable the SIR system. Refer to SIR Disabling and Enabling.
- Cut the front hinge pillar body in corresponding locations to fit the
remaining original panel. The sectioning joint should be trimmed to overlap
the remaining original panel by 25?€‰mm (1?€‰in)
 Eliminating Unwanted Odors in Vehicles
GM Vehicle Care Odor Eliminator, Refer to Adhesives, Fluids, Lubricants, and
Sealers, may control or eliminate odors in the interior and luggage compartment
areas of GM vehicles. This non-toxic, b ...
 General Plastic Repair
Warning: In order to reduce the risk of personal injury when exposed
to toxic fumes while grinding, cutting, or applying repair material on any type
of sheet molded compound or RIM rigid plas ...
Other materials:
Body Lock Pillar Upper Trim Panel Replacement (Sedan)
Body Lock Pillar Upper Trim Panel Replacement
Callout
Component Name
Preliminary Procedure
Disable the SIR system. Refer to SIR Disabling and Enabling.
Remove the body side trim panel. Refer to Body Side Trim Panel Replace ...
Battery Tray Replacement
Battery Tray Replacement
Callout
Component Name
Preliminary Procedures
Remove the battery. Refer to Battery Replacement.
Unclip the engine control module (ECM) bracket from the battery
tray and set aside.
Unclip the ...
Intelligent Key battery discharge
If the Intelligent Key battery in your Nissan Armada becomes discharged, or if
external conditions such as interference affect its operation, the engine can still
be started using an alternative method. This ensures continued usability of the
Nissan Armada even in low-battery situations. ...

0.0053