Chevrolet Sonic Repair Manual: Front Seat Belt Anchor Plate Tensioner Replacement
|
Callout |
Component Name |
|---|---|
|
Warning: Refer to SIR Warning. Warning: In order to prevent accidental deployment and the risk of personal injury, do not dispose of an undeployed inflatable restraint seat belt pretensioner as normal shop waste. Undeployed seat belt pretensioners contain substances that could cause severe illness or personal injury if their sealed containers are damaged during disposal. Use the following deployment procedures to safely dispose of an undeployed seat belt pretensioner. Failure to observe the following disposal methods may be a violation of federal, state, or local laws.
|
|
|
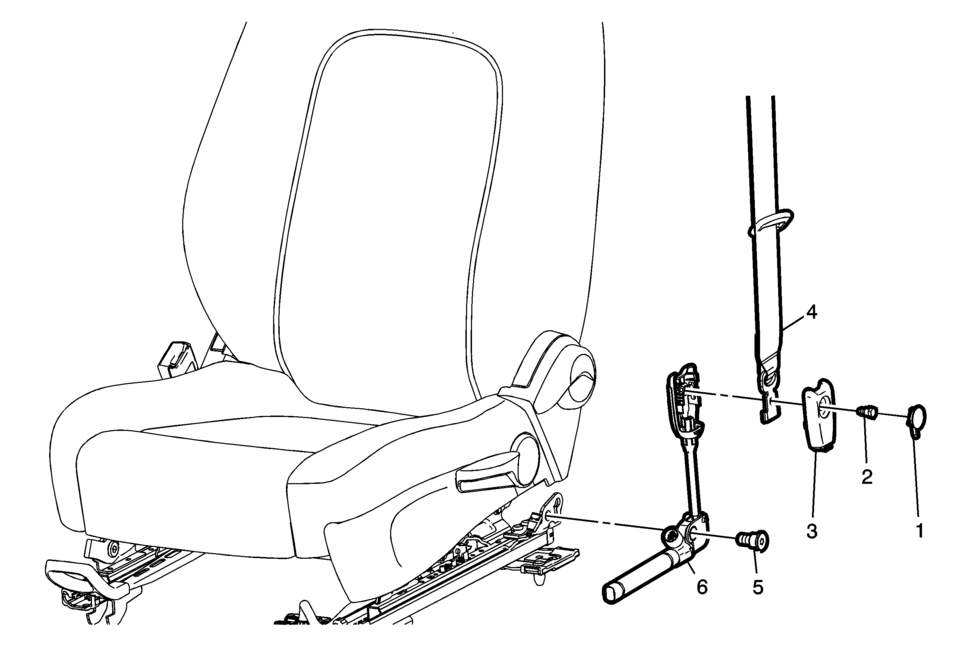
1 |
Driver or Passenger Seat Belt Tensioner Cover |
|
2 |
Driver or Passenger Seat Belt Tensioner Cover Fastener Caution: Refer to Fastener Caution
7.5 Y (66 lb in) |
|
3 |
Driver or Passenger Seat Belt Tensioner Cover |
|
4 |
Driver or Passenger Seat Belt Tensioner Seat Belt Latch Procedure
Remove the seat belt with latch from front seat belt tensioner. |
|
5 |
Driver or Passenger Seat Belt Tensioner Fastener Tighten
45 Y (33 lb ft) |
|
6 |
Driver or Passenger Seat Belt Tensioner Assembly Procedure
Disconnect the electrical connector. |
 Front Seat Belt Anchor Plate Tensioner Cover Replacement (4 Way)
Front Seat Belt Anchor Plate Tensioner Cover Replacement
Callout
Component Name
1
Driver or Passenger Seat Belt Tensione ...
 Rear Brake Caliper Bracket Replacement
Removal Procedure
Warning: Refer to Brake Dust Warning.
Raise and support the vehicle. Refer to Lifting and Jacking the Vehicle.
Remove the tire and wheel assembly. Refer ...
Other materials:
Rear Side Door Trim Replacement (Sedan)
Rear Side Door Trim Replacement
Callout
Component Name
1
Rear Side Door Inside Handle Bolt Cap
2
Rear Side Door Inside Handle Fastener
Caution: Refer to Fastener Caution.
Proce ...
Instrument Panel Compartment Door Dampener Replacement
Instrument Panel Compartment Door Dampener Replacement
Callout
Component Name
Preliminary Procedure
Remove the instrument panel lower compartment. Refer to Instrument Panel
Lower Compartment Replacement.
1 ...
Starter Replacement (LUV)
Removal Procedure
Disconnect the battery negative cable. Refer to Battery Negative Cable
Disconnection and Connection.
Raise and support the vehicle. Refer to Lifting and Jacking the Vehicle.
If equipped with a front suspension skid plate, remove the drivetrain
...

0.0061