Chevrolet Sonic Repair Manual: Front Wheel Speed Sensor Replacement
- Removal Procedure
-
Warning:
Refer to Brake Dust Warning.
- Raise and support the vehicle. Refer to Lifting and Jacking the Vehicle.
- Remove the tire and wheel assembly. Refer to Tire and Wheel Removal and Installation.
- Clean the wheel speed sensor mounting area on the steering knuckle of any accumulated dirt and debris.
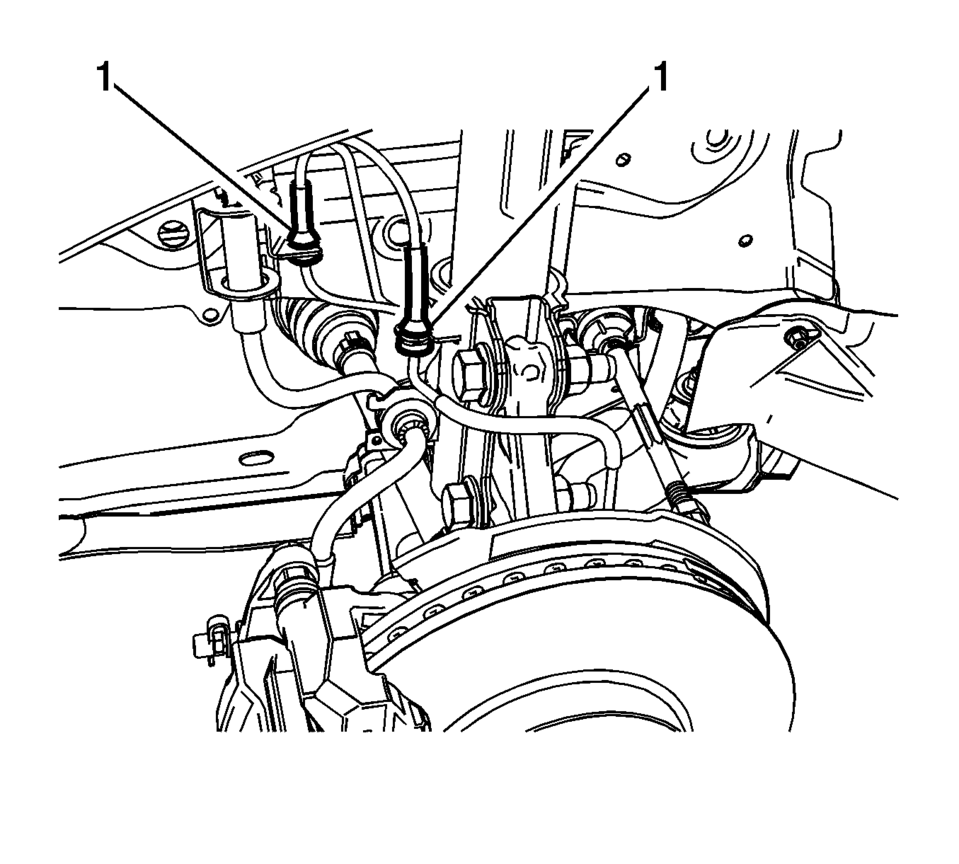
- Disconnect the wheel speed sensor electrical connector (1) and release the connector from the vehicle body.
- Release the wheel speed sensor harness grommets (1) from the brake hose brackets.
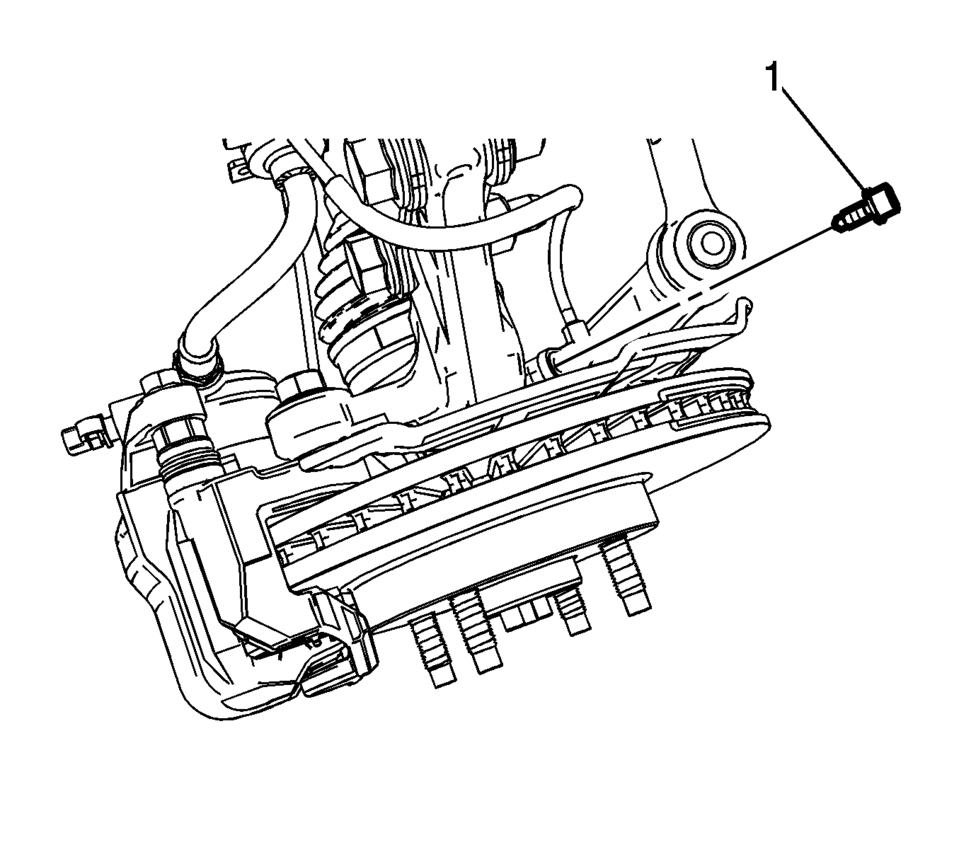
- Remove the wheel speed sensor bolt (1).
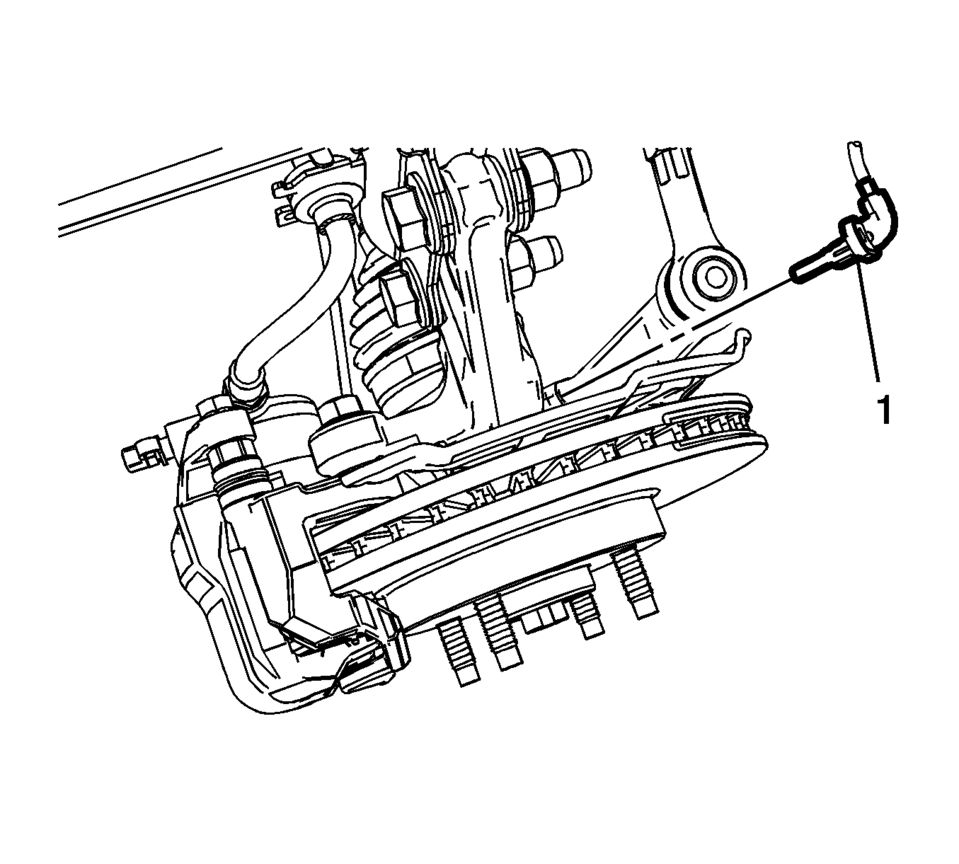
- Carefully remove the wheel speed sensor (1) from the steering knuckle by pulling the sensor straight upward using a slight twisting motion.

- Installation Procedure
-
- Install the wheel speed sensor (1) to the steering knuckle.
- Install the wheel speed sensor bolt (1) and tighten to 8 Y (71 lb in)
.
- Install the wheel speed sensor harness grommets (1) to the brake hose brackets.
- Connect the wheel speed sensor electrical connector (1) and install the connector to the vehicle body.
- Install the tire and wheel assembly. Refer to Tire and Wheel Removal and Installation.
- Perform the Diagnostic System Check - Vehicle.
Caution:
Refer to Fastener Caution.
 Steering Angle Sensor Replacement
Steering Angle Sensor Replacement
Callout
Component Name
Preliminary Procedure
Remove the steering wheel airbag coil. Refer to ...
 Input Speed Sensor Replacement
Removal Procedure
Remove the control solenoid valve and transmission control module assembly.
Refer to Control Solenoid Valve and Transmission Control Module Assembly
Replacement. ...
Other materials:
Rear Side Door Outer Panel Replacement
Removal Procedure
Warning: Refer to Glass and Sheet Metal Handling Warning.
Note: According to different corrosion warranties, only the
regional mandatory joining methods are allowed.
Disable the SIR System. Refer to SIR Disabling and Enabling.
Dis ...
Front Floor Console Extension Replacement - Right Side
Front Floor Console Extension Replacement - Right Side
Callout
Component Name
1
Front Floor Console Extension
Procedure
Use a flat bladed plastic trim tool in order to release the retainers
securing the extens ...
Timing Belt Inspection
Special Tools
EN-6340 Locking Tool
EN-6628-A Locking Tool
For equivalent regional tools, refer to Special Tools.
Removal Procedure
Remove the timing belt upper front cover. Refer to Timing Belt Upper
Front Cover Removal.
Set the crankshaft balancer in the ...

0.005